Joomla provides several features which allow your users to edit content from the front end, without logging in to the administrator panel.
By default, users in the Author, Editor, and Publisher user groups cannot log in to the administration panel at all. So you need to make sure they can create, edit, and publish content from the front end.
Author Role (Writing Articles)
By default, users in the Author user group are able to create new articles and edit their own published articles, but they cannot edit other user’s articles or make changes to the publishing status of an article.
Authors can be given access to the article editor from the website’s front end.
From The Category List
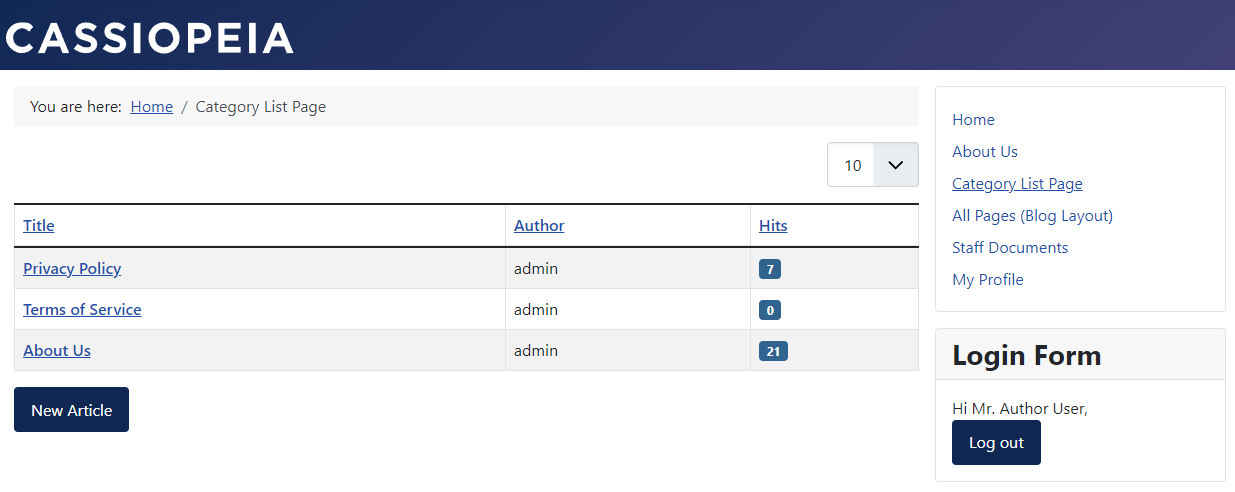
If you have a category list layout, your logged in authors will see a button that says “New Article” on the category list page. This will open the front-end article editor with a blank article in the same category the user was just viewing.
From The Menu
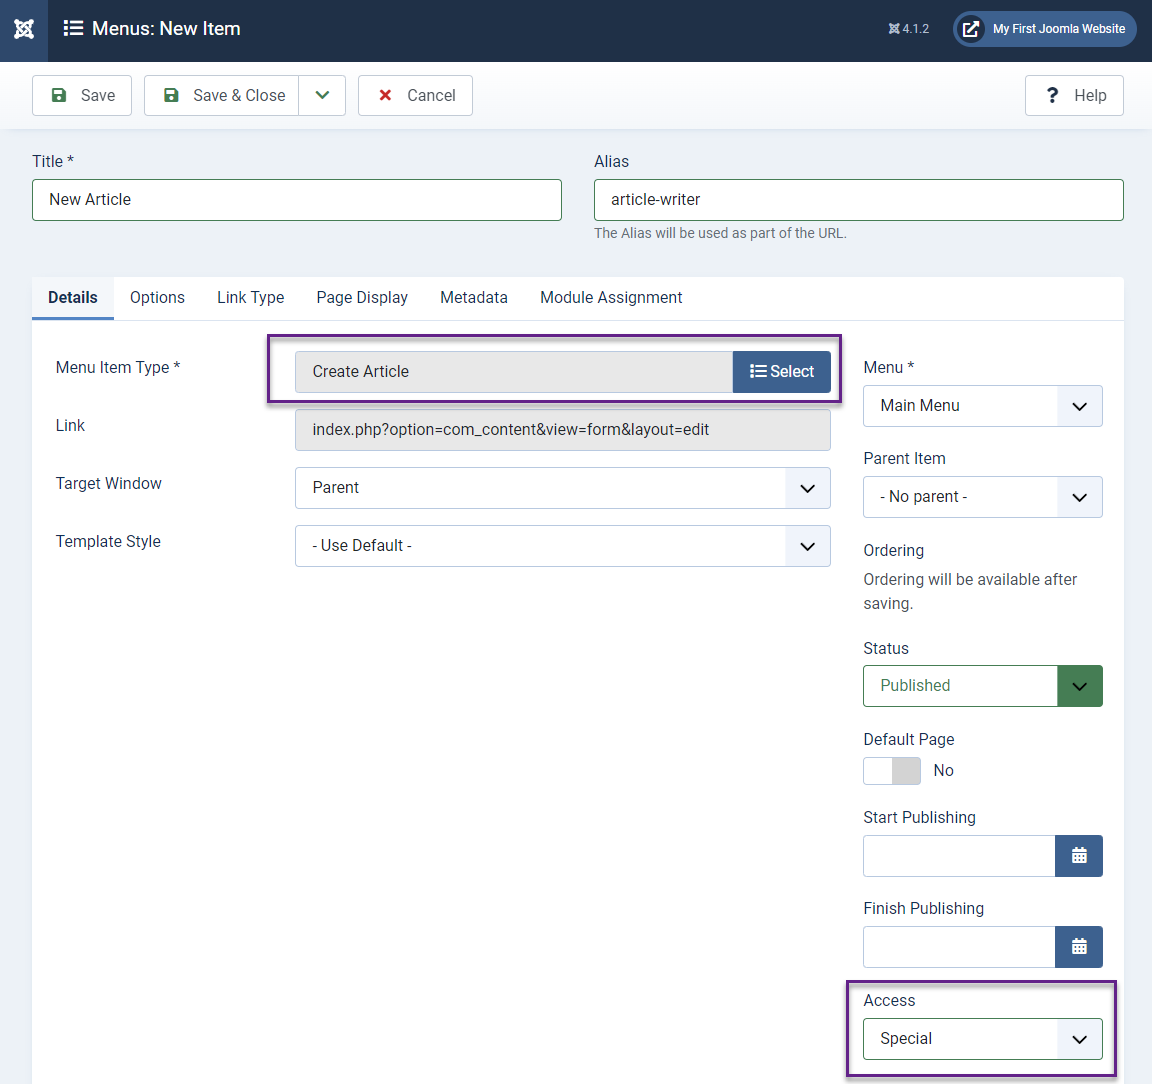
We can also create a link to the article editor in our menu. Create a new menu item and set its Menu Item Type to “Create Article.”
Name it whatever you’d like and set the access level to “Special” so only authors and higher can view it.
Now, when you’re logged in as an Author or higher user group, you will be able to see the link in the menu to create a new article.
Front End Article Editor
The article editor on the front end looks very similar to the one in the administration panel. The editor itself is actually the same (unless you’ve changed it). It’s using the default TinyMCE editor by default.
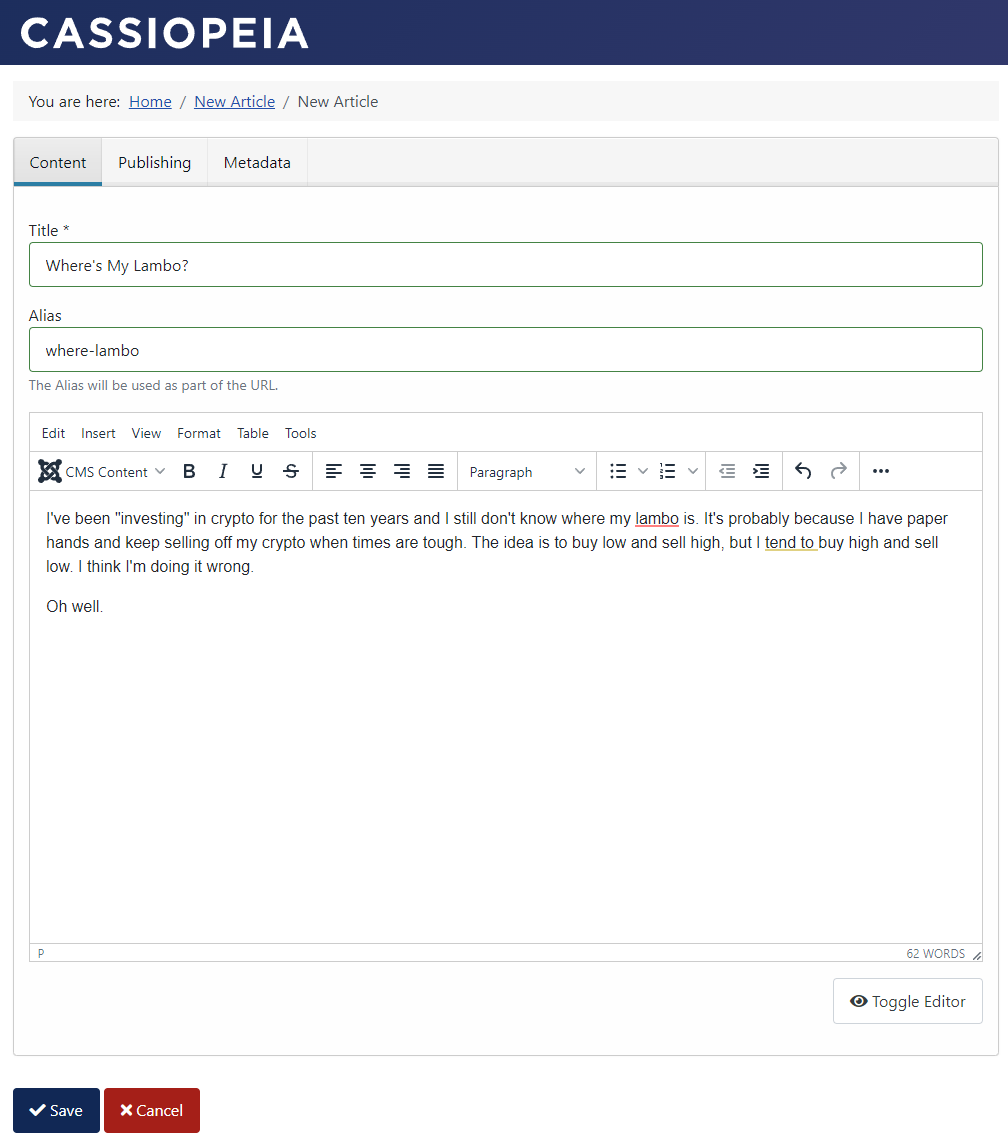
Authors and higher can use the front end article editor to write and edit the articles from the front end without logging into the admin panel.
I’m logged into the front end as a user in the “Author” user group in the screenshot. The options are largely the same as they are in the back end.
Although I can see the publishing tab, the settings are mostly uneditable. Just because authors can see this tab doesn’t mean they can make major changes here.
Permissions of Authors
The role of author is designed for people who write the content. People given the author role may not be experienced in areas of web development, design, style, and optimization. This is why you need editors and publishers to review the content before it gets posted, to make the necessary changes.
Note that by default, the author can set their category to whatever they want.
All articles added by authors are automatically set to “unpublished” even though the system says “published” when they save it (don’t ask me why).
Once an author saves their article, it will become invisible to them, since authors cannot see unpublished articles. They will get a notification saying it was saved successfully.
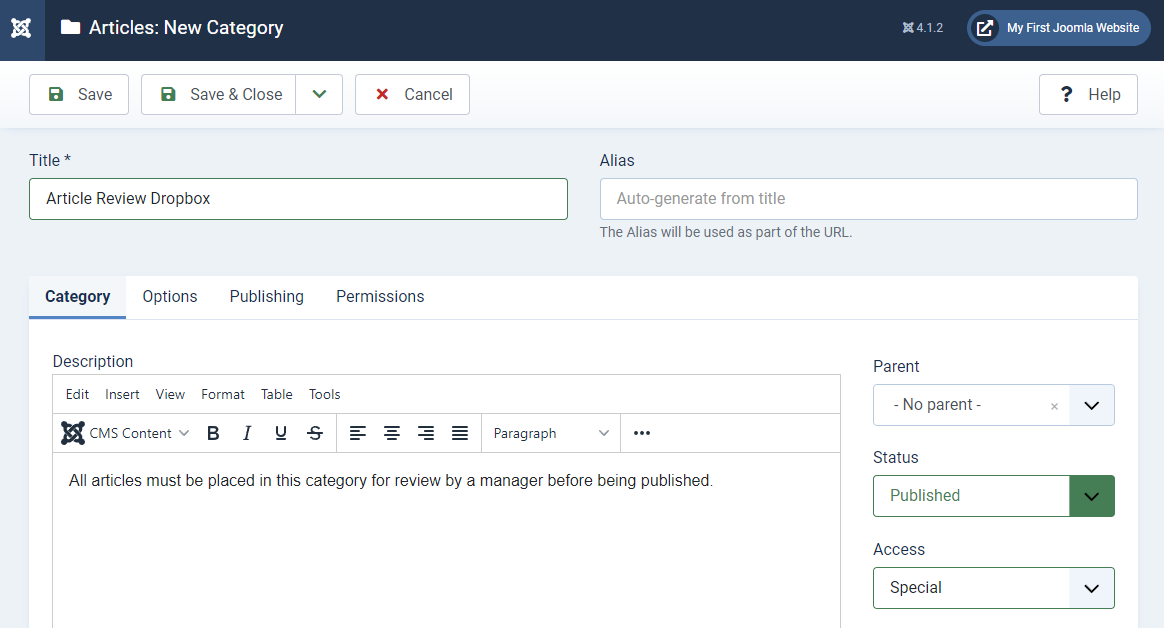
If you don’t want your authors to be able to place their new articles in any category, you can create a separate category on the website for authors to submit their content to. This category won’t be accessible to the general public. It will be hidden until a publisher reviews the article and moves it to a public facing category.
Make sure this category access is set to special, so regular users and the general public cannot see it.
You may also want to create a Category List link to this category, with access level set to special, so authors, editors, and publishers can easily find the articles.
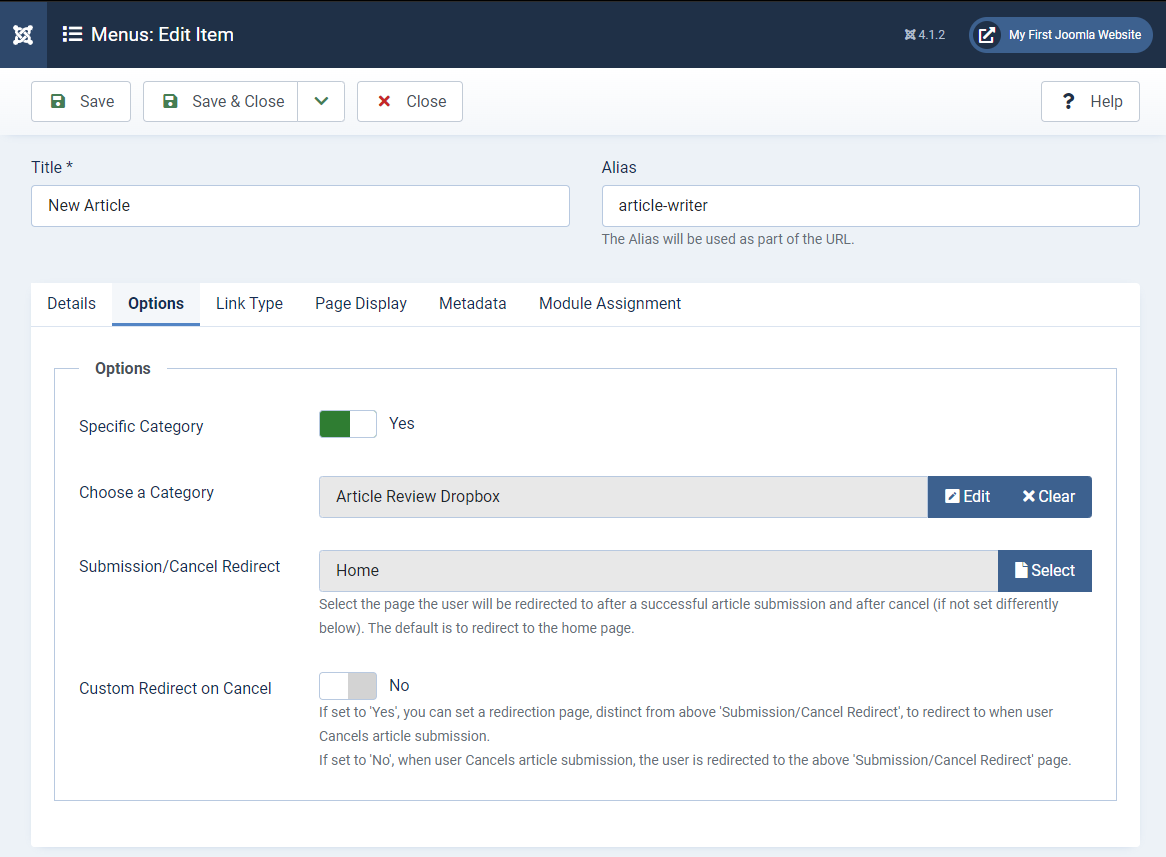
Next, under the menu item for creating new articles, go to the options tab. There is an option here to set the default category to this new article review category.
Save this menu item. Now, when authors create new articles, they will automatically go to the newly created special category.
This will force all articles created to go to this new category. The authors will not be able to publish to any other categories.
Editor Role (Editing Articles)
Editors can edit any article on the front end. When logged in as an editor or higher, an edit button will appear on every article. Edit links will also appear next to articles in a category list.
Editors can edit the contents of any article, but they cannot change the publishing status or the category of the article.

They can also see articles set to unpublished. If an article is unpublished, a tag will say “Unpublished” at the top, so they know the article isn’t visible to general users.
Note that they can edit live articles. So even though they won’t be able to change the location or publishing status, they could still wreak havoc if not properly trained. Only give editing privileges to people you trust to edit all articles. You don’t want your editors messing up your website’s most important articles.
When anyone is editing an article, its status is changed to “Checked Out” so others cannot edit the article at the same time. This applies to other things as well. For more information on how items get checked in and out, see the guide on user management.
Publisher Role (Publishing Articles)
Publishers can add, edit, and change the status/category of all articles from the publishing tab. Editors and authors can view this tab, but they can’t make many changes.
It’s the publisher’s job to give a final review of the article before moving it to the appropriate category and setting the status to published.
Media Management
We don’t want authors to be able to accidentally delete images used in other people’s articles.
It’s important to have good policies in place related to the management of images/media in your content. By default, authors can create images, editors can create and edit images, and publishers can create, edit, and delete images.
You can view and change these permissions under the permissions options of the Media component in the configuration. The screenshot shows what the default author permissions look like.
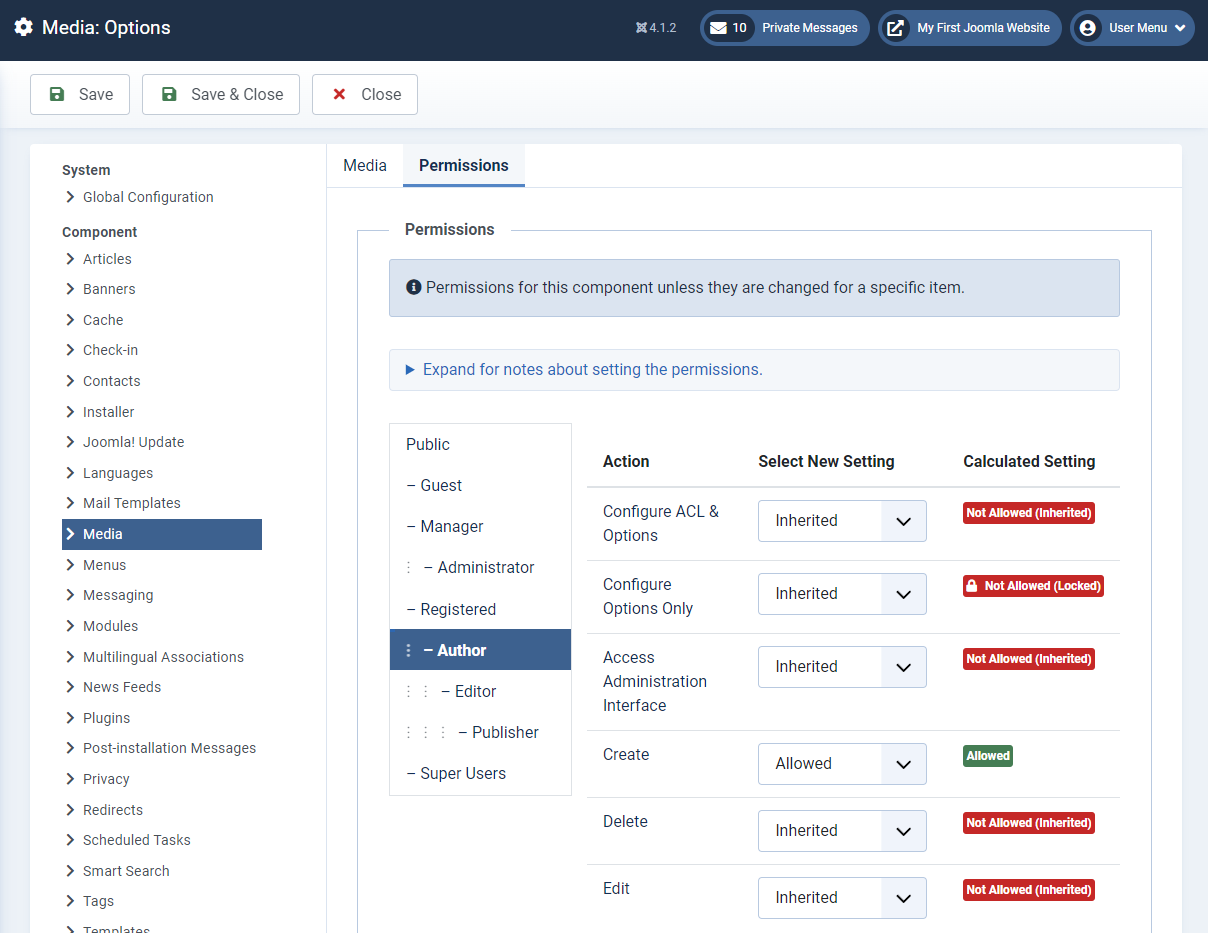
With these permissions in place, authors can add other user’s images to their articles, but they won’t be able to edit or delete images.
This is a good first step for media management. Beyond this, you need to have policies in place regarding where files go and how they should be saved/named.
Some of these policies can be set in the options for the media component. Here, you can set things like the maximum file size and the file types allowed. For example, if you don’t want users to be allowed to upload videos, you could delete the file extensions from the “Legal video extensions” list.
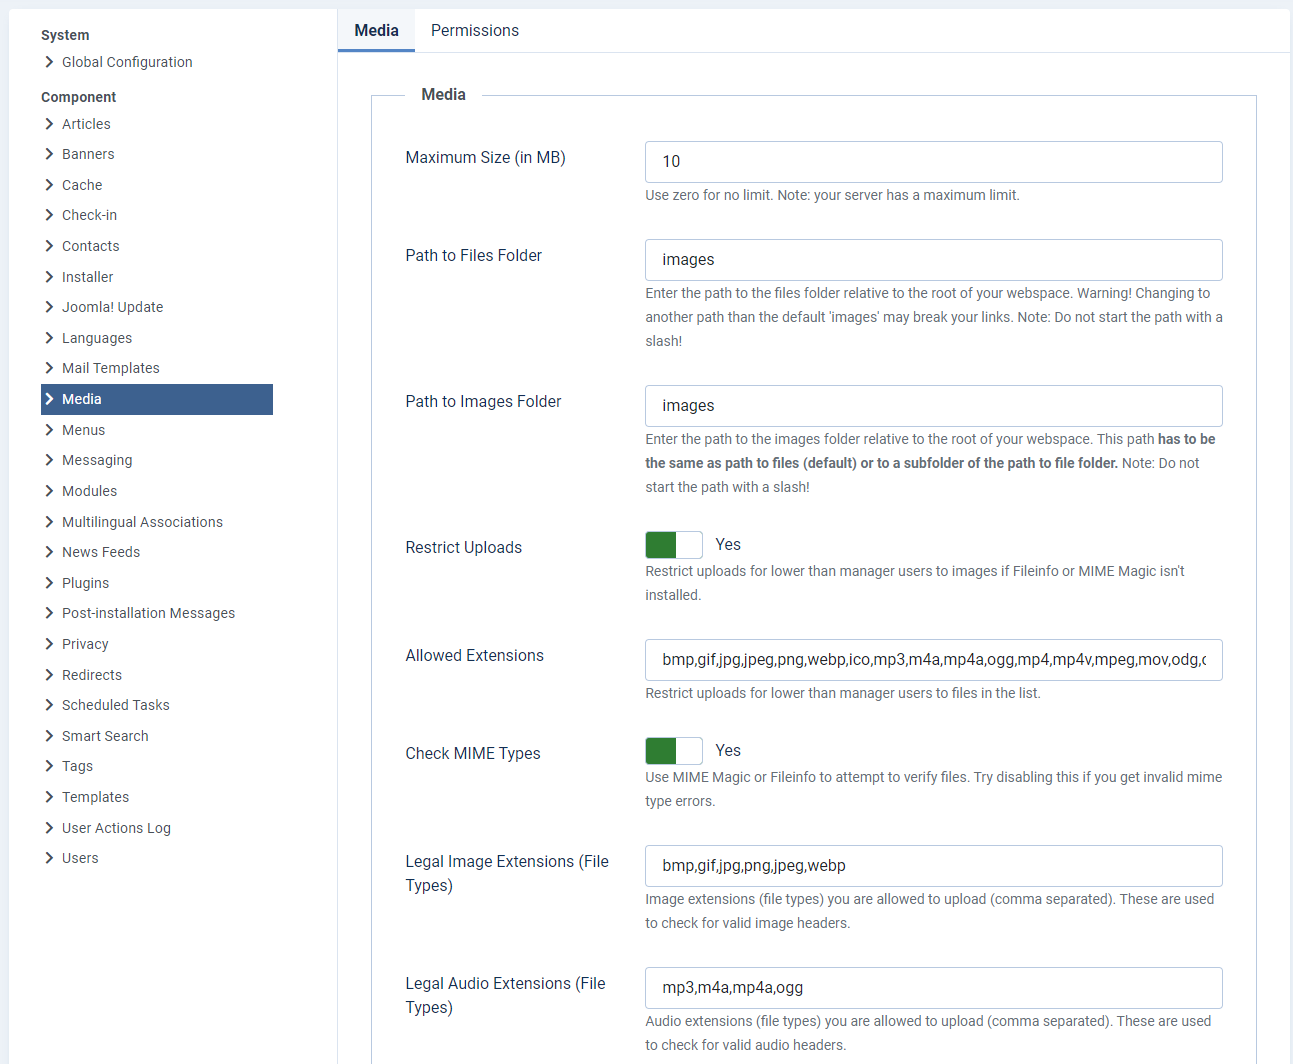
While these settings help, it will not prevent users from uploading images to the wrong folders, or prevent users from giving their files odd names. You don’t want your authors naming their images things like “image-1.png” or “a431245gaa.png” File names should be descriptive. You will have to train your users and have written policies in place regarding your company’s naming conventions. You should also have written guidelines in place regarding suggested file size, resolution, type, and what goes where.
Third party extensions exist that expand the capabilities of the media manager, and alternative media management tools exist. The Joomla Content Editor (JCE) extension is a good place to start if you’re looking for more extensive media management tools.
File Locations/Folder Structures
By default, all media goes in your website’s “images” folder. Authors can’t delete folders, but they can create them! You don’t want them creating a bunch of ambiguous folders in confusing locations. Make sure you properly instruct your users with written instructions on what goes where. Here are a few suggested options for folder management:
- User Folders: Create a unique folder for each author/user and instruct them to only upload media to their folder. The third-party extension JCE has a built-in way to restrict users to an individual user folder.
- Category/Article Folders: Structure your images into folders based on the category and article they’re uploading to. For example, if the article is in the “general” category and it’s called “my first article.” Instruct your users to go to the folder “categories/general” and create a new folder called “my-first-article” Then, instruct them to upload their images for that article to the “my-first-article” folder.
Editor Settings
The settings of the editor itself can be customized for different user groups. This enables you to give more or less editor functionality to different user groups. For example, if you want your registered users to be able to use the editor, you might only want to allow them to edit paragraphs and lists. You probably don’t want your registered users making complex tables, adding links, or inserting images into the content they submit.

You can change which buttons are visible in the editor to different user groups by going to the settings for the TinyMCE editor in the plugins manager. Go to “System” “Manage” “Plugins” in the admin panel and find TinyMCE. Then open up its settings.
In the settings for TinyMCE, different user groups are placed into one of three “Sets.” Each set has different settings. By default, the last set is for “Public” users – anyone.
Options can be changed per user set. You may drag and drop items from the area near the top to the toolbar in the middle. This will make these buttons accessible to users in this set.
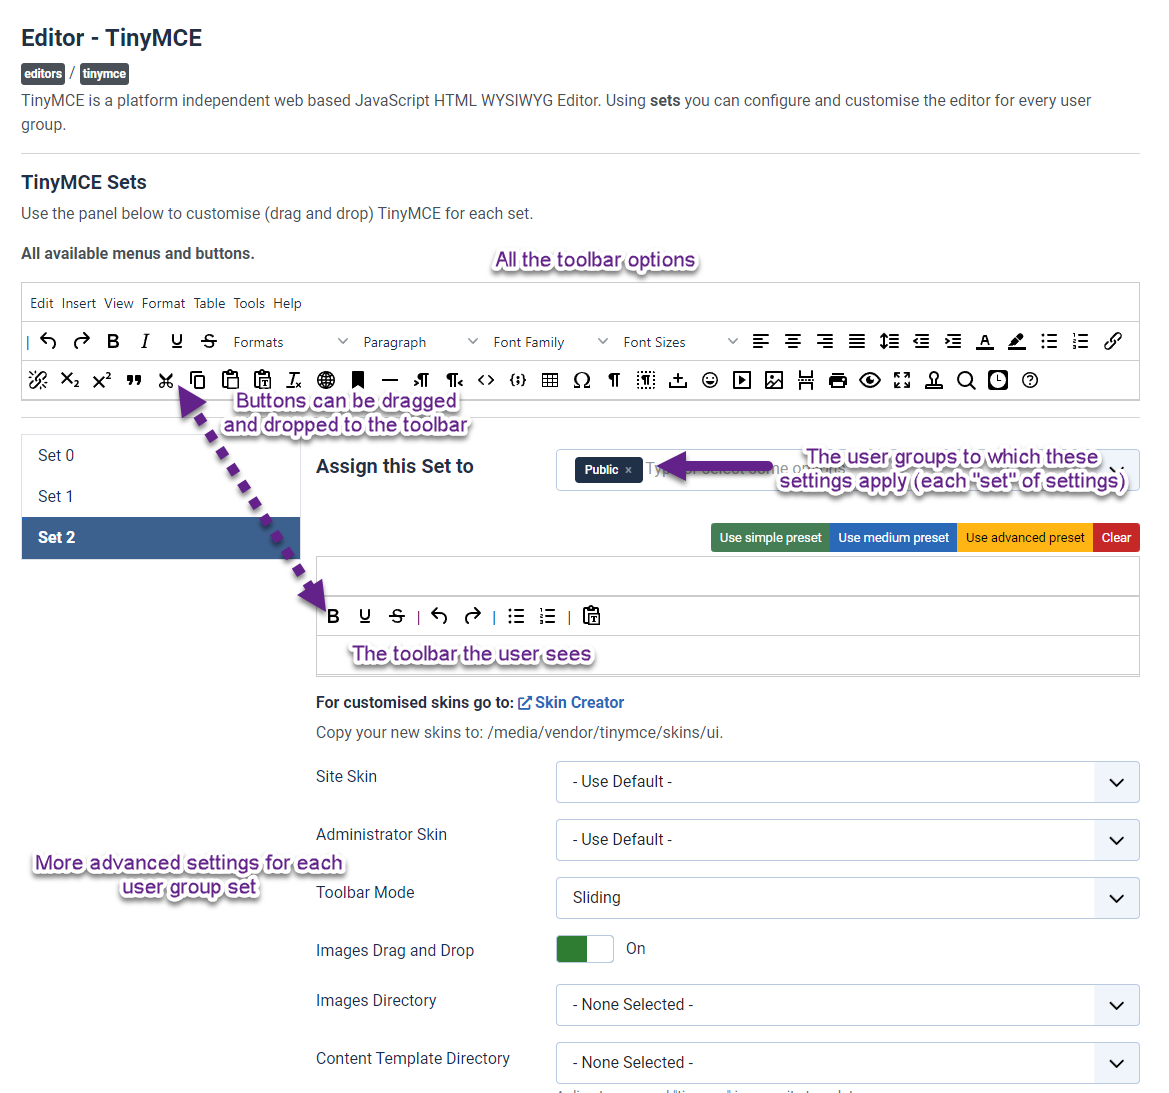
As you can see, the set for “Public” does not contain many buttons. It only contains options to add lists, and make test italicized/bold/underlined. This is a good start, because we probably don’t want our public users to be able to do more advanced things with the editor.
You can change the sets to suit the needs of your website. The default settings will likely be fine for most use cases, but you may want to disable drag and drop images for public users.
Different third party editors may be used too. If you’re using a third party editor, check their documentation for more information on the specifics of who’s allowed to do what.
Other Security Tips
Author Self-Edit Permissions
By default, Joomla has it configured so that authors may edit their own content after it has been published. To disable this, you can go to the Article component settings and change the permissions for the Author’s “Edit Own” action to “Denied.”
If you only want to restrict a certain article from being edited again by the original author, you can change the author by editing the “Created By” field in the article’s “Publishing” setting tab and select a different user. This will prevent the original author from editing the article. You could also change the author to a different author user if you want to allow another author to edit that same article at a later time.
Allowing Authors To Edit Unpublished
By default, once an author submits an article, it’s set to unpublished status and becomes invisible to them. If you’d like them to be able to see their unpublished articles, you need to change the “Edit State” permission for authors to “Allowed.” This will enable them to see all unpublished articles. They still won’t be able to edit other’s articles, as long as the “Edit” action is set to “Not Allowed” and the “Edit Own” action is set to allowed.
If you allow the “Edit State” action for authors, their articles will default to the “Published” state when they save them. So if you do this, make sure you’re restricting authors editing to only one special category (like the Dropbox category in my examples above). If you allow them to post to any category, they could post published articles without review.