Modern tools make it easy to add images to your website. However, as a good web developer, there are many things you should consider when adding images to make them responsive and accessible. In this guide, you will learn about the best image file formats for the web. You’ll also learn how to serve different image files to users based on the formats their browser supports.
Image File Formats
Browsers support numerous file formats for images, including JPG, GIF, WEBP, PNG, SVG, AVIF, and more. Each format has unique advantages and disadvantages.
Lossy vs Lossless Compression
There are two fundamental ways an image may be saved: lossy or lossless. Lossy image formats compress images using algorithms that may produce artifacts or distortion. JPG is an example of a lossy image format. Depending on the image and how much it is compressed (the “quality” setting), it may still look fine when compressed. It may also look like a distorted mess.
Lossless image formats may still compress the files, but do so in a way that does not sacrifice quality. They preserve the original details of each pixel as the image originally was. Lossless image formats are ideal for saving images containing text, since their sharpness is preserved.
Traditional Image Formats
Older image formats include PNG, JPG or JPEG, and GIF. These formats are supported on every major browser dating back to Internet Explorer. They are still widely used, and a viable option. However, they may be significantly larger in file size compared to more modern formats, such as WebP or AVIF.
If you want your images to simply work without considering file size or bandwidth, the PNG and JPG file formats will get the job done. I’d avoid using GIF, as their limited color palette and relatively large file size makes them obsolete. If you’re looking to use animated images, go with webp, svg, or a video file such as mp4.
- PNG – Portable Network Graphics
- A PNG file is notable for preserving the quality of the original image and for supporting transparency. Transparency is useful in web development if you’re going for certain effects or styles. For example, you could take a PNG of a company logo with a transparent background and use the same image across multiple areas of your site with different background colors.
- JPG – Joint Photographic Experts Group
- JPG/JPEG images are used for photos that do not require transparency. Think background photos or large feature photos taken with cameras. Real life images of landscapes, people, animals, etc. JPG is a lossy image format that can be saved at various levels of compression. The lower the quality you save the image, the more distortion and artifacts that will appear. The higher the quality, the better the image will look. However, if you save a jpg at high quality, it may be much larger in file size. Due to potential artifacts, JPG is not recommended for saving images containing text, unless saved at the highest quality levels. Even then, it may look somewhat distorted.
- GIF – Graphic Interchange Format
- The GIF format was mainly used to display short cartoon-like animations. Each gif file is limited to only 256 colors, which makes it look bad except for simple animations with limited colors. GIF files are exceptionally large for the quality of the content they contain. Avoid using GIFs.
WebP – The Best Format Overall?
The best image format to use this decade is arguably WebP. WebP, or Web Picture Format, is an image format created by Google in 2010. It took some time to gain traction, but now it’s supported in nearly every major web browser including Chrome, Edge, Safari, Firefox, and their mobile versions. According to caniuse.com, 94% of users have browsers that support fully WebP, and 97% have browsers that at least partially support it.
- WebP is notable for
- high levels of compression, much smaller file size compared to JPG or PNG
- both lossy or lossless compression
- relatively decent preservation of image details at medium to high quality settings
These settings can all be changed when saving files in the WebP format using Google’s WebP Converter, Photoshop, or other major graphic design programs.
If you are a Photoshop user, the latest versions (within the last year or so) support WebP out of the box. However, consider using the WebPShop plugin, as it gives you a preview of the image before you save it, which you may find helpful.


The above 500×500 image of Monkey the dog was saved using different formats and settings. As you can see, they all appear nearly identical, if you can notice any difference at all. At high quality (80/100), the WebP image format beat out JPG by a significant margin in terms of size. It’s nearly 70% smaller than the JPG saved with similar settings. However, the JPG may be slightly sharper if you look closely at Monkey’s hair. At maximum quality, the WebP is still smaller than a lossless PNG. This illustrates how much you may save in file size if you use WebP.
Now, let’s compare the formats using an image that has just text.
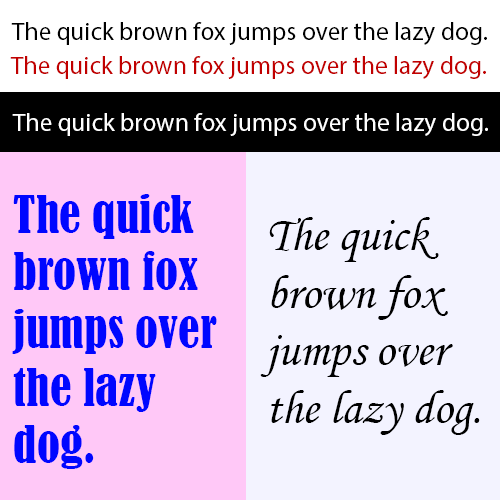
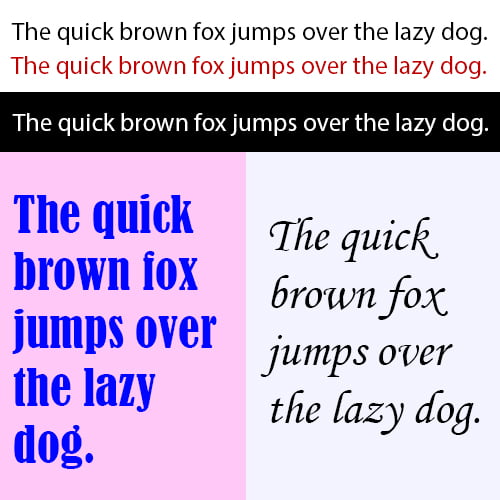

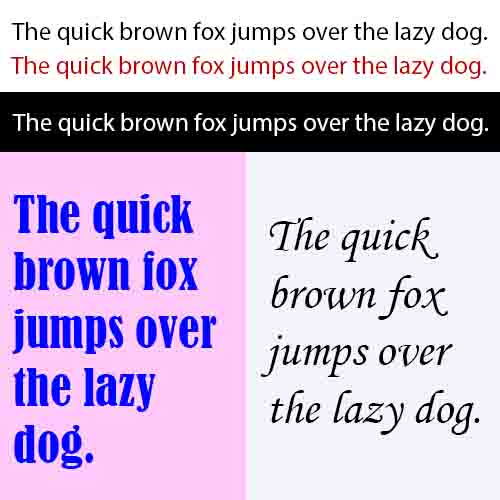
As you can see, when just text is involved, WebP is the best choice, with PNG being a close second. When saved at the highest quality, the JPG looks fine. However, it’s 158KB, which is over ten times that of the WebP format. At the lowest quality setting, the text in the JPG looks blurry and artifacts appear around the edges, yet it’s still four times larger than the WebP. If you can’t see the distortion, click the image to view it in a larger window.
If you’re using a CMS like WordPress or Joomla, there are extensions or plugins to automatically convert your images to the WebP format.
I would highly encourage you to save your images in the WebP format if they’re intended for the web. Fallback images may be created in PNG or JPG format for users of older browsers.
AVIF
The most modern image format is currently AVIF. This is an image format designed for video animations, though it works fine for still images as well. It compresses images using AV1 (a video container) in the HEIF container format. You don’t need to know exactly what that means to use it. Files of this type are saved using the .avif extension.
Images compressed using AV1 may have incredibly small file sizes, though the overall quality will suffer significantly. The one major drawback of this format is lack of browser support. At the time of writing (Oct 2022), it’s supported in the latest versions of Chrome, Firefox, and Opera, but not Edge or Safari. That means if you choose to use this format, you must include fallback types or a significant amount of users (about 30%, basically every Apple user) cannot see the images.
If your browser does not support AVIF, the images in these comparisons won’t load for you. Here’s a quick browser check for you:

Below is the dog picture from before, saved at multiple different quality levels with AV1.


As you can see, the images saved with low quality are compressed the most. On quality level 25/100, AVIF could get the image down to a remarkably small 3kb. It did so at the cost of the sharpness of the image. The image on the left almost appears as if a filter has applied to it. It’s been smoothed out too much. Depending on your use case, any of the remaining three images may be suitable. The sharpness or level of detail gets better and better up to the last image, which is lossless. There isn’t a huge difference between the image saved at 75 vs the lossless image, but it’s still noticeable. It’s ultimately up to you to decide what quality looks best for your use case.
Ideally, I think saving images with a quality between 80 and 90 is the best compromise between quality and file size. For small thumbnails and such, a lower quality may suffice.
Also note that the lossless WebP (pictured in previous section) is identical in appearance to the lossless AVIF, but at a reduced file size. The image above saved as a lossless WebP had a size of 182KB, slightly less than AVIF’s 219KB. So it may make sense to use WebP instead of AVIF if you need to serve lossless images.
Next, let’s look at a watercolor painting saved at different AVIF and WebP quality levels.


The first image set was saved with higher end quality settings. The WebP saved at quality level 80 beat out the AVIF file saved at 75 in terms of file size. It’s difficult to tell, but I think the WebP came out slightly sharper as well. Pay close attention to the detail in the rocks near the bottom. At these levels, I’d say WebP certainly beat AVIF.


I next tried to get both images down to around the same size, about 18KB. To do this, I had to save the WebP at quality level 10. This is heavily distorted compared to the original, though users might not notice much if it was by itself.
The AVIF came out ahead at the same file size, slightly smaller, saved at 27 quality. It looks much better than the WebP image of the same file size. For a water color painting like this, I think the smoothness of the AVIF at lower quality levels is a clear advantage. If you’re trying to compress an image heavily and keep it looking smooth, AVIF is the clear winner.


The portrait of the woman is pretty close. They both came to 50kb with a 750×750 resolution at quality 50/100. I think the AVIF looks a bit better again.
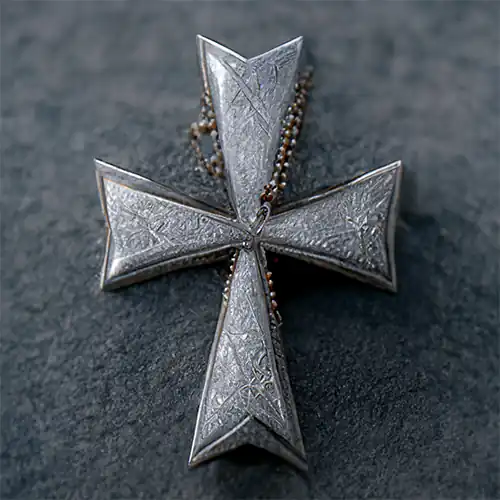

For the images of the cross, I think AVIF did slightly better. If you focus in on the right arm of the cross, it preserved some more of the brownish tint that disappeared from the WebP. Also, I think the AVIF is slightly sharper looking overall with more contrast preserved. This is rather subjective. Ultimately I think they both did a good job, and I’d be happy to use either.

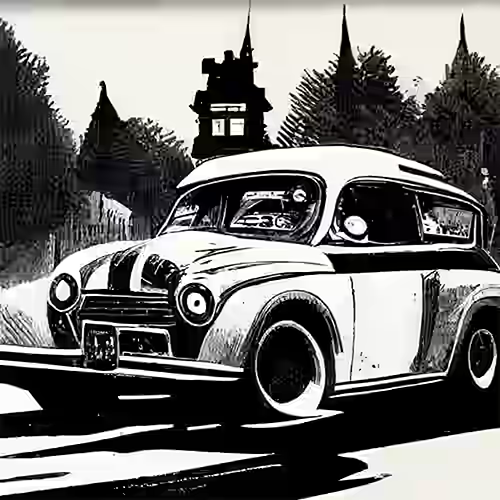
My goal with the car illustration was to get both images to under 10KB. To do this, I had to lower WebP all the way down to the lowest possible quality setting, zero. For the AVIF, I got away with a quality level of 10. The AVIF was larger by 1KB, which is basically nothing. However, the AVIF is many times better than the WebP. It still suffered some loss of detail and sharpness compared to the original (not pictured), but it’s passable. To save the WebP with a similar quality to the AVIF, it would come out over twice the file in size.


The portrait of the young man was saved at the same quality level in both WebP and AVIF formats. The resulting sizes were 58KB and 63KB respectively. At these higher quality levels, I can barely notice a difference between the two. I think the AVIF might be slightly sharper, by an extremely small margin.
The images you start with will drastically impact how they look when compressed with AVIF or WebP. I think WebP is usually the better option because of its wider browser support, but AVIF certainly looks better if your goal is to heavily compress photos or artwork. For each image I tested, AVIF seemed to perform better than WebP at quality levels 50 and below. It’s ultimately up to you to get them down to the desired size and see which one looks better.
Transparency
Of the formats discussed in this guide, PNG, GIF, WebP, and AVIF support transparency. Gif is not a viable option, so we disregard that option.
By default, PNGs do not support lossy compression. However, there are third-party tools such as TinyPNG which can optimize PNGs to reduce their file size with a minor (usually unnoticeable) decrease in overall quality. The WebP and AVIF support all the same lossy compression levels with and without transparency enabled. So an advantage of WebP and AVIF is that you can preserve transparency while using lossy compression.
I have prepared an illustration of a chocolate lab puppy on a transparent background. You can examine my results below.


This time around, WebP appears to win by a landslide. It’s 20% smaller than a similar AVIF image, and much smaller than the PNG or GIF equivalencies. Despite using the least amount of colors, the GIF was the largest in file size after the original PNG before TinyPNG compression was applied.
Animations
Now let’s discuss animations. They used to be all over the place on the web, but now they tend to be more subtle and are done with CSS effects. If you do require an animated image for some reason, browsers support animation achieved with WebP, AVIF, and GIF. You could also store your images as video files (MP4, OGG, WebM). Depending on the scenario, an animated SVG may also be an option.
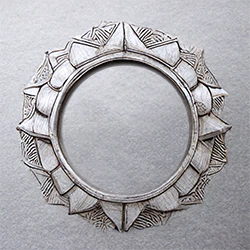
Original MP4 954KB
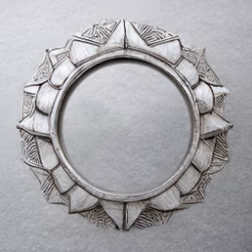

To create the above animation, I started with a picture of a gear and animated it to rotate. I then exported this animation as an MP4 video. Finally, the videos were converted to avif and webp using a free tool I found called FastFlix.
If you really need video animations on your site longer than a few seconds in length, a better option is probably to just upload the files to YouTube and embed them into your website.
The original MP4 had the best quality. The AVIF came in significantly smaller at 273KB while preserving most of the frames, so the animation remains smooth. To get the WebP down to around the same size as the AVIF, I had to reduce the frames significantly, resulting in a choppier animation.
Vector Graphics
If you’re not familiar, Vector Graphics are essentially graphics created from math formulas. They’re basically text documents instructing the computer where to draw lines, curves, shapes, etc. and what colors they should be. This makes vector graphics infinitely scalable. If you’ve heard of InkScape or Adobe Illustrator, those programs are for creating vector graphics. Most of the icons and illustrations you see on the web are vector graphics. For examples, check out OpenClipart.org
The predominant file format for vector graphics on the web is SVGs (Scalable Vector Graphics). According to caniuse.com, nearly every browser, or 99% of users, supports SVGs going back to Internet Explorer 8 (released all the way back in 2009).
SVGs can be added to your site using the img element just as any other photo. If you have access to the SVG files (or AI files you can convert to SVGs) you should almost always use the SVGs.
One thing to know about SVGs is that different browsers may draw them slightly differently. This is especially true in the case of SVGs containing text. If your SVG contains text, you should make sure it gets converted to an outline before using it, or you run the risk of the text appearing odd in some browsers. Test your SVGs out in a few different browsers before you use them to make sure there are no extreme issues.

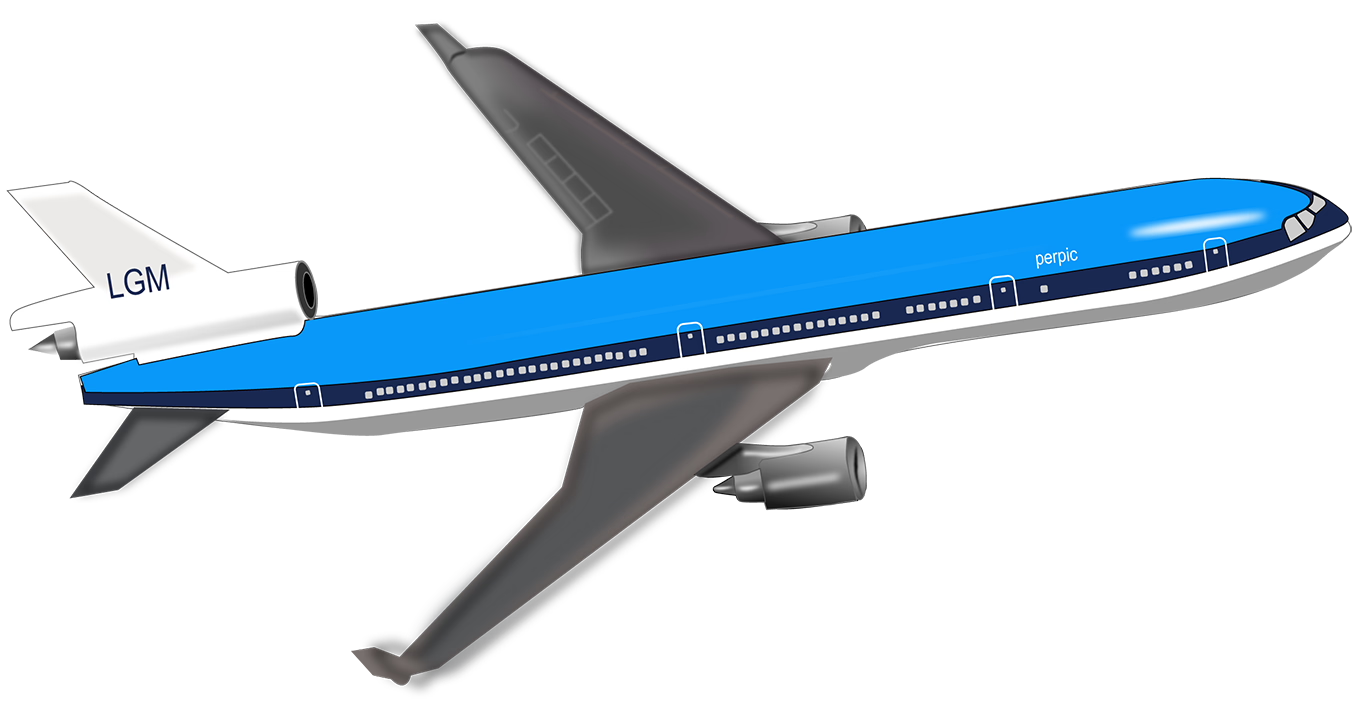

Consider the planes above. It’s a relatively complex SVG with a variety of shapes and colors. The first image is an SVG. It can be scaled up to infinity without losing quality, it supports transparency, and it’s smaller than all the other files saved at 720p.
SVG Animations
There are a few ways to animate SVGs. First, you can use a program like Adobe Animate or SVGator to animate a scene. These animations rely on Javascript to work. Here’s an animation I made with Adobe Animate, it’s only 16KB in size.
The other option is to animate SVGs using CSS animations/transforms. Here’s the same gear with a simple spin animation accomplished in CSS. This is about 7KB in size between the SVG and the animation CSS.
Note that these are more advanced techniques. Assuming you have an animation ready to go, you can just embed it in your page using an iFrame or by adding the given CSS/JS.
Serving Multiple Image Formats
With all the different file types to choose from, it may be hard to decide what is best. If your aim is to provide the best experience to every user on every possible browser, the best option is simply to serve multiple file types. This way, we can serve fast loading high-quality images to users with modern web browsers, and older format images like PNG or JPG to users of dated browsers and devices. The browser will only download the image that it can display, so bandwidth is not a major concern here. However, it will require more space and more effort on your part to create multiple variants of every image type if you’re doing this manually.
We can place multiple image types within the picture element. The picture element contains source elements within it, each linking to a different image file. It also contains the traditional img element, which supports older browsers. If the browser does not support the picture element, the img element will be loaded instead.
Suppose you’re creating a local government webpage and need to ensure an important poster loads properly for all users, even if their computer is over a decade old. You can achieve this using the picture element in HTML.
Start by deciding what image formats you want to use. I have decided to go with a high quality WebP image, with a PNG and a JPG as backups.
<picture>
  <source srcset="/poster.webp" type="image/webp" />
  <source srcset="/poster.png" type="image/png" />
  <img src="/poster.jpg" alt="an important banner about emergency situations" />
</picture>Code language: HTML, XML (xml)
Note that the srcset attribute defines the locations of the images and the type attribute tells the browser their type. This is so the browser knows what file type it is before it begins downloading the image. If the browser doesn’t support webp, but still supports the picture element, it skips to png. If it doesn’t support png or the picture element, the final jpg is loaded. The first image that the browser can display is the one that gets loaded. This should be the image in the most modern format.
I used this same code to load the image below. If you’re using a modern browser, it should load the webp. If not, almost certainly it will load the png. Finally, if you’re using a very old browser, it will load the jpg.

Conclusion
To wrap up, there are many different image formats that work on the web. In general, WebP is the most widely supported modern format but you should include fallback support with PNGs or JPGs for older browsers. If you use AVIF, you absolutely must include fallback image formats.
If you’re lazy, in a situation where bandwidth isn’t of much concern (maybe a local intranet site), or you only plan on using a few small images, PNGs and JPGs by themselves may be sufficient.
SVGs are almost universally supported if you need to use vector graphics. If they’re an option, you should usually go with them. If your SVG is very complex or high in file size, convert it back to a regular image.
If you’re trying to create animations, the best looking solution will probably be an animated SVG or a looping video file. WebP and AVIF may be used as alternative to GIFs if your goal is to display a very short looping animation. GIF files are almost always too large, sacrafice quality with limited color options, and should be avoided at all costs.
Supporting a variety of image file types is key to ensuring your site looks great for all visitors. However, this may become a lot of work if you’re doing it manually. You can look into options with your CMS, Web Host, or CDN service which automatically convert between image formats, negating the need to manually create and upload multiple copies of each file.