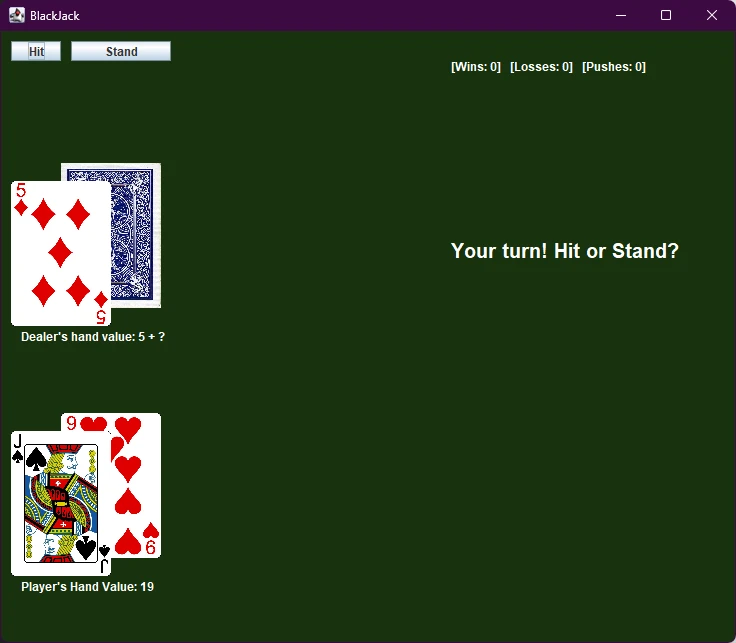
In this project, we will expand upon the earlier console blackjack project. You should begin there if you haven’t already. This project relies on much of the same logic and methods as the previous project, so these parts will not be re-explained.
Goal: To remaster the console blackjack project with visual cards on the screen and working hit/stand buttons.
Getting Started
Begin by ensuring your existing BlackJack project is still functioning. Remember you can review the code for that project in the GitHub repo.
Next, make a copy of your old project so you don’t break any of the old code or download a copy of console BlackJack from GitHub. We’ll start working from this newly cloned project.
Finally, go to the GUI BlackJack repo and download the card images zip file. This archive contains all the card face images we’ll use in this project, and they’re named properly. Extract all the images to a folder under your project’s source directory. I put mine under src/img/cards but you can place them wherever, as long as you remember where they are located relative to your project’s class files.
Considerations
Before we write any code, let’s try to come up with a plan on how we should proceed.
Currently, our project is divided into several important classes.
- Main – Contains main method and starts a Game
- Game – This object handles the main game loop and handling most of the important logic
- Card – An object representing a single card
- Deck – An ArrayList of Cards representing a deck
- Hand – An ArrayList of Cards representing the cards the dealer or player currently is in possession of
- Person – Parent class to Player and Dealer, responsible for handling shared logic such as displaying their hands and letting them hit the deck
- Player – specific decision making only the user can do
- Dealer – logic to automatically hit/stand as needed according to the rules
Finally, there are enums for Suits and Ranks that are used on the cards themselves.
It may be helpful to review the UML diagram from the previous lesson as well.
A lot of the logic we already created can be reused or slightly repurposed for the GUI version of BlackJack. Of course, with a GUI we will need to create a Window, load images rather than printing to the console, and have buttons for hit/stand. But other than that, we’ve already written the bulk of the complex code needed to make everything work.
Making the GUI itself is pretty straightforward. Most of the change required will happen in the Game class, as we’ll need to rethink how the main game loop works now that we’re not relying on console commands to advance to the next step in the process.
Create GUI
Let’s begin by creating an empty window using a JFrame from the swing package. I think the most sensible place to do this is in the main method of the Main class.
I’ve decided to create a 800×600 window titled “BlackJack” in the main method. Don’t forget to import swing. The dimensions you select are up to you, but it needs to be enough room to display at least 5 dealer cards and 5 player cards, ideally more.
Main.java
import javax.swing.*;

public class Main {

    public static void main(String[] args) {

        System.out.println("Welcome to BlackJack.");

        //create game window
        JFrame frame = new JFrame("BlackJack");
        frame.setDefaultCloseOperation(JFrame.EXIT_ON_CLOSE);
        frame.setSize(800, 600);

        Game blackjack = new Game();

        frame.setVisible(true);

    }
}Code language: JavaScript (javascript)
If you launch your application at this point, it should just display an empty window.
Next, we need to add a JPanel to the JFrame. With the JPanel, we can then draw or load the card images onto the screen and add other important GUI components, like buttons.
Since we already have a Game class, I think it makes sense to have this act as our JPanel. So define your Game class to extend JPanel. Leave everything else inside the Game class the same for now. Remember to import swing for the GUI components and AWT for the Graphics and Color objects.
Game.java
import javax.swing.*;
import java.awt.*;

/**
 * Contains all Game logic
 */
public class Game extends JPanel{
 ...
}Code language: JavaScript (javascript)
By extending JPanel, the Game class is given access to the paintComponent method and it’s 2D graphics object. All I want to do here is use paintComponent to make the background of the panel green. So add this to your Game class…
Game.java
//This just makes the background of the "table" dark green
public void paintComponent(Graphics g) {
    super.paintComponent(g);
    g.setColor(Color.decode("#18320e"));
    g.fillRect(0,0,1000,1000);
}Code language: JavaScript (javascript)
Now you can add the blackjack Game object to the JFrame we created earlier in the main method.
Main.java
public static void main(String[] args) {

    System.out.println("Welcome to BlackJack.");

    //create game window
    JFrame frame = new JFrame("BlackJack");
    frame.setDefaultCloseOperation(JFrame.EXIT_ON_CLOSE);
    frame.setSize(800, 600);

    Game blackjack = new Game();

    //add the blackjack jpanel
    frame.add(blackjack);

    frame.setVisible(true);

}Code language: JavaScript (javascript)
You can run the program here, but if you do, you’ll probably encounter an issue where the GUI doesn’t load. This is because upon the creation of the Game object, its constructor starts the game loop using code we created in the first section of this guide. This blocks the JPanel and JFrame from displaying. To get around this, for now, you can simply comment out the line startRound(); in the Game class’s constructor. Now, when you run the program, it should load the GUI with a green background.
Add Buttons
Now that we’re off to a good start, let’s add the buttons we need to make the game work. In the first part of this project, the user really only had two options – Hit or Stand. Then the game automatically progressed. So we know we need Hit and Stand buttons. Additionally, a button to control when the next hand or round starts may be useful.
I’ve decided I want to put all this GUI logic in a separate method called setupGUI within the Game class. It will initialize and place our buttons. But before I can do that, I need to declare the instance variables for the buttons at the top of the class.
Game.java
public class Game extends JPanel{

    //Declare variables needed for Game class
    private Deck deck, discarded;

    private Dealer dealer;
    private Player player;
    private int wins, losses, pushes;

    //declare the 3 buttons needed for GUI
    private JButton btnHit, btnStand, btnNext;Code language: PHP (php)
Create the setupGUI method, place and label the JButtons by passing the label to their constructor and calling the setBounds method to position and size them. Use the JPanel’s add method to add the objects to the panel, and remember to set the layout to null. You’re free to use other layout types if you’d like, but it won’t match my examples. Then call the new method from the Game constructor.
public Game(){

    //Create a new deck with 52 cards
    deck = new Deck(true);
    //Create a new empty deck
    discarded = new Deck();

    //Create the People
    dealer = new Dealer();
    player = new Player();
    //Shuffle the deck and start the first round
    deck.shuffle();

    setupGUI();

    //startRound();
}


private void setupGUI(){
    //Size of JPanel
    this.setSize(800, 500);

    //Make Buttons for "Hit" "Stand" and "Next Round" actions.
    //setBounds is used to define their locations and sizes
    btnHit = new JButton("Hit");
    btnHit.setBounds(10, 10, 50, 20);
    btnStand = new JButton("Stand");
    btnStand.setBounds(70, 10, 100, 20);
    btnNext = new JButton("Next Round");
    btnNext.setBounds(180, 10, 140, 20);

    //need this layout so we can use absolute positioning
    this.setLayout(null);

    //Add the buttons to the JPanel
    this.add(btnHit);
    this.add(btnStand);
    this.add(btnNext);

}Code language: JavaScript (javascript)
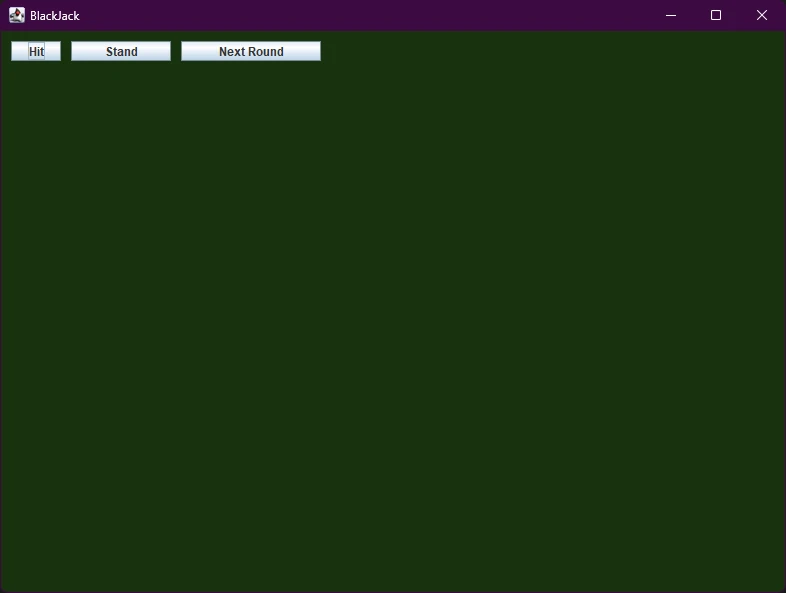
If you’ve followed along, you can run the program now and the buttons should be visible and placed properly. Don’t worry about adding action listeners for the buttons yet.
Displaying Cards
My next highest priority is figuring out how we’re going to display cards on the screen. One relatively easy way to do this is using JLabels with ImageIcons. We’ll load the images with the ImageIcons, and then display them by placing the ImageIcons in JLabels. This way, each JLabel/ImageIcon can act like an image container we can use to easily swap out different image files as needed to represent the different cards.
Let’s begin by creating some constants in the Game class: A constant for the directory the images are located in (relative to wherever the program runs from), and the width and height of a single card in pixels (as sized to fit in the window, not the actual image file resolution).
//insert somewhere near top of Game class...
public static final int CARD_WIDTH = 100;
public static final int CARD_HEIGHT = 145;
public static final String IMAGE_DIR="img/cards/";Code language: PHP (php)
My project is currently set up so that all my .java class files are in one directory, there’s a directory called img in that same directory with the class files, and a subdirectory of img called “cards” holds all the card image files. If you’ve placed your images somewhere else, you may need to move them or change the IMAGE_DIR string.
Depending on your IDE and project settings, your project’s files may not be running from the same directory as the source code itself. For example, it’s possible your files are actually executed from the “bin” directory instead of the “src” directory. This means you have to double check that your card image files are being loaded from the right directory relative to wherever the program is actually executing from.
A simple way to figure this out is to run this line of code in your main method:
System.out.println("Project directory to start finding images from is: " + System.getProperty("user.dir"));Code language: CSS (css)My program returns a value that’s the same as my “src” directory. So I’m fine using the IMAGE_DIR path I defined, since my images are, in fact, in that folder. If your project returns a different directory, you may have to edit the IMAGE_DIR string to contain a relative path to the directory containing your card images from a different folder. Alternatively, you can copy your card images folder to the “bin” folder or wherever, to see if that works.
Let’s test this out by displaying a single card image on the screen. Try adding the following code to the end of your setupGUI method in the Game class.
//see if we can load an image

//make the imageIcon
ImageIcon testImage = new ImageIcon(IMAGE_DIR+"CardDown.png");
//resize image to fit the dimensions we want
testImage = new ImageIcon(testImage.getImage().getScaledInstance(CARD_WIDTH, CARD_HEIGHT, Image.SCALE_SMOOTH));
//make a JLabel to hold the image
JLabel testCardLabel = new JLabel(testImage);
//set its bounds to position and size it
testCardLabel.setBounds(10, 40, CARD_WIDTH, CARD_HEIGHT);
//add to panel
this.add(testCardLabel);Code language: JavaScript (javascript)
We will condense the above down into a single statement later, but for now, I’ve spread it out across multiple lines so you can see what each part is doing. The structure of everything is a little confusing here…
First, an ImageIcon is created. The ImageIcon constructor takes the filename of an image as a parameter. So at this point, basically testImage is just an object representing the CardDown image file.
We can’t just call this an “Image” even though semantically that may seem to make more sense (Image is an abstract class and we need to make a specific type of Image).
It might seem odd to make yet another new ImageIcon on the following line, but this is the easiest way for us to scale the image. When you create an ImageIcon, you can pass it another Image (ImageIcon) object, and use the getScaledInstance method to resize the image. There are a few different scaling methods, but I think smooth looks good for this. So now we’ve replaced the original testImage object with a resized version of itself.
The part with the JLabel is straightforward: we just add the ImageIcon we generated to the label. Then the setBounds method allows us to place it on the screen, and finally the add method adds it to the JPanel.
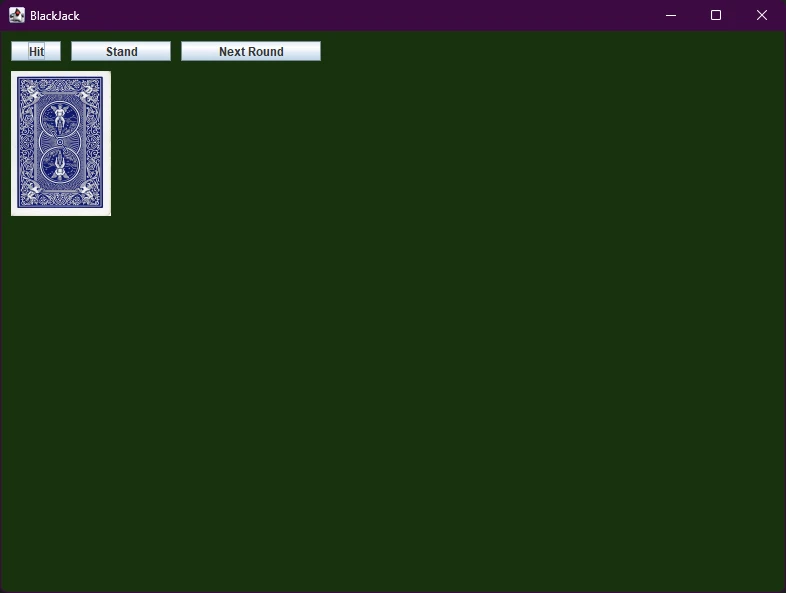
If you run the program, your images are in the proper directory, and you’ve properly set the IMAGE_DIR constant, you should see a single card face down on the screen below the buttons.
If for some reason the image does not show up, that means your program is probably executing from a different directory, or your relative path is incorrect. Review what I said above regarding setting the directory and copying images to your program’s bin or build directory if needed. Alternatively, see if you can set your Java project / IDE settings to execute the program from the src directory.
Proceed only if you’ve gotten the image to show up properly!
More Cards…
Congratulations, getting the image to properly show up was arguably the hardest part of this entire exercise. So now that you’ve (hopefully) gotten an image to show up, let’s take it a step farther. We need to display a maximum of 11 cards for both the Dealer and the Player. This is because the maximum possible amount of cards we could have to show without going over 21 is 11 cards.
That’s 1 + 1 + 1 + 1 + 2 + 2 + 2 + 2 + 3 + 3 + 3 = 21. Or 4 Ace cards, 4 two cards, and 3 three cards, assuming we’re playing with one deck of 52 cards. If we have that exact combination of cards (which is highly unlikely), it’s the maximum amount we could possibly have to display at a single time on the screen, as anything over that would be a bust. However, if you changed your game to work more like a real casino (they may use multiple decks of 52 cards at a single table, so there are many more possible combos) you might need even more spaces, or set a hard limit on the maximum amount of cards a person may have.
I’m going to go with 11 as the max for my game. So the dealer can have a maximum of 11 cards being displayed, as can the player. So we need to create labels and image icons for all of these.
The easiest way to do this is with an array of JLabels. First, declare two arrays of JLabels with the rest of the Game’s instance variables.
//declare 2 label arrays (this goes above Game constructor...)
private JLabel[] lblDealerCards, lblPlayerCards;Code language: PHP (php)
Next, delete the code we created a moment ago in setupGUI to display the single card face down and replace it with this code initializing the two arrays:
lblDealerCards = new JLabel[11];
lblPlayerCards = new JLabel[11];Code language: JavaScript (javascript)
Next, we have to determine how we want to lay these cards out on the screen. To display all the cards while conserving space, I’ve decided to go with this layout:
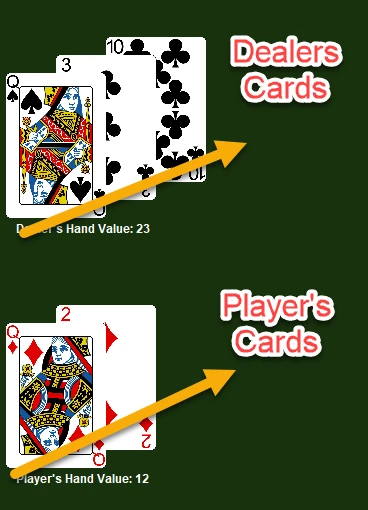
With that layout, we can see all the card values and faces. But they’re also stacked so we can fit more into a smaller space if necessary. Each additional card just appears behind the last with an offset to the upper right. How you want to place your cards is up to you, though I would recommend the method I’m showing if you want more than a few cards to properly display without running out of screen space.
Since we have arrays of JLabels, we just need to loop through them all, initialize them, and set their positions. We only need to set their label positions when we initialize them the first time. Later, we can change the images around as much as we’d like, and they’ll still be in the right positions.
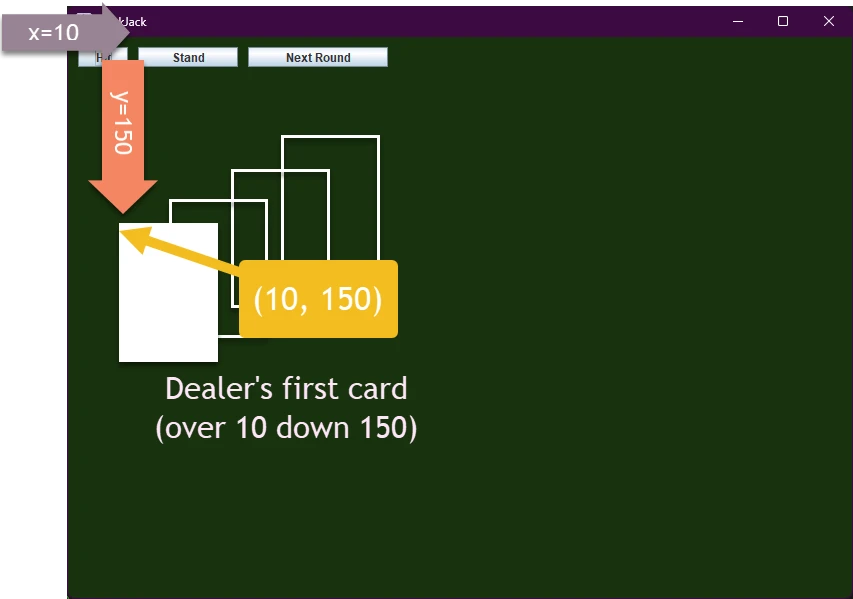
I started with an x value of 10 and a y value of 150. This is where the top left corner of the dealer’s first card will go. So set some variables to store this location.
lblDealerCards = new JLabel[11];
lblPlayerCards = new JLabel[11];

//set the initial location of the card on the screen
int initialCardX = 10, initialCardY = 150;Code language: JavaScript (javascript)
If you look at this diagram, you can see where (roughly) the initialCardX and initialCardY variables represent. Once we get to the loop, we can offset these variables by a certain amount each time to change the position of each card that follows.
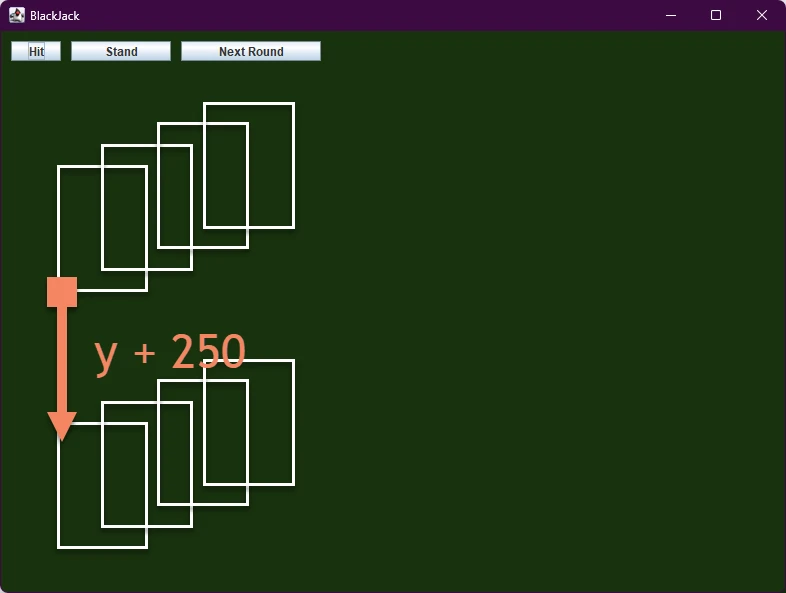
Since the Player’s cards are going to follow the same layout, but shifted further down, all I’ll need to do is set their y position to the same as their dealer card counterpart plus 250.
JLabel Generation Loop
With the explanation out of the way, let’s see the code that creates this layout. Here’s what all my code looks like in the setupGUI method after I made the buttons.
lblDealerCards = new JLabel[11];
lblPlayerCards = new JLabel[11];

//set the initial location of the card on the screen
int initialCardX = 10, initialCardY = 150;

//for each card that can possibly be displayed in the array
for (int i = 0; i < lblDealerCards.length; i++) {

    //set them to new cards face down
    //done with JLabels and ImageIcons
    lblDealerCards[i] = new JLabel(new ImageIcon(new ImageIcon(IMAGE_DIR+"CardDown.png").getImage().getScaledInstance(CARD_WIDTH, CARD_HEIGHT, Image.SCALE_SMOOTH)));
    lblPlayerCards[i] = new JLabel(new ImageIcon(new ImageIcon(IMAGE_DIR+"CardDown.png").getImage().getScaledInstance(CARD_WIDTH, CARD_HEIGHT, Image.SCALE_SMOOTH)));

    //Use setBounds to set the width/height of each card, and their positions
    lblDealerCards[i].setBounds(initialCardX, initialCardY, CARD_WIDTH, CARD_HEIGHT);
    lblPlayerCards[i].setBounds(initialCardX, initialCardY+250, CARD_WIDTH, CARD_HEIGHT);

    //add the JLabel to the JPanel so we can see it later
    this.add(lblDealerCards[i]);
    this.add(lblPlayerCards[i]);

    //increment the x/y values of each card by some amount, this will make them appear "stacked" so users can see each one
    initialCardX +=  50;
    initialCardY -= 18;

}Code language: JavaScript (javascript)
It uses a simple for loop to iterate from 0 through 10, so 11 elements total in each array. I have combined all the statements regarding creating and scaling the ImageIcons into single lines. It’s a long line of code, but hopefully it makes sense since I explained it earlier. As you can see, I initially set them all to be cards face down – the “CardDown.png” image.
The setBounds places the cards using the layout variables I made earlier (initialCardX and Y). Each label in the lblPlayerCards array is offset by y + 250 (so they appear below the lblDealerCards). Finally, I changed the values of initialCardX and Y slightly each time the loop runs. So when a new label is generated, it’s moved slightly back and to the right.
Run the program again after adding the loop. You should see 11 cards face down for both the dealer and the player.
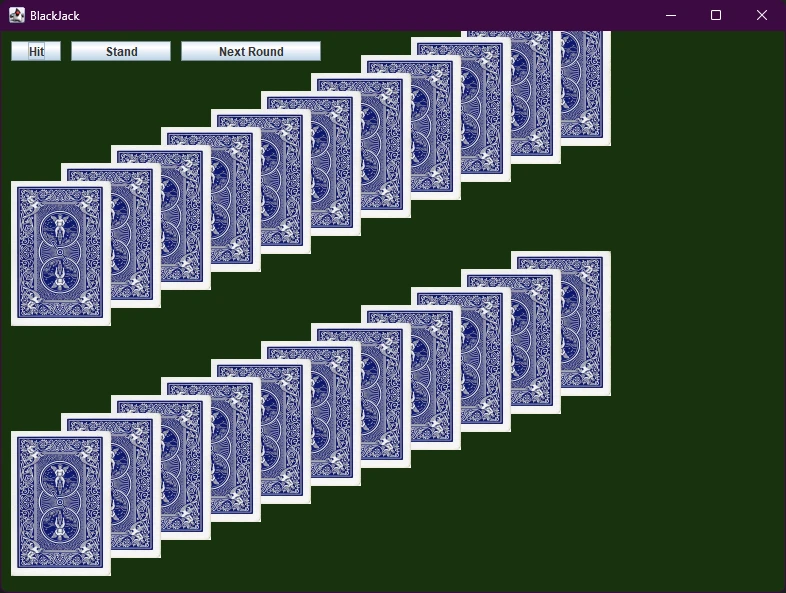
Table Setup
With the GUI mostly setup and cards on the table, I think it’s time to start setting up the table for the first round of Blackjack. We already have code to create decks and give cards to the player. This logic is largely handled in the existing startRound() method. Now we need to make some tweaks so it works with our GUI.
Uncomment out the startRound() method at the end of the game constructor (or put it here if it’s missing). So we should be calling setupGUI then startRound in the Game constructor.
Game.java
public Game(){

    //Create a new deck with 52 cards
    deck = new Deck(true);
    //Create a new empty deck
    discarded = new Deck();

    //Create the People
    dealer = new Dealer();
    player = new Player();
    //Shuffle the deck and start the first round
    deck.shuffle();

    setupGUI();
    startRound();

}Code language: PHP (php)
Now go to the startRound method and look over it. Currently, we make a lot of recursive calls to the startRound method from within itself whenever a round ends to start the next round. I want you to delete all instances where we call startRound from the startRound method. We are going to handle restarting rounds a bit differently with the GUI.
Also, delete the line where the player makes their decision. Remember, the makeDecision method relies on console input and allows the player to decide to hit or stand. We’re going to use buttons as input rather than typed console messages going forward, so this is unneeded.
player.makeDecision(deck, discarded);Code language: CSS (css)Run the program and make sure it still creates the GUI. It may take a bit longer to appear than earlier, but it should still work. You’ll also notice it prints the first hand to the console since we haven’t moved that to the GUI yet. For testing purposes, it might be helpful to largely leave the console output alone.
Currently, the startRound method sets up the table by giving the dealer and the player two cards. With normal rules, the player can see both of their cards and one of the dealer’s cards.
Recall that the printFirstHand and printHand methods were used before to “print” string representations of the cards into the terminal. We need to do the same thing, but load the images instead. In fact, I’m still going to call it printHand. The logic in this method will largely remain the same, but rather than print the hand, we’ll update the array of JLabels with the correct images.
The printHand() method is in the Person class since the logic may be shared between the Player and the Dealer. Go to this method and add a new argument of type JLabel[]. I called mine cardPics.
Person.java
//updated printHand declaration...
public void printHand(JLabel[] cardPics){Code language: JavaScript (javascript)
Remember to import javax.swing.*; at the top of the Person class.
You can leave the println statements as they are if you’d like. Below them, we’ll load the images into the JLabels.
If you look at the folder containing all the card images, you’ll find that I’ve named them according to their RANK followed by their SUIT. For example, an Ace of Spades is named “AceSpades.png” and a Two of Hearts is named “TwoHearts.png” All of the files follow this same convention. This exactly matches the Enums we made for SUIT and RANK in the first version of this project. The only exception is the CardDown.png file which we used earlier to represent a face down card.
Earlier I demonstrated how to load a card into a JLabel and resize it. The printHand() method will do the same thing with the correct filenames. So the method will work by looping through all the cards in the person’s hand and calling setIcon on the appropriate indices. We need a method in the Hand class to get the size of a hand so we can loop through it properly.
Go to the Hand class and add a new getter for getHandSize.
Hand.java
public int getHandSize(){
    return hand.size();
}Code language: PHP (php)
Now we have everything we need to implement the new printHand method.
Person.java
/**
 * Update the image icons for the player's hand
 */
public void printHand(JLabel[] cardPics){
    System.out.println(this.name + "'s hand looks like this:");
    System.out.println(this.hand + " Valued at: " + this.hand.calculatedValue());


    //iterate through each card, update pic, hide remaining
    for(int i = 0; i < 11; i++){
        cardPics[i].setVisible(false);
    }
    for(int i = 0; i < this.hand.getHandSize(); i++){
        String rank = this.hand.getCard(i).getRank().toString();
        String suit = this.hand.getCard(i).getSuit().toString();
        String filename = rank + suit + ".png";
        cardPics[i].setIcon(new ImageIcon(new ImageIcon(Game.IMAGE_DIR+filename).getImage().getScaledInstance(Game.CARD_WIDTH, Game.CARD_HEIGHT, Image.SCALE_SMOOTH)));
        cardPics[i].setVisible(true);
    }

}Code language: JavaScript (javascript)
Hopefully the above code is understandable with the comments, but if it’s not, here’s a quick breakdown.
- I printed the hands out the old way using println
- I loop through all 11 possible spaces and I make them all invisible to start
- (so we don’t accidentally display cards from older hands if the last hand had more than this hand’s cards)
- I loop through the amount of cards the Person actually has in their hand
- I get the suit and rank of each card, then create a filename based on that
- I load the image into the icon the same way I did earlier
- I set each image that’s actually in a hand to be visible, the rest remain hidden
We’re almost ready to test this. But first, I have to return to the Game class and fix spots where we called printHand, so they use the proper arrays of labels in each case. So basically, wherever you see “player.printHand();” replace it with player.printHand(lblPlayerCards); and do the same thing with dealer using dealer.printHand(lblDealerCards);
If you run the program at this point, you’ll likely encounter an error. In the last version of the game, we also called the printHand method from the Person’s .hit method. Go to the .hit method in the Person class and delete this. You can also delete the pause statement if you have one.Person.java
public void hit(Deck deck, Deck discard){

    //If there's no cards left in the deck
    if (!deck.hasCards()) {
        deck.reloadDeckFromDiscard(discard);
    }
    this.hand.takeCardFromDeck(deck);
    System.out.println(this.name + " gets a card");

}Code language: JavaScript (javascript)
Now, when you run the program, you should see both your first two cards and the dealer’s first two cards on the screen, with all the other cards hidden.
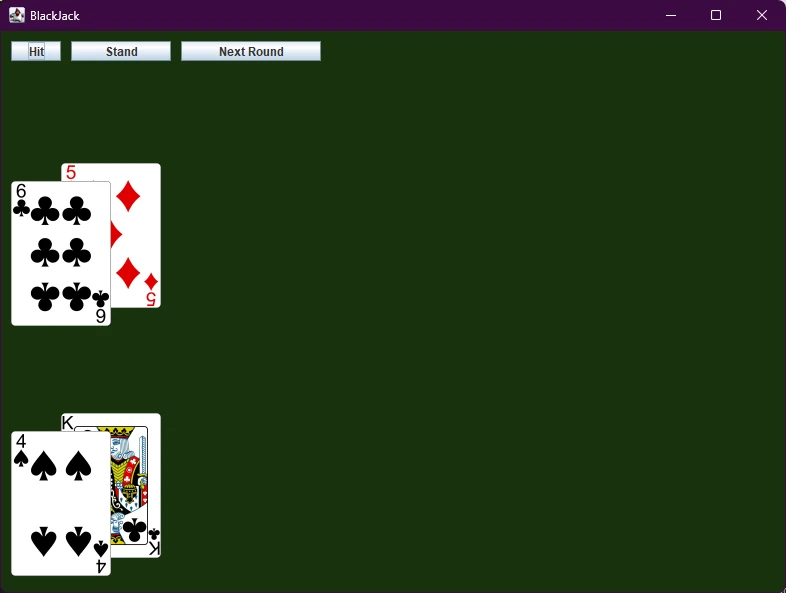
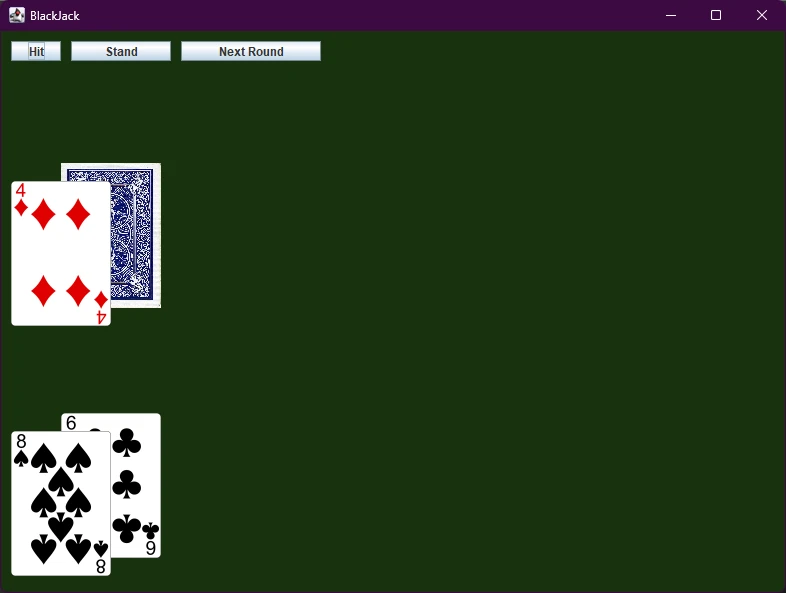
While this is close to how we want to set the screen up at the start of each round, there’s one small issue. One of the dealers cards is supposed to be face down. A simple solution to this is to simply set lblDealerCards[1]’s icon back to the FaceDown.png image as it was before, after we request it be printed in the startRound method. You could also modify the printFirstHand method created earlier to achieve the same thing. But I’m going to just delete the call to “printFirstHand” and do this instead.
Remove the last instance of dealer.printHand(lblDealerCards);
Replace dealer.printFirstHand(); with:
//Show the dealers hand with one card face down
dealer.printHand(lblDealerCards);
lblDealerCards[1].setIcon(new ImageIcon(new ImageIcon(IMAGE_DIR+"CardDown.png").getImage()
.getScaledInstance(CARD_WIDTH, CARD_HEIGHT, Image.SCALE_DEFAULT)));Code language: JavaScript (javascript)
Now, when you run the game, you should only be able to see the dealer’s first card off the start. The second card should be there, but face down. If you still see both cards, double check that you don’t still have a dealer.printHand() floating around somewhere after we hid the second card.
A Few More Labels
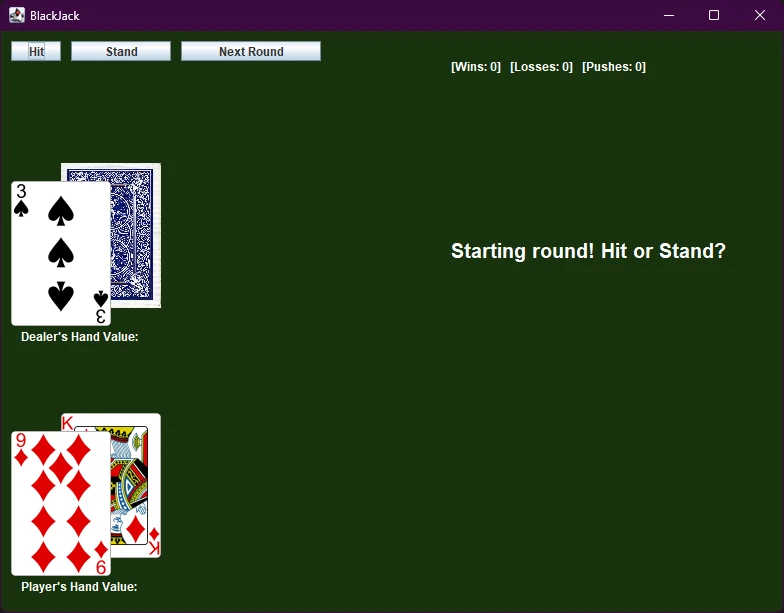
Let’s add a few more labels to the GUI to instruct the user on what they should be doing, display the value of the hands, and display the score.
Declare the following JLabels at the top of the Game class.
private JLabel lblScore, lblPlayerHandVal, lblDealerHandVal, lblGameMessage;Code language: PHP (php)The first one’s for the score, the next two show the value of the player or dealer’s hands, and the last one (lblGameMessage) will display important messages like “Do you want to hit or stand?” “You Win!” and things like that.
Then, initialize them, position them, and make them whatever color you want at the end of the setupGUI method.
//make scoreboard
lblScore = new JLabel("[Wins: 0]   [Losses: 0]   [Pushes: 0]");
lblScore.setBounds(450,10, 300, 50);
this.add(lblScore);

//message board
lblGameMessage = new JLabel("Starting round! Hit or Stand?");
lblGameMessage.setBounds(450, 200, 300, 40);
lblGameMessage.setFont(new Font("Arial", 1, 20));
this.add(lblGameMessage);

//hand values on display
lblDealerHandVal = new JLabel("Dealer's Hand Value:");
lblPlayerHandVal = new JLabel("Player's Hand Value:");
lblDealerHandVal.setBounds(20, 280, 300, 50);
lblPlayerHandVal.setBounds(20, 530, 300, 50);
this.add(lblDealerHandVal);
this.add(lblPlayerHandVal);

//make all labels white
lblGameMessage.setForeground(Color.WHITE);
lblDealerHandVal.setForeground(Color.WHITE);
lblPlayerHandVal.setForeground(Color.WHITE);
lblScore.setForeground(Color.WHITE);Code language: JavaScript (javascript)
If everything went according to plan, your screen show now have labels in all these locations. You can always change this later to suit your tastes as needed.
Button Logic
Now we can focus on implementing the Hit, Stand, and Next Round buttons.
Hit Button
Let’s start with the hit button. We already have a hit method, so we really just need to call that and update the cards shown on the screen.
Don’t worry about changing the hit method. We need to implement an updateScreen method, which will update the message labels and cards the player can see.
Implement the method in the Game class wherever you’d like.
/**
     * Updates everything on the screen. Cards, Values, Scores, etc. except dealer cards/value
     */
    private void updateScreen(){

        lblPlayerHandVal.setText("Player's Hand Value: " + player.getHand().calculatedValue());
        player.printHand(lblPlayerCards);
        //score
        lblScore.setText("[Wins: " + wins + "]   [Losses: " + losses + "]   [Pushes: "+pushes+"]");

    }Code language: PHP (php)
With that out of the way, we can make the Hit button finally do something. Import the ActionEvent and ActionListener classes at the top of Game.java.
import java.awt.event.ActionEvent;
import java.awt.event.ActionListener;Code language: CSS (css)
Then, in the setupGUI method, anywhere after you initialize the btnHit object, add this code to listen for clicks of the hit button.
//When someone clicks the Hit button
btnHit.addActionListener(new ActionListener() {
    @Override
    public void actionPerformed(ActionEvent e) {
        //make the player hit the deck
        player.hit(deck, discarded);
        //update screen with their new card, and their score
        updateScreen();
    }
});Code language: JavaScript (javascript)
Test the program again by launching it and pushing the hit button a few times. More cards should start to appear.
Remember, all the button does is calls the hit method and updates the screen. So it basically just draws cards and adds them to the screen for now. We’ll also need to check if the user has busted after they hit the hit button.
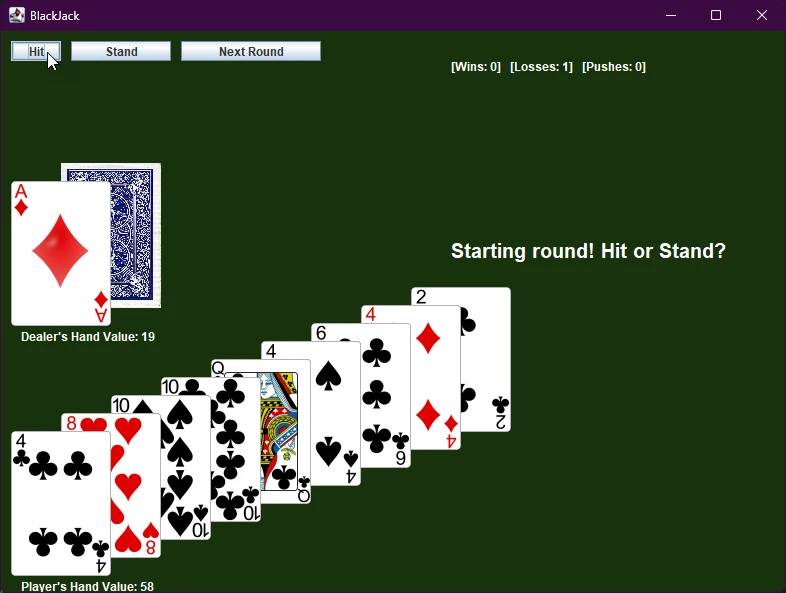
In the console version, the Player’s makeDecision method checked if the user went over 21 or not. Since we’re not using that method anymore, we need to move this logic to the hit button. So when the user goes over 21, we remove their ability to hit the deck again until the next hand is dealt.
I decided to do this in the Game class as well with a new method simply titled “checkBusts” – So add this to Game.java somewhere
private void checkBusts(){
    //Check if they busted
    if (player.getHand().calculatedValue() > 21) {
        //show message
        lblGameMessage.setText("You BUST - Over 21");
        //update score
        losses++;
        //make next round button only visible button
        btnHit.setVisible(false);
        btnStand.setVisible(false);
        btnNext.setVisible(true);
    }
}Code language: JavaScript (javascript)
As you can see, it checks if the value of the player’s cards are over 21, displays a message, and hides the hit button and the stand button.
Return to the code in the hit button’s actionPerformed method and add checkBusts() after you update the screen.
//When someone clicks the Hit button
btnHit.addActionListener(new ActionListener() {
    @Override
    public void actionPerformed(ActionEvent e) {
        //make the player hit the deck
        player.hit(deck, discarded);
        //update screen with their new card, and their score
        updateScreen();
        checkBusts();

    }
});Code language: JavaScript (javascript)
Test the application again. The program should allow you to hit until you go over 21. Then, the hit button should disappear and a message should display saying that you’ve busted.
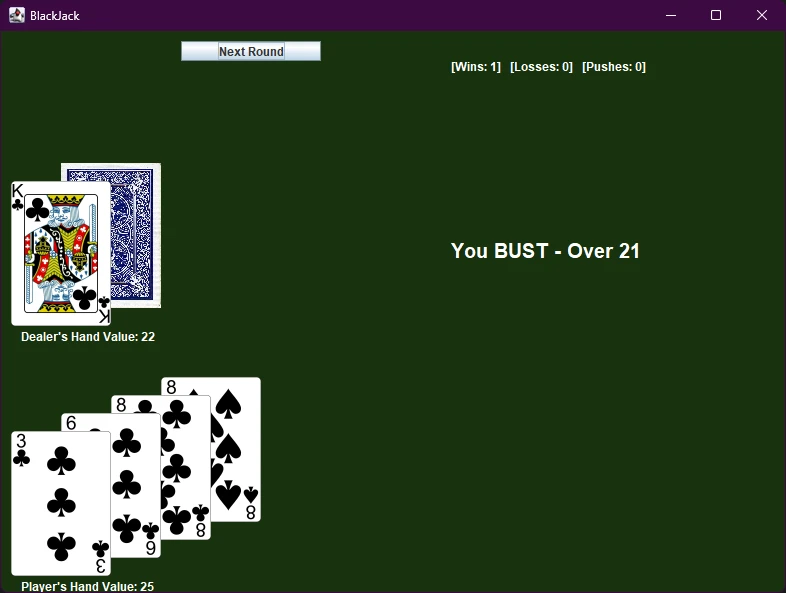
Remember, when a user hits the deck they either:
- Draw a card
- Draw a card and bust
- Draw a card and get 21 (shouldn’t be allowed to draw anymore)
We’ve handled the first two events. Let’s worry about the third event later, once we figure out the other two buttons.
Stand Button
The stand button needs to do a little more than the hit button. It needs to…
- Make the dealer draw to 16 and stand on 17 or higher
- See who won
- Update the screen so we can see all cards on the table
- Make the next round button visible, and hide the other two
Before, we handled most of this in the startRound method. Now, I’d like to separate these functions out a bit better, so we can call exactly the functions we need when we hit the stand button.
At this point, remove all the code towards the end of the startRound method that doesn’t actually deal with things that happen at the start of the round. But leave all the code that checks for blackjack at the start.
So delete the following from Game.java
//Check if they busted
if(player.getHand().calculatedValue() > 21){
    System.out.println("You have gone over 21.");
    losses ++;
}


while(dealer.getHand().calculatedValue()<17){
    dealer.hit(deck, discarded);
}

//Check who wins
if(dealer.getHand().calculatedValue()>21){
    System.out.println("Dealer busts");
    wins++;
}
else if(dealer.getHand().calculatedValue() > player.getHand().calculatedValue()){
    System.out.println("You lose.");
    losses++;
}
else if(player.getHand().calculatedValue() > dealer.getHand().calculatedValue()){
    System.out.println("You win.");
    wins++;
}
else{
    System.out.println("Push.");
}Code language: JavaScript (javascript)
We’re going to take the part towards the end that we just deleted and put that in a new void checkWins method (still in the Game class)
The only major difference is I’m updating the label here to show the total value of the dealer’s hand.
Game.java
private void checkWins(){

    //Show value of dealers hand
    lblDealerHandVal.setText("Dealer's hand value: " + dealer.getHand().calculatedValue());

    //Check who wins and count wins or losses
    if (dealer.getHand().calculatedValue() > 21) {
        lblGameMessage.setText("Dealer Busts! You win!");
        wins++;
    } else if (dealer.getHand().calculatedValue() > player.getHand().calculatedValue()) {
        lblGameMessage.setText("Dealer wins - Higher hand");
        losses++;
    } else if (player.getHand().calculatedValue() > dealer.getHand().calculatedValue()) {
        lblGameMessage.setText("You win - Higher hand");
        wins++;
    } else {
        lblGameMessage.setText("Equal Value Hands - Push");
        pushes++;
    }
}Code language: JavaScript (javascript)
We’ll also turn that little while loop that had the dealer draw up 17 and put that in a “dealersTurn()” method.
Game.java
private void dealersTurn(){

    //Now it's the dealer's turn
    //Dealer will continue drawing until hand is valued at 17 or higher
    while (dealer.getHand().calculatedValue() < 17) {
        //dealer hits deck
        dealer.hit(deck, discarded);
        updateScreen();
    }
}Code language: JavaScript (javascript)
Finally, return to setupGUI and call those methods from a listener tied to the stand button. I inserted this code right after the hit button:
//when someone clicks the "Stand" button
btnStand.addActionListener(new ActionListener() {
    @Override
    public void actionPerformed(ActionEvent e) {
        //that means it's the dealers turn now
        dealersTurn();
        //see who won after dealer drew card
        checkWins();
        //update screen with player's cards
        updateScreen();
        //also reveal all the dealer's cards, so we can see what they drew
        dealer.printHand(lblDealerCards);

        //make only the next round button visible, they cannot hit/stand at this point
        btnHit.setVisible(false);
        btnStand.setVisible(false);
        btnNext.setVisible(true);
    }
});Code language: JavaScript (javascript)
Run the program and test it out. The hit and stand button should both be working. So now you can actually win or lose a round and the results of each hand are displayed. We have yet to implement the next round button, so you can only play the first hand for now…
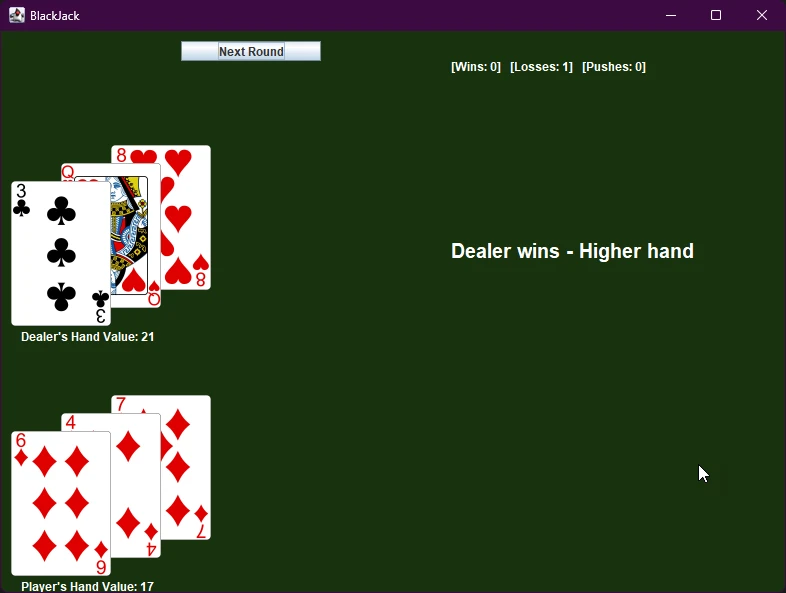
Next Round Button
The next round button is the simplest of the three, since we’ve already completed most of the code. All this button does is call the startRound() method and sets the visibility of the buttons again. So add this after the previous two buttons’ code in setupGUI…
//someone hits the next round button
btnNext.addActionListener(new ActionListener() {
    @Override
    public void actionPerformed(ActionEvent e) {
        //reset buttons and start next round
        btnNext.setVisible(false);
        btnHit.setVisible(true);
        btnStand.setVisible(true);
        startRound();
    }
});Code language: JavaScript (javascript)
Test it out again. While we’re almost there, we still have a few small issues to resolve before the program’s ready.
Finishing Touches
You may have noticed that the messages aren’t all updating quite right after new rounds start. Also, we need to do a bit more to handle events where the player or the PC has a hand valued at 21 to start. Finally, the program is telling us the value of both of the dealer’s cards before we flip the second card over.
Fixing the incorrect card values showing at the start of the round is simple enough.
Just call the updateScreen(); method from the startRound() method after we deal the cards. This will update message to show the actual value of the player’s hand when new rounds start.
Additionally, you can call setText on the lblDealerHandVal object to show only the value of the first card.
//in startRound after you give the player and dealer their two cards...
updateScreen();
lblDealerHandVal.setText("Dealer's hand value: " + dealer.getHand().getCard(0).getValue() + " + ?");
lblGameMessage.setText("Starting round! Hit or Stand?");Code language: JavaScript (javascript)
We should probably hide the next round button off the very start. I added this code right after I made the btnNext in the setupGUI method.
btnNext.setVisible(false);Code language: JavaScript (javascript)Finally, we need to deal with what happens when the player or dealer get blackjack to start. The checks are already in place in the startRound method, but we need to do a few other things too if someone starts with 21. Before, we just printed a message and incremented wins, losses, or pushes. Now, we need to show the dealer’s hand and make the next round button visible if either of us start with 21 points.
Game.java
//Check if dealer has BlackJack to start
if(dealer.hasBlackjack()){
    //Show the dealer has BlackJack
    dealer.printHand(lblDealerCards);

    //Check if the player also has BlackJack
    if(player.hasBlackjack()){
        //End the round with a push
        lblGameMessage.setText("Both 21 - Push");
        pushes++;
        //New round buttons
        btnHit.setVisible(false);
        btnStand.setVisible(false);
        btnNext.setVisible(true);
    }
    else{
        lblGameMessage.setText("Dealer has Blackjack!");
        dealer.printHand(lblDealerCards);
        losses++;
        //player lost, start a new round
        btnHit.setVisible(false);
        btnStand.setVisible(false);
        btnNext.setVisible(true);
    }
}

//Check if player has blackjack to start
//If we got to this point, we already know the dealer didn't have blackjack
if(player.hasBlackjack()){
    //say player has blackjack
    lblGameMessage.setText("You have Blackjack!");
    //update score
    wins++;
    //make next round button only visible button
    btnHit.setVisible(false);
    btnStand.setVisible(false);
    btnNext.setVisible(true);

}Code language: JavaScript (javascript)
The only thing I think I’m still missing is logic to see if the user gets to 21 after the start of the hand. Currently, they could draw a third card, get 21, and still draw a fourth card. We can prevent this by checking if the user gets to 21 after they hit the deck.
Game.java
private void checkPlayer21(){
    if(player.getHand().calculatedValue() == 21){
        lblGameMessage.setText("You have 21!");
        //update score
        wins++;
        //make next round button only visible button
        btnHit.setVisible(false);
        btnStand.setVisible(false);
        btnNext.setVisible(true);
    }
}Code language: JavaScript (javascript)
Then call that right after we call checkBusts when the user hits “Hit”
Game.java
//When someone clicks the Hit button
btnHit.addActionListener(new ActionListener() {
    @Override
    public void actionPerformed(ActionEvent e) {
        //make the player hit the deck
        player.hit(deck, discarded);
        //update screen with their new card, and their score
        updateScreen();
        checkBusts();
        checkPlayer21();

    }
});Code language: JavaScript (javascript)
Test your game thoroughly. If all seems to be working well, you can delete the console print statements. You should probably delete the makeDecision method in the Player class too, since we’re not using it anymore.
If you need to review the finished source code, here’s a link to the finished project on Github.
