In this guide, you will learn the structure of a basic Joomla Content Plugin. We’ll explore several examples, so you can create your own content plugins from the ground up.
Joomla Content Plugins are extensions which manipulate the content of an article in some manner. They allow us to add new styles and features to our articles.
In this guide, we will create a Joomla Content Plugin that can:
- Add custom stylesheets and JavaScript to the page
- Add shortcodes so non-developer folk can easily add styled card blocks to articles
- Add configuration options to the plugin’s settings
- Modify the shortcode to allow the user to specify the title of the card inline
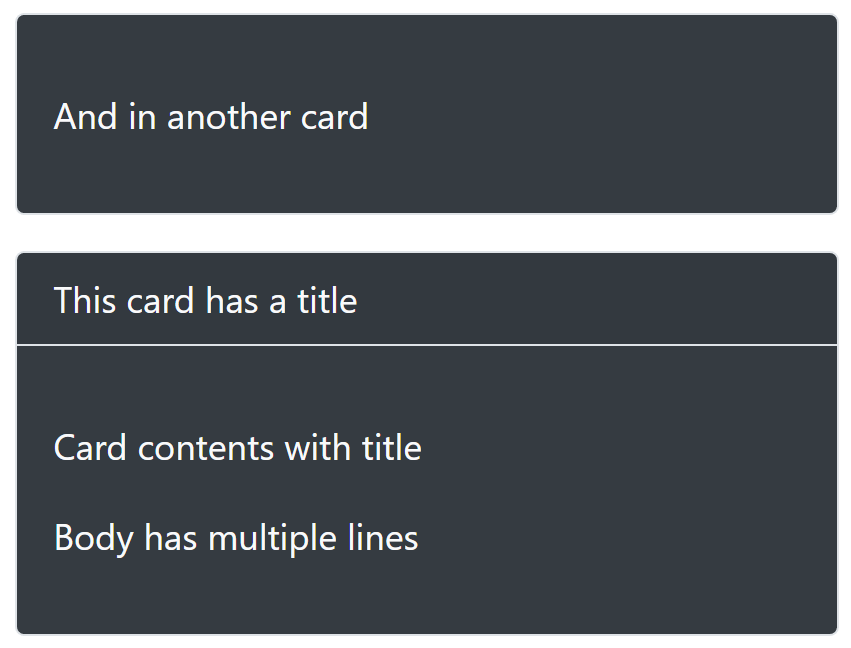
By the end of this guide, you will have coded a plugin that does this:

Prerequisites: This guide aims to be beginner friendly. However, you should have a basic to intermediate level understanding of HTML and CSS. It would help to be at least slightly familiar with PHP, or the basics of any programming language. You must have a local test environment setup with Joomla installed. You must have your favorite code editor ready to go.
This plugin uses PHP’s implementation of Regular Expressions (RegEx). You don’t need to know RegEx to complete this guide or create similar shortcode-based plugins. Just follow my template and make the appropriate changes. The entire completed plugin is available at the end.
Structure
Before we look at any code, let’s examine the structure of a content plugin. At their most basic level, you only need two files to make a content plugin work. These two important files are:
- The Plugin’s Core PHP File
- The Plugin Config File
All the files related to your plugin must go under Site_Root/plugins/content/yourplugin
I will refer to this new location as the “root plugin” folder.
Come up with a short name or alias representing your plugin and create the corresponding folder in the content plugins directory. For my example, I’m going to use the uninspired plugin name “contentplugdemo”. So I’m creating a new directory called “contentplugdemo” in the plugins/content folder. Do not use spaces. The convention is to just use all lowercase characters in one string. No camelCase, PascalCase, or-hyphenated-strings.
Create Essential Files
Next, create a new xml file and a new php file. These files should have the same name as the directory name just created.
My directory structure now looks like this:
- site_root
- plugins
- content
- contentplugdemo
- contentplugdemo.php
- contentplugdemo.xml
- contentplugdemo
- content
- plugins
Create Language Folders/Files
The next priority is to create a “language” folder. This is where the language files will be stored. Make this directory in the same directory as the php and xml files just created. While having language files is technically optional, it’s standard practice to do this, in case you or anyone else needs to translate your plugin in the future.
Create a sub-folder of the language folder using your site’s language code. If your first language and target-audience is English, use “en-GB” for your language code. I wouldn’t recommend using “en-US” even if you’re an American user, since en-GB is the default Joomla language code. Most extensions only use “en-GB” rather than “en-GB” and “en-US”. If you use specific wording, that’s different between US and UK, like “colors” and “colours” it may make sense to create a separate “en-US” language files later. This is usually a non-issue. Everyone knows “colors” and “colours” mean the same thing, regardless of where you are. I’d be more concerned if your plugin has public-facing strings of text.
Under the “en-GB” language folder, create two ini files: en-GB.plg_content_PLUGINNAME.ini and the same name, but .sys.ini.
- plugins
- content
- contentplugdemo
- contentplugdemo.php, contentplugdemo.xml
- language
- en-GB
- en-GB.plg_content_contentplugdemo.ini
- en-GB.plg_content_contentplugdemo.sys.ini
- en-GB
- contentplugdemo
- content
That’s it for files and folders, for now. Time to start writing some code.
Configuration XML File
Open the empty configuration .xml file under the plugin root. This is where you will define important things about your plugin. Joomla requires this file in order to understand the structure of your plugin. Without this, your plugin will not work or install.
Below is what the xml file looks like for my plugin. You’ll want to update some options. We’ll examine each setting line by line.
<?xml version="1.0" encoding="utf-8"?>
<extension version="4.0" type="plugin" group="content" method="upgrade">
	<name>plg_content_contentplugdemo</name>
	<author>Kevins Guides</author>
	<creationDate>Jan 2024</creationDate>
	<copyright>Copyright (C) 2024 Kevin Olson - Kevin's Guides</copyright>
	<license>MIT</license>
	<authorEmail>[email protected]</authorEmail>
	<authorUrl>www.kevinsguides.com</authorUrl>
	<version>1.26</version>
	<description>PLG_CONTENT_CONTENTPLUGDEMO_XML_DESCRIPTION</description>
	<files>
		<filename plugin="contentplugdemo">contentplugdemo.php</filename>
		<folder>language</folder>
	</files>
	<languages folder="language">
		<language tag="en-GB">en-GB/en-GB.plg_content_contentplugdemo.sys.ini</language>
		<language tag="en-GB">en-GB/en-GB.plg_content_contentplugdemo.ini</language>
	</languages>
</extension>
Code language: HTML, XML (xml)
The first line defines the XML version. Leave that alone.
<extension version="4.0" type="plugin" group="content" method="upgrade">Code language: HTML, XML (xml)The second line has a few important things in it. The version attribute defines the Joomla version this plugin works with. 4.0 means it will work with all 4.x Joomla installations. This is not the version of your plugin itself. You’d just change this to 5 if you want the plugin to only be for Joomla 5.
The type attribute is just telling Joomla this is a plugin. The group means it’s a content plugin.
The method defines how the plugin is installed or upgraded. In most scenarios, you’ll want to leave this set to upgrade. With this option set, when someone tries to install the plugin using Joomla’s extension manager from a zip file, it will create the new plugin directory if it doesn’t exist, and replace the files with the new files if it’s an updated package of an older version.
Lines 3 through 11 all have to do with your credits and some misc info about the plugin. You may fill in your name, email, website, etc. here if you’d like. These fields are for informational purposes only, and have no bearing on the functionality of the plugin.
In the above example, I used language constants to access the name and XML description of the plugin. This has to do with the plugin’s language files, which we’ll discuss shortly.
<files>
	<filename plugin="contentplugdemo">contentplugdemo.php</filename>
	<folder>language</folder>
</files>Code language: HTML, XML (xml)
The files section is important. This tells Joomla where each file and folder in your extension is located. Without this section configured, Joomla cannot install the plugin using the extension manager.
Line 13, <filename plugin="" ... is very important. The name in the plugin attribute should match the name of your plugin’s folder. It’s the short plugin name/alias created earlier. The php file associated with this property is the plugin’s main PHP file. This is where Joomla will look to execute your plugin when someone loads an article on the front-end.
Each folder in the plugin’s root directory should be defined using the folder tag. For now, there’s just “language” but down the road, we may need to add more folders here for things like scripts and styles.
<languages folder="language">
	<language tag="en-GB">en-GB/en-GB.plg_content_contentplugdemo.sys.ini</language>
	<language tag="en-GB">en-GB/en-GB.plg_content_contentplugdemo.ini</language>
</languages>Code language: HTML, XML (xml)
The language element contains references to the language files created earlier. Make sure these match the name and structure of your actual language files.
Language Definitions
In Joomla, all language-specific text is stored in .ini files. These are based on constants and string values. The language constant is used to represent a string of text, the value, defined in the ini file.
In the XML config file, I used the language constant “plg_content_contentplugdemo” for my Plugin’s name on line 3. This means Joomla will search for a language file with the matching constant “PLG_CONTENT_CONTENTPLUGDEMO” and replace the constant with whatever’s found in the file.
Here’s what my language .ini and .sys.ini files look like:
PLG_CONTENT_CONTENTPLUGDEMO="Content Plugin Demo"
PLG_CONTENT_CONTENTPLUGDEMO_XML_DESCRIPTION="Adds a shortcode for creating cards in articles"Code language: JavaScript (javascript)
The constant is on the left, and the string of text it gets replaced with on the right, in quotes.
Note that for now, these files look exactly the same. It’s still important to define the name and description in both files.
As a rule:
- mylanguagefile.ini – Used for constants shown in the actual settings of the plugin
- mylanguagefile.sys.ini – Used for constants shown across the backend, in admin dashboards, installation screen, etc.
Take this time to define the title of your plugin and the description in both the .ini and .sys.ini files.
Main PHP Functions
Now that the plugin’s basic configuration and language files are ready to go, we can begin working on the php file. This is where we will make the plugin actually do something.
Open the plugin’s main PHP file created earlier. Add the following code to it.
<?php
/**
 * @version    1.0.0
 * @package    contentplugdemo (plugin)
 * @author     Kevin Olson - kevinsguides.com
 * @copyright  Copyright (c) 2022 Kevin Olson
 * @license    GNU/GPL license: https://www.gnu.org/copyleft/gpl.html
 */
//kill direct access
defined('_JEXEC') || die;

use Joomla\CMS\Plugin\CMSPlugin;
use Joomla\CMS\Factory;


class PlgContentContentPlugDemo extends CMSPlugin
{

    public function onContentPrepare($context, &$article, &$params, $page = 0)
    {

        //getters
        $doc = Factory::getApplication()->getDocument();
        $wa  = $doc->getWebAssetManager();
        $pluginPath = 'plugins/content/' . $this->_name;
        $view = Factory::getApplication()->input->get('view');
    }
}
Code language: PHP (php)
You may change or remove the comments at the start, to match your information.
Pay attention to the class definition “PlgContentContentPlugDemo” in the above code. This should match your plugin’s name in the format: PlgContentYourPluginName
The “PlgContent” prefix is saying that this is a content plugin. The “ContentPlugDemo” represents the “contentplugdemo” alias I’ve been using for my project. So you don’t need to have the word “Content” in there twice, unless the first word of your plugin name is “Content” as mine is.
Discover and Install
At this point, the extension doesn’t do anything. However, we have everything we need to discover and install the plugin.
Navigate to your site’s admin panel and go to the “System” page. Then click “Discover” under the “Install” area.
The Discover feature is used by Joomla to “discover” extensions that exist somewhere on the site, but haven’t been installed, or registered to the database yet.
On the Discover page, click the “Discover” button. Your plugin should appear. Install it.

If your plugin does not appear when you click discover, return and check that all files are named correctly. Make sure the files are all in the right locations, too.
Go to the plugin manager under System -> Plugins. Search for your new content plugin and enable it.
If everything goes according to plan, you should be able to load an article on your site and nothing different should happen. The plugin should just be enabled, with no errors happening.
Security, Imports, Basic Setup
The first few lines are essential.
defined('_JEXEC') || die;Code language: PHP (php)The defined jexec or die line is a security feature. You should use this at the start of all your PHP files associated with Joomla. It prevents the php file from being accessed directly. Only Joomla can use this file. It’s not a page the public can just go to and access outside the context of Joomla.
The “use” lines are needed to access basic plugin and CMS features.
class PlgContentContentPlugDemo extends CMSPluginCode language: PHP (php)This line defines the plugin class and says it’s an extension of CMSPlugin. This allows us to use the CMSPlugin functions necessary for creating this plugin.
public function onContentPrepare($context, &$article, &$params, $page = 0)Code language: PHP (php)The onContentPrepare function is executed when the content is being prepared, before it gets sent to the user. This method is important, since our goal with this content plugin is to modify the contents of the article before it gets sent out.
This function has several parameters. The $context is the context of the plugin – where it’s being called from. For example, if the plugin is being called from an article, the context is “com_content.article”
The &$article is a reference to the article itself. We can use this object to access important things like all the text in the article.
The &$params has to do with the actual article/menu settings. It can see whether the “Linked titles” or “Tags” options are set, for example.
The $page has to do with the page of the article being loaded. For example, if you split an article into multiple pages using page breaks, you could use $page to determine which page someone is on. Zero is the first page, 1 is the second page, and so on.
The Standard Variables
If you’ve been following along with my example I’ve included a few active variables for you to use.
$doc = Factory::getApplication()->getDocument();
        $wa  = $doc->getWebAssetManager();
        $pluginPath = 'plugins/content/' . $this->_name;
$view = JFactory::getApplication()->input->get('view');Code language: PHP (php)- $doc – An object used to display the HTML document. Has several useful methods for parsing/displaying documents.
- $wa – The document’s WebAssetManager. We will use this object to add “assets” – scripts and stylesheets – to the page.
- $pluginPath – The relative directory to the plugin itself, if you need it later.
- $view – The current component view. For example, an article view is “article”
For a better demonstration of what these variables contain, add the following code to your onContentPrepare method, after the variables are set up.
echo '<br/>the context is '.$context;
echo '<br/>the params are '.$params;
echo '<br/>the page is '.$page;
echo '<br/>the view is '.$view;Code language: PHP (php)
Save the PHP file and navigate to any content page on your site. See what the output is. Here’s what my output looks like on the second page of a multi-page article:
the context is com_content.article
the params are {"article_layout":"_:default","show_title":"1","link_titles":"1"........}
the page is 1
the view is articleCode language: PHP (php)
If you got any errors, review your code. Check for typos. Delete the 4 lines of code we just added when you’re done seeing what it does. You can always put it back later if you want to test something or figure out what something’s named.
Adding Scripts and Styles
We can add scripts and styles to the page using the WebAssetManager $wa object defined earlier.
In this example, I have created a “style.css” file under a new “css” folder in my plugin’s root directory. I’ve also created a “js” folder containing a “script.js” file. You can name these whatever you’d like. You can skip this step entirely, if you don’t need your plugin to load CSS or scripts.
$wa->registerAndUseStyle('contentplugdemo.mainstyle',$pluginPath.'/css/style.css');
$wa->registerAndUseScript('contentplugdemo.mainscript',$pluginPath.'/js/script.js');Code language: PHP (php)
The registerAndUseStyle function registers a new style with a name (the first arg) and a path (the second). registerAndUseScript does the same thing, but for JavaScript files.
If you decide to create additional folders or files within your plugin, remember to specify them in the plugin’s config .xml file! For folders, you can just use the folder element, no need to add each file in the folder individually.
Shortcode Example (Cards)
For my first demo, we’ll be updating the plugin so that it detects shortcodes and replaces them with divs. You may have seen these before. They’re commonly used in situations where people don’t want to edit page HTML directly.
Our plugin will do this:
- Find the shortcode {card} within an article
- Replace the text {card} with a div
- The div will have the classes: card card-body bg-dark text-light
- This will create a really simple dark card with light text using Bootstrap
- Replace the text {/card} with a div closing tag </div>
To achieve this, we need to understand how to get and modify the article’s text. You can get the text of the article by using the $article object and using the text accessor.
$allTheText = $article->text;Code language: PHP (php)We can change it using that same article accessor.
$article->text = "My new article text here";Code language: PHP (php)Note that changing the $article->text does nothing to the MySQL database. The content in the database remains the same. The plugin is only changing the output of the article before it’s sent to the user. No changes made to the $article->text will be saved back to the site database.
If you’d like to see this in action yourself, just add that last line to your onContentPrepare function. It should make every single article on your website appear as that string of text.
Find/Replace
Now that you understand how to get and change the text of an article, let’s find and replace our shortcode. To do this, I will use the PHP function preg_replace()
preg_replace() finds a string using regular expression syntax (RegEx). It requires three arguments to work. The first is the RegEx pattern, the second is what we’re replacing the found expression with, and the third is the subject, or what we’re searching through. The preg_replace() function will return a String in which all the replacements have happened. So we’ll need to set $article->text to this replaced string.
I am going to replace {card}. The RegEx for that with PHP formatting is /{card}/
I want to replace the shortcode with my div, which looks like this: <div class="card card-body bg-dark text-light"> – So that will be my second argument.
The last argument is going to be $article->text, since we’re searching through all the article text.
When complete, my first replacement method looks like this:
$article->text = preg_replace('/{card}/','<div class="card card-body bg-dark text-light">',$article->text);Code language: PHP (php)Remember, you should be putting this code somewhere inside the onContentPrepare function.
I need to do the same thing for the {/card} part and replace it with the div close. Note that the forward slash is reserved for use in RegEx. To tell PHP we want to look for the exact character of a forward slash, we need to escape it using a backslash in front of it. Here’s what the second line looks like when complete:
$article->text = preg_replace('/{\/card}/','</div>',$article->text);Code language: PHP (php)Save the php file. Let’s test it by creating a new article which uses the shortcodes. My article looks like this:
The Article Editor
Hello, World.
This is some text outside of a card.
{card}
And this is text inside a card
{/card}
And this is outside again
{card}
And in another card
{/card}Code language: plaintext (plaintext)
If you’d like to learn more about RegEx to create your own shortcodes beyond what I was explained, check out Regex101.com which has a built-in tool for formatting PHP RegEx. RegExR.com may also be useful.
Hooray! It seems to be working. If you had issues, check out all the source files up to this point.
Shortcode Extended – Card Titles
For the second demonstration, I’d like to extend the capability of the previous demo. Now, it will have a title attribute, which allows us to give the card a separate header.
The shortcode will look like this:
{card title="My Fancy Title"} card contents {/card}Code language: JavaScript (javascript)It will produce the following Bootstrap card output:
<div class="card bg-dark text-light">
    <span class="card-header">Card Title Here</span>
    <div class="card-body">
        Card contents here.
    </div>
</div>Code language: HTML, XML (xml)
This is going to be significantly more involved than the other example. We have to figure out how to isolate the title attribute from the card shortcode and put that in a separate span. Then we need to isolate the card body and put that in its div. We have to make sure we do this in a way that doesn’t leave remnants of the shortcode on the page. We should also consider what we should do if a shortcode is encountered without a title attribute.
The RegEx used in this section is going to be a bit more complicated than the previous. If you’re confused, skip this part or just copy/paste my RegEx examples. They could be easily changed to use any shortcode, even if you don’t fully understand the RegEx.
There are several ways we could do this. I have settled on the following solution:
- Match all cards based on them starting with ‘{card’ and ending with ‘{/card}’
- Create an array (list of card elements) holding the entirety of each card from start to end
- Break each found card apart, see if it has a title, isolate the body, generate the card
- Replace what we originally found from the start of each card shortcode with the newly generated card.
Begin by deleting the code we made for the last example, after the //getters section.
Finding Each Card
The PHP preg_match_all function will return an array of matches based on a given RegEx. We can use this to build our array of cards on the page. This function has three arguments minimum. The first is the regex expression, the second is the string we’re searching through, and the third is an array to store the matches in.
preg_match_all('/{card.*?\/card}/s', $article->text, $matches);Code language: PHP (php)The code above uses RegEx to match the beginning and end of each card, in their entirety. Starting from the start of the card shortcode ‘{card’ and ending with the ‘/card}’
Create a new test article, or use the same one from earlier. Create assorted cards using the {card} {/card} shortcodes. Add titles to some of them. We want a mix of titled and untitled cards, so we can make sure RegEx found them all properly.
You can then add this line to your PHP file:
print_r($matches);Code language: PHP (php)This should print out the contents of each card shortcode, as an array. It may look a little odd. Note that it’s technically a two-dimensional array. The results are actually in the second dimension of the array. [0][0] [0][1] [0][2] and so on. Delete the test print line when you’re done testing.
The Loop
Now we need to iterate over each value in the second dimension of the array. Use a foreach loop to achieve this.
foreach($matches[0] as $value){
	//do stuff with $value
}Code language: PHP (php)
We need to extract the title attribute (if it has one) and the card body from each $value we have found.
You may get the card body, or text between the shortcodes, using this code:
//do stuff with $value
preg_match('/(?<={card)(.*?})(.*?)(?={\/card})/s', $value, $cardMatcher);
$cardBody = $cardMatcher[2];Code language: PHP (php)
This uses preg_match instead of preg_match_all, we only need one match, since we already narrowed it down to a single card shortcode section. It works very much the same.
The RegEx here is searching for anything that comes between ‘{card’ and ‘}’ – which gets put into the first group of the match. We’ll use this later to determine if it found a ‘title=’ attribute. The second group matches between ‘{card…}’ and ‘{/card}’ – this is the body of the card. So I set a new variable $cardBody to this value.
You may stop here and echo/print $cardBody to see if it’s working right.
To continue, we need to figure out the value of the title attribute. This can be done by using a preg_match on the first group from the previous cardMatcher array. This will be empty ” if the title attribute does not exist, which will be useful.
//Match the title attribute based on the first group in the previous match
preg_match('/(?<=title=").*?(?=")/s', $cardMatcher[1], $titleMatch);

$title = '';
//if this isn't null, the title attribute must be there
if($titleMatch){
    $title = $titleMatch[0];
}Code language: PHP (php)
The RegEx above matches for everything between ‘title=”‘ and the closing quotation mark. After matching for title, I set $title to be an empty string. If it’s not null, we set it equal to the found title.
Now we have a $value – the original card created with shortcode, the $cardBody and the $title. We have everything we need to generate the new cards with divs and replace the original $value.
We’re still in the foreach loop.
I created a variable called $output to store the output while we’re working on it. First, if the card has no title, I created a div with the classes .card.bg-dark.text-white and another div for the card-body – This results in the same thing we got earlier, a card with a card body and no title.
If it finds a title, we need to change the output a bit. I set it to create the opening div.card.bg-dark.text-light, a span.card-header, and another div.card-body within the parent div.card.
It injects the $cardBody and $cardTitle by combining the parts together (in PHP, a period is a concatenation operator, if you’re not familiar).
//generate the output
if($title == ''){
    $output = '<div class="card bg-dark text-light"><div class="card-body">'.$cardBody.'</div></div>';
}
else{
    $output = '<div class="card bg-dark text-light"><span class="card-header">'.
            $title.'</span><div class="card-body">'.$cardBody.'</div></div>';
}Code language: HTML, XML (xml)
The last thing we need to do is replace the original $value with the new $output. We can do that using PHP’s str_replace function.
$article->text = str_replace($value, $output, $article->text);Code language: PHP (php)Remember, $value is still the entire card from {card} to {/card}.
The above code is saying: set the article text to the str_replace function, which is searching through $article->text for $value and replacing it with $output.
Be sure to save the PHP file and test your site out with the updated plugin. Test the {card} shortcode with and without title attributes. Make sure it works right.
Here is my plugin’s PHP in entirety, if you need it or miss something.
Config Options
The last topic I want to address is adding back-end config fields to the plugin. This will allow people using your plugin to make global changes to how it works directly from within Joomla, without having to touch the PHP files or other code.
I would like to add two configuration options to my plugin.
- White Card Bodies – The titles/borders will still be colored, but the card body portion will be white instead of colored.
- Color Options – User will pick from three card colors at a global level – “Primary” “Dark” or “Danger” – The exact colors these end up being will depend on how Bootstrap is implemented in the template.
Config
Return to your plugin’s configuration .xml file. At the end of the file, after the languages section, but before the end of the </extension>, create an additional element “config”
The config section is where we can define controls for our plugin. These can be virtually any form field Joomla supports – everything from text boxes to file selectors, radio buttons, and dropdowns. For a full list, see Joomla’s Standard Form Field Types.
Here’s what my config looks like with one new field added for controlling the card body background color.
<config>
<fields name="params">
	<fieldset name="basic">
		<field name="white-body"
			type="radio"
			default="0"
			label="PLG_CONTENT_CONTENTPLUGDEMO_WHITECARDBODY"
			description=""
			class="btn-group btn-group-yesno"
		>
			<option value="1">JYES</option>
			<option value="0">JNO</option>
		</field>
	</fieldset>
</fields>
</config>Code language: HTML, XML (xml)
The “config” denotes the start of the config options. The “fields” element is telling Joomla these are the plugin’s “params” or parameters. We’ll need this filled in to access the saved values later. The “params” name is common convention, so just leave it as is.
The fieldset with a name of basic means these are the fields that get shown to the user on the first page of the plugin’s settings. If you had many fields, you could create a separate fieldset for “advanced” which would appear on a separate tab in the back-end.
Finally, we can start defining each field within the fieldset. Each field should have a name, type, default value, label, and description. The class is optional, but since I want this to be a yes/no button, I’m using these Joomla provided classes.
Finally, the options tell Joomla what options the field has. As a radio yes/no button, it only has two potential values – yes (1) or no (0). You will have to read the Joomla docs if you’d like to see how other field types are created. I set my field to have a default value of 0 (no).
I used a language constant for the label of my field. This is replaced with some text in my language.ini file.
PLG_CONTENT_CONTENTPLUGDEMO_WHITECARDBODY="Use White Card Bodies?"Code language: JavaScript (javascript)The JYES and JNO are global language constants used by Joomla for the words “Yes” and “No”
After you’ve created the config section of the plugin’s xml file, save it and open your plugin in the Joomla backend. You should see the newly created field.
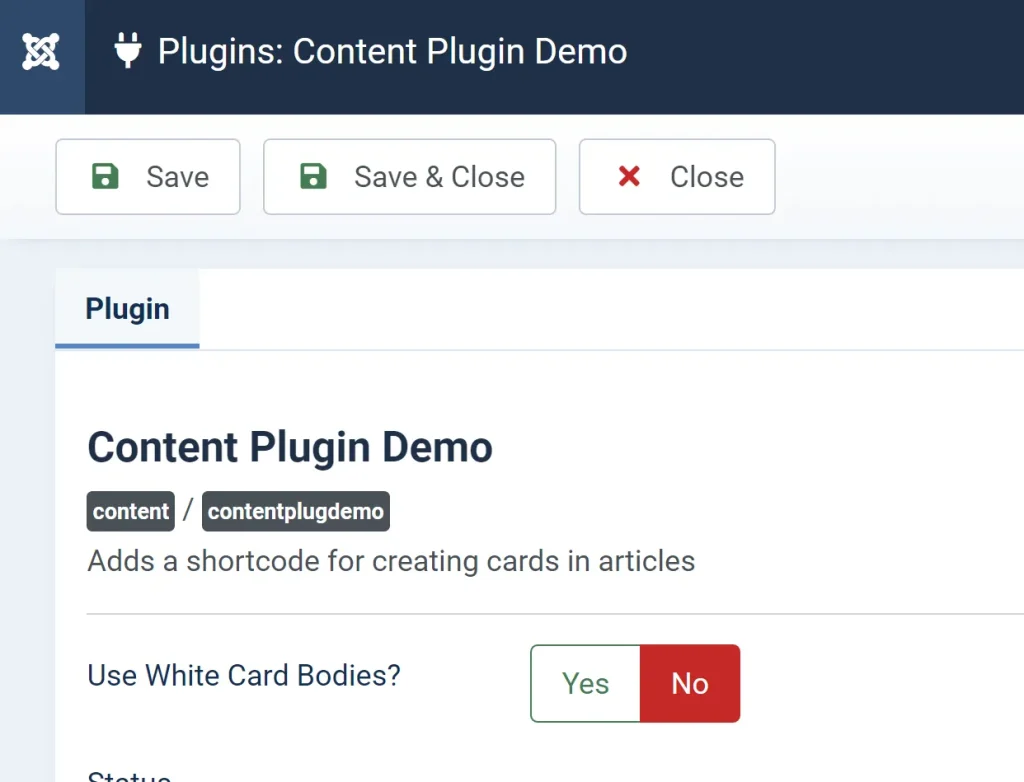
Of course, it does nothing for now. But it is there. If your plugin page won’t load or errors out, check your syntax and make sure you didn’t forget to open/close any of the tags in the xml file.
Now let’s make it do something.
Card Body White Param
Return to the plugin’s PHP file. Near the top of the onContentPrepare function, just after the getters, add this line:
$whiteBodybg = $this->params->get('white-body','0');Code language: PHP (php)This will set $whiteBodybg to 0 or 1 based on what the plugin loads from the plugin’s config. In params->get('white-body','0') the first argument is the field we’re looking for. This should match the field name defined in the .xml file. The second argument is the default value. It’s what is loaded if the plugin can’t find the field and should match the default= attribute from the field config.
Now that we have the value, we just need to modify the PHP to add a white background or not.
I’m creating a new variable called $cardBodyClass which will contain the card body’s background color. It’ll also contain the text color, since we’ll want to use a darker text class if the card body is white.
$whiteBodybg = $this->params->get('white-body','0');

//by default, don't change anything
$cardBodyClass = '';
if($whiteBodybg == '1'){
    //if 1, change classes
    $cardBodyClass = 'bg-white text-dark link-dark';
}Code language: PHP (php)
Now all that’s left is to add the $cardBodyClass to the $output in the foreach loop used earlier.
//generate the output
if ($title == '') {
//make a card div with no title
$output = '<div class="card bg-dark text-light"><div class="card-body '.$cardBodyClass.'">'.$cardBody.'</div></div>';
} else {
//make a card div with a span title and a card body div, remember to close both divs.
$output = '<div class="card bg-dark text-light"><span class="card-header">' .
$title . '</span><div class="card-body '.$cardBodyClass.'">' . $cardBody . '</div></div>';
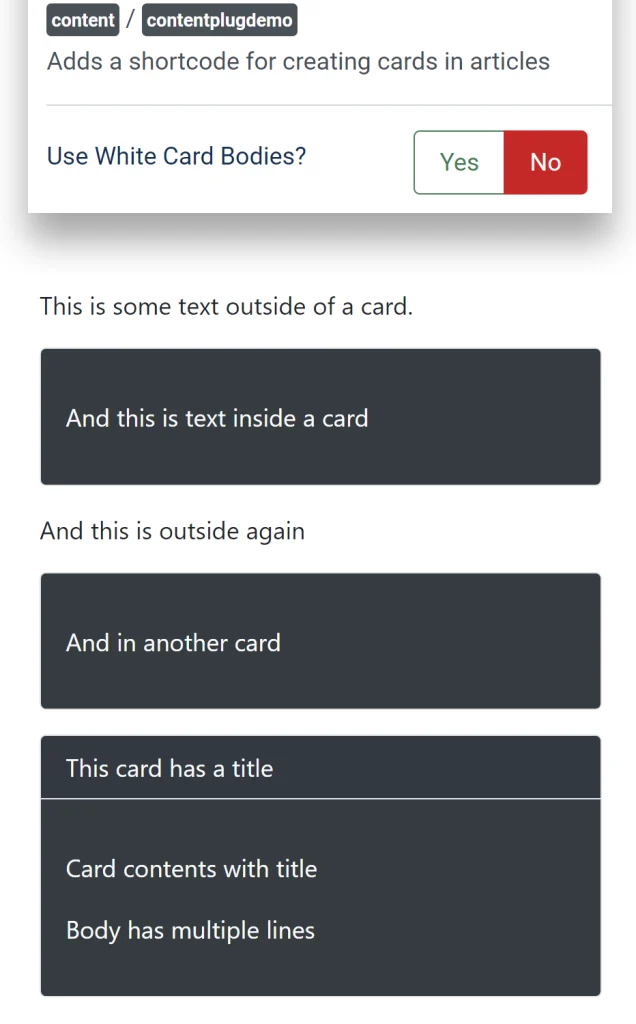
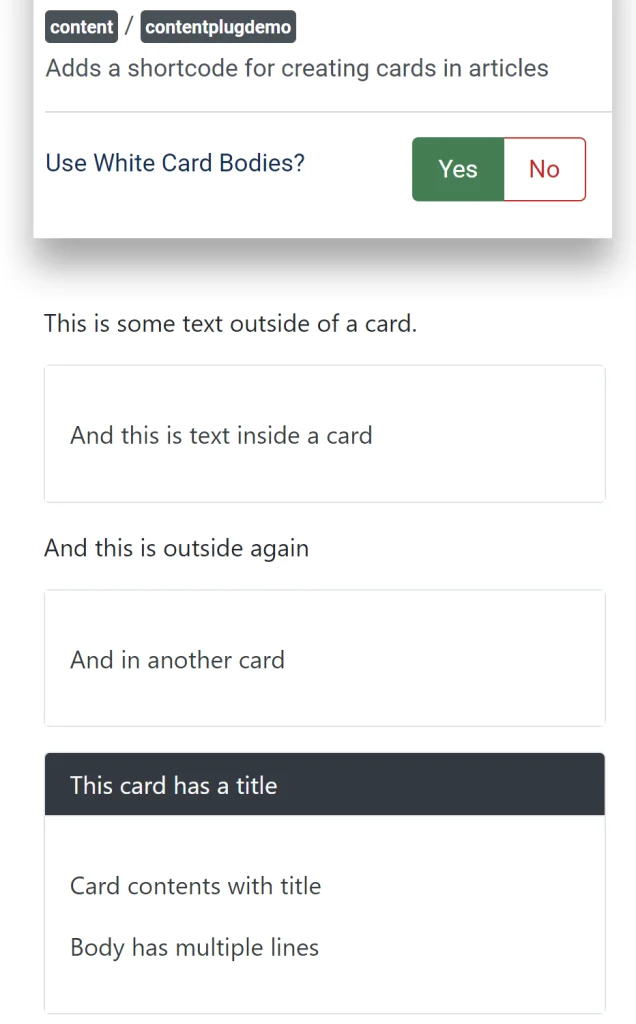
}Code language: PHP (php)Now I can test my code out. Using the cards I made earlier, and the setting set to “No” everything looks the same. When I change the setting to “Yes” the bodies of the cards become white. Perfect.
Your turn! Using the same logic as the card background example, can you add a second field that allows users to pick between the colors “Primary” “Dark” and “Danger”?
Use the List Field Type to define the three options. Use the Bootstrap classes “bg-dark” “bg-primary” and “bg-danger” to change the colors in the PHP.
Hint: You can put the actual class names directly as values under the list options.
Don’t feel like it, or run into problems? Check out the full solution.
Distribution
Before you distribute your plugin, you’ll probably want to rename all the instances of “contentplugdemo” with whatever you elected to call the plugin. Unless it’s just for you. This means updating the xml file in multiple places, the class name in the php file, the language constants, etc.
To distribute your new plugin, you’ll want to package it as an installable zip file. To do this, simply zip everything in your plugin’s directory. You can call it whatever you’d like. Double check to ensure all the files and folders you’re using are defined in the .xml file!
Save the zip file somewhere safe.
Go to your extension manager and uninstall your plugin. Or better yet, install a fresh copy of Joomla 4 in a separate directory.
Upload your plugin using the zip file you created. Make sure it installs and works properly with no errors.
All done.