In this chapter you will learn about how Joomla organizes content with categories. We touched on this briefly in the previous chapter, but now we’ll go into more detail.
Categories
Categories are a hierarchical, linear way to organize articles. Every article in Joomla is assigned to the Uncategorized category by default. Categories can be created and changed through the use of the category manager. Different options and access levels can be assigned to each category individually. Joomla permits an unlimited number of subcategories, so you can have categories within categories, within categories if you want. You can also have articles and categories in one category at the same time.
Categories and tags can both be used to organize content. The difference is that articles can only be assigned to one category at a time, but can have multiple tags at a time. This is why I say articles in categories follow a linear structure – there is a straight line going from the article to its parent category. Tags are more like a cloud, or pool of articles.
Look at the accompanying figure. It shows how a website that focuses on articles related to organisms might be structured. The highest categories in the structure are called top level categories. Categories that are in another category are said to be children of that category, or child categories. The parent category is the category directly above a child category. By default, articles are assigned to the Uncategorized category, which functions as a top-level category.
Before we can put an article into a category, we must first create it using the category manager.
Category Manager
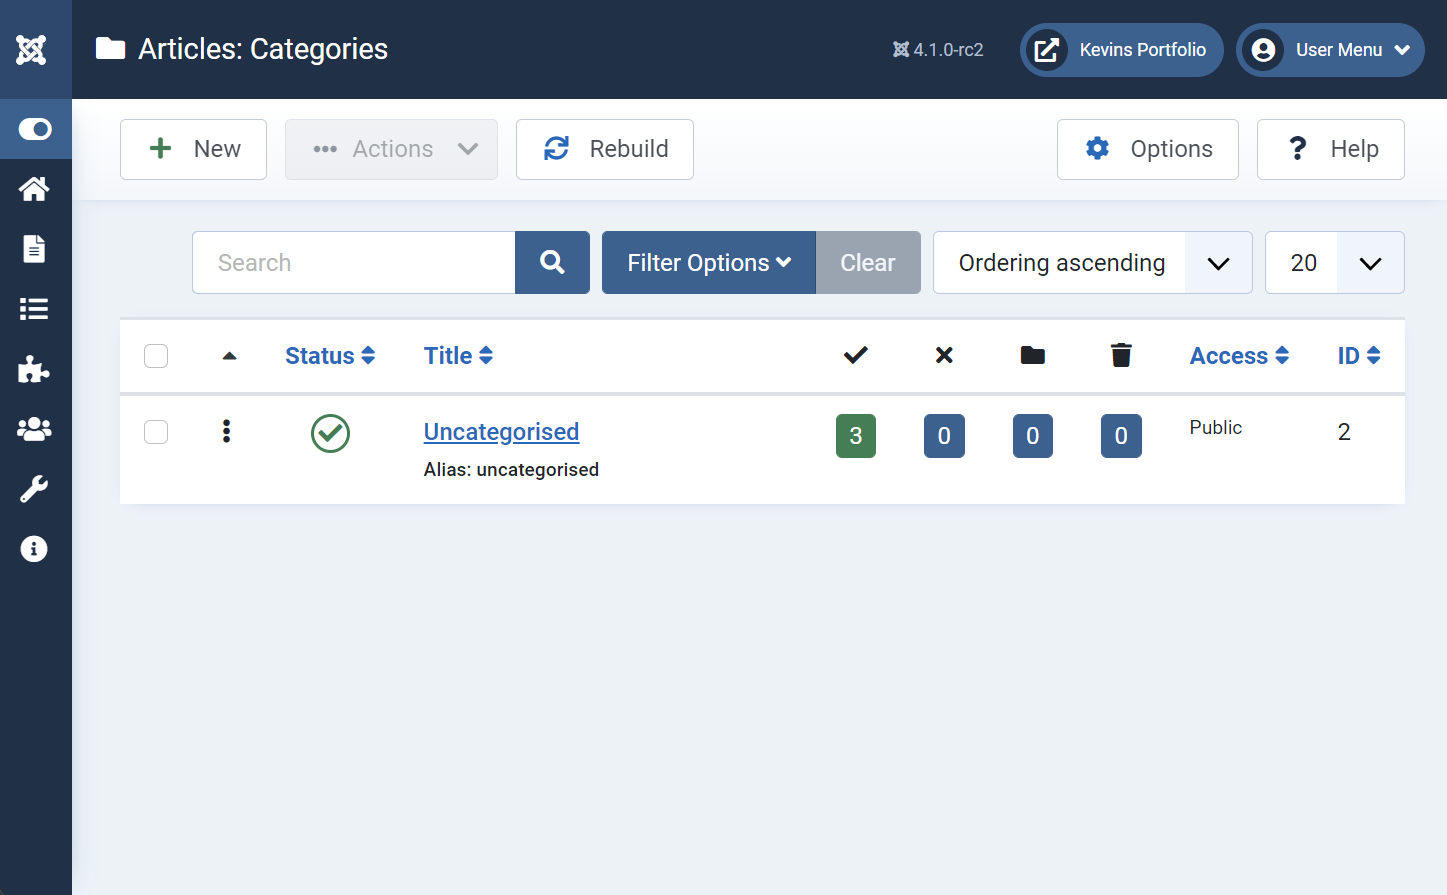
The Category Manager is a tool used to look at and manage all the categories on your website. It can be accessed from the admin menu under Content, Categories.
Functionally, the category manager looks and behaves similarly to the article manager. Just with categories instead of articles.
Category Edit Screen
The Category Edit screen allows you to set and change options pertaining to a specific category. Click the “New” button under the category manager to create a new category.
You may notice that this looks almost identical to the article edit screen. Don’t get them confused, you’re in the right place! The large area in the center with an editor is for the category description. Here, you can provide some details about this category that can be made visible to users when they visit that category page. I’m going to go with the earlier example and create a category called “Living Things” to demonstrate.
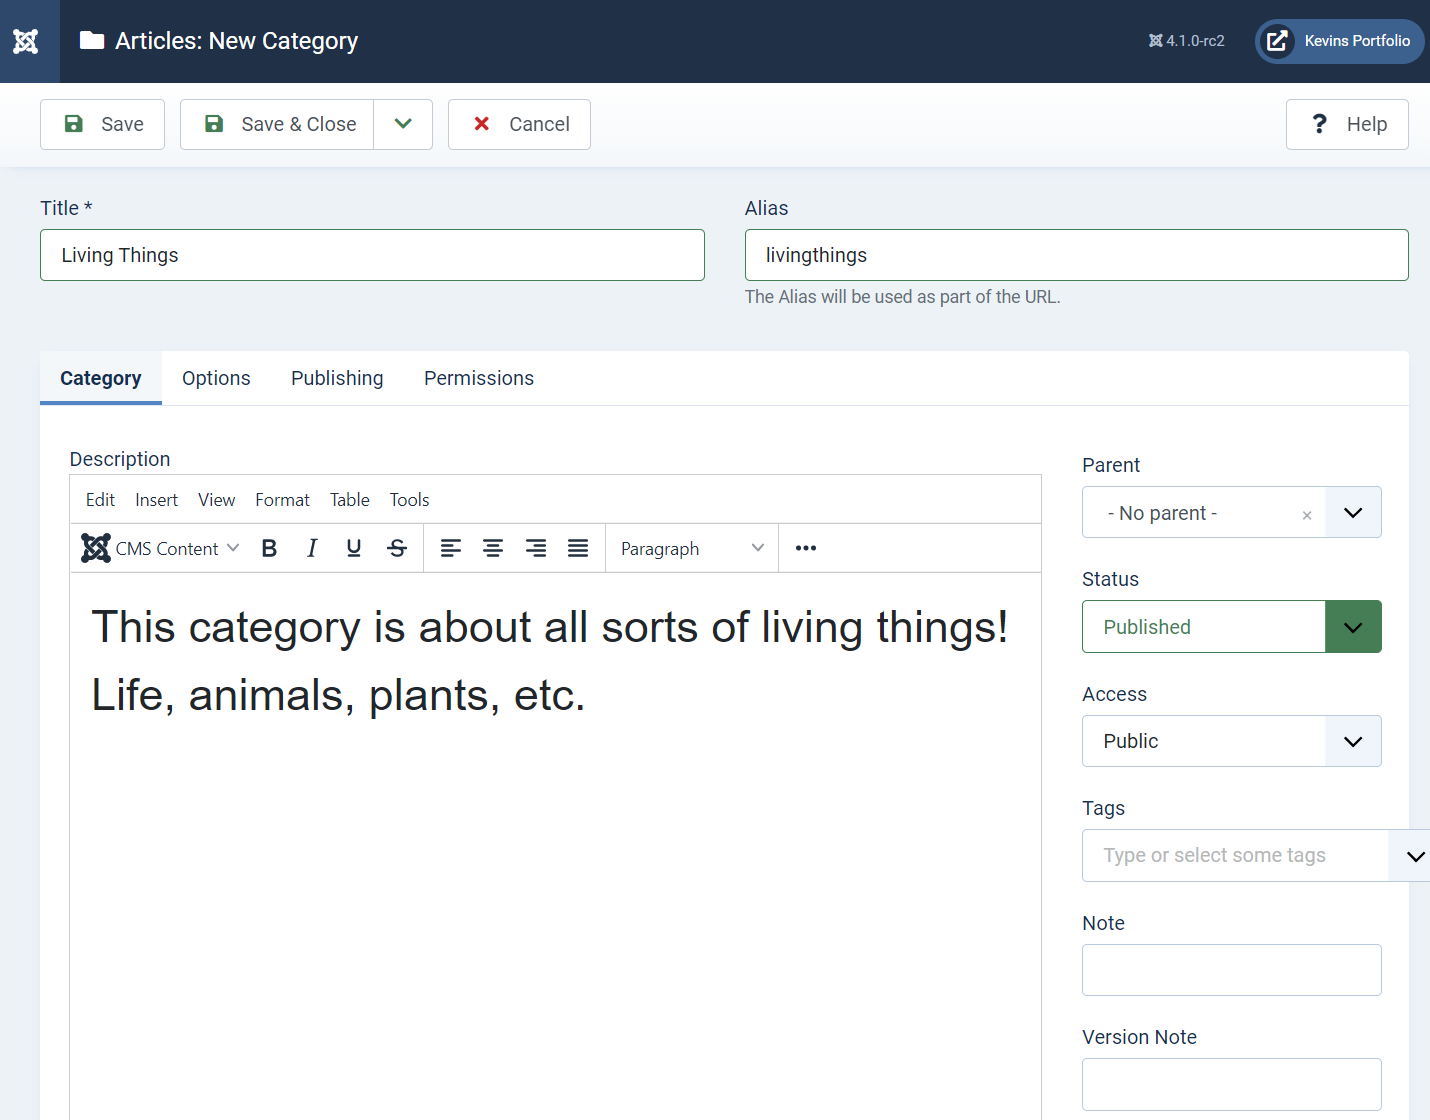
I will not go into detail on which option does like I did for articles, as they are largely the same – but applied to categories. If you want to know what each field does, check out the last chapter on articles or click the help button in the upper right.
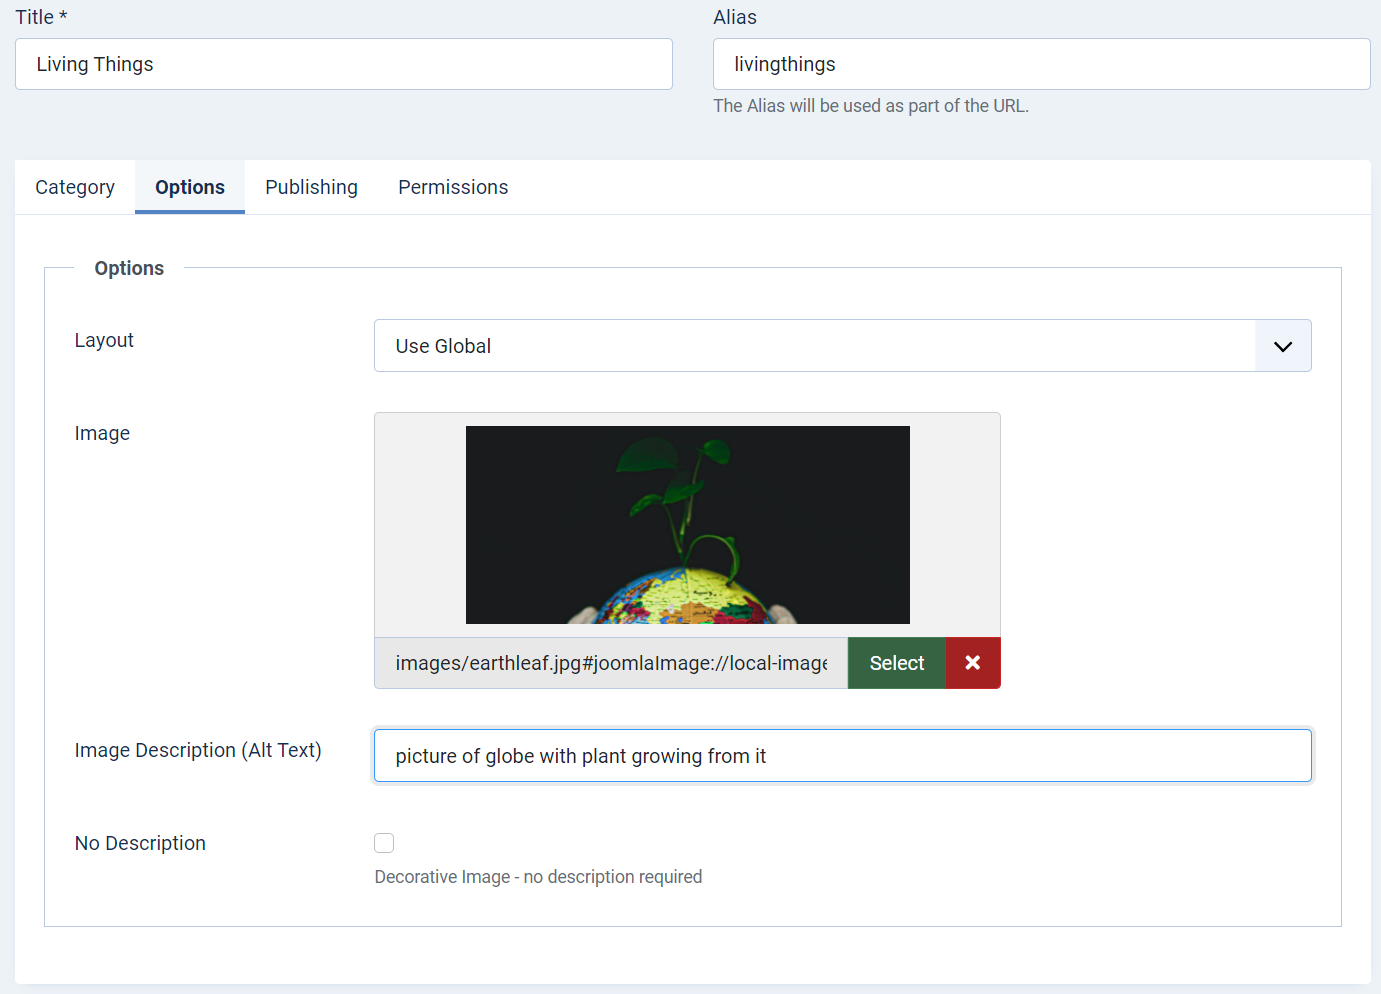
One notable thing is the Options tab has an image that can be set as the category image. You may want to select an image to represent your category.
Create a new top level category relevant to the content you intend on using with your website. Ideas for categories include a “Pages” category to hold all your site’s static pages (like about us and terms of service), a “News” category to hold site news, or a “Blog” category to hold your personal blog posts.
Creating a Subcategory
After you have created a top level category, you can create a subcategory within it by simply choosing the appropriate category under the “Parent” field in the right sidebar of the category edit page.
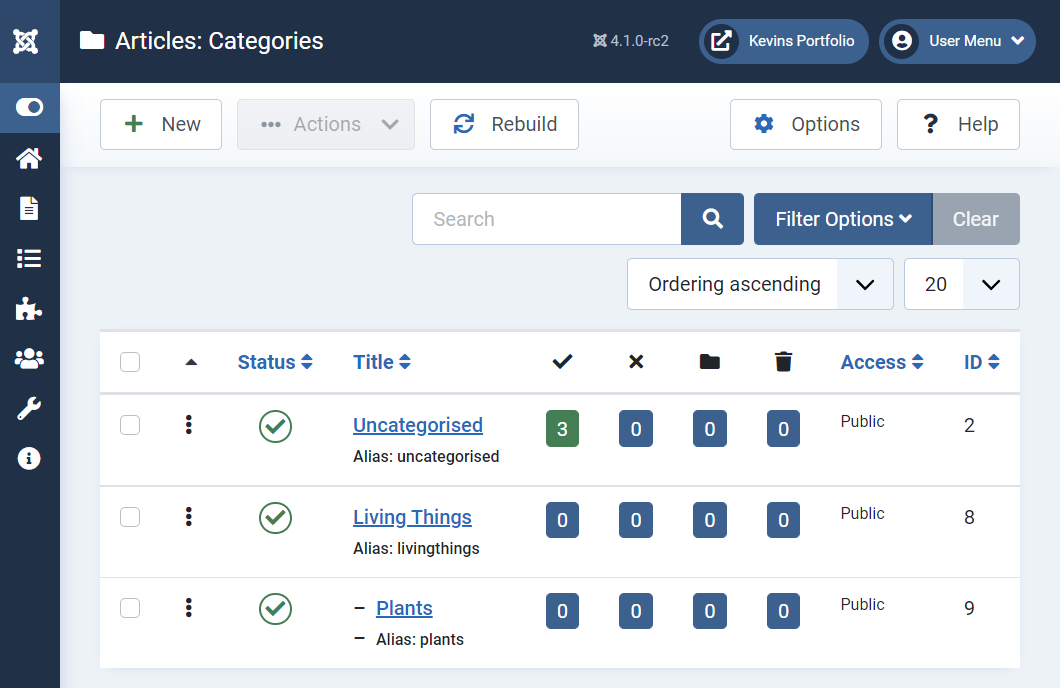
In the example below, I add a subcategory “Plants” to my parent “Living Things” category.
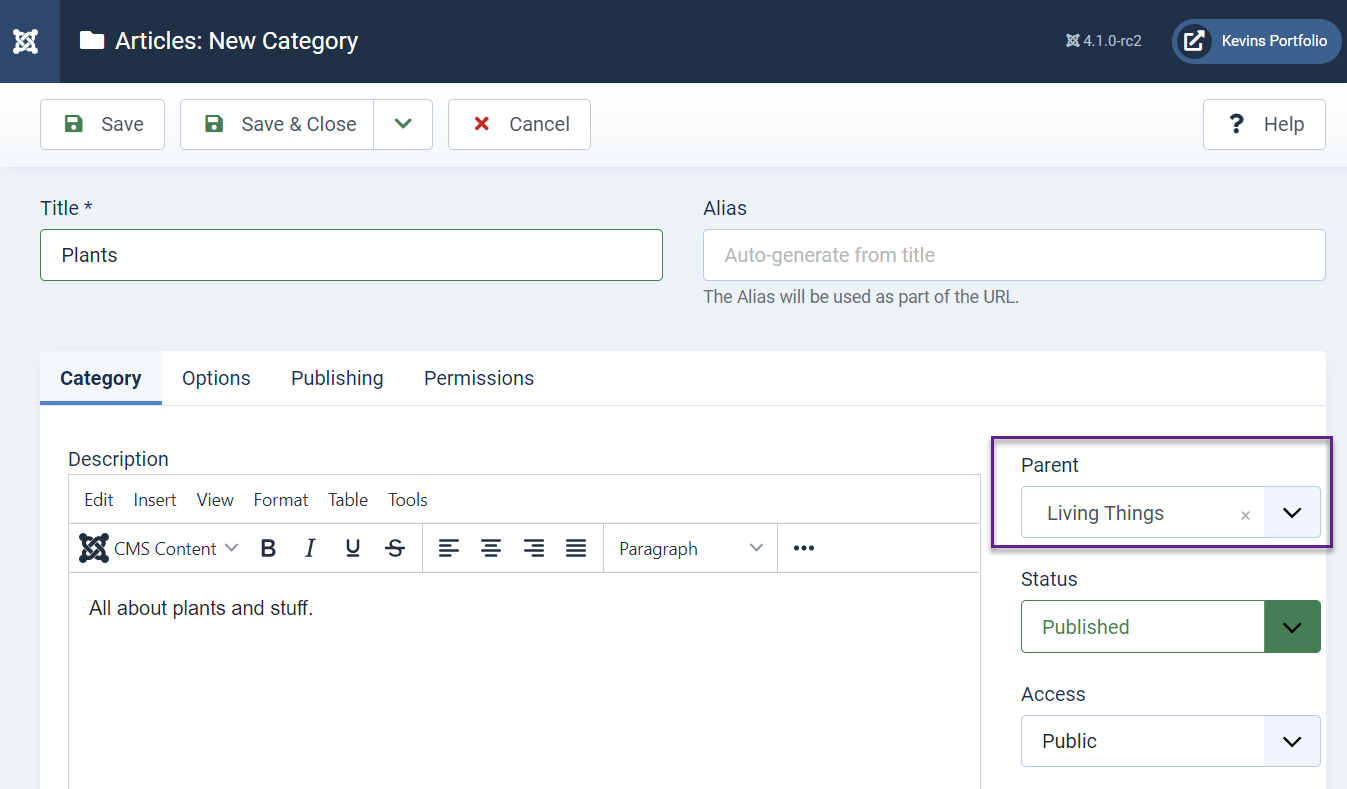
After saving my subcategory with its parent, the category manager now adds a dashed line in front of the subcategory to indicate that it belongs to the category above it.
Assigning Articles To A Category
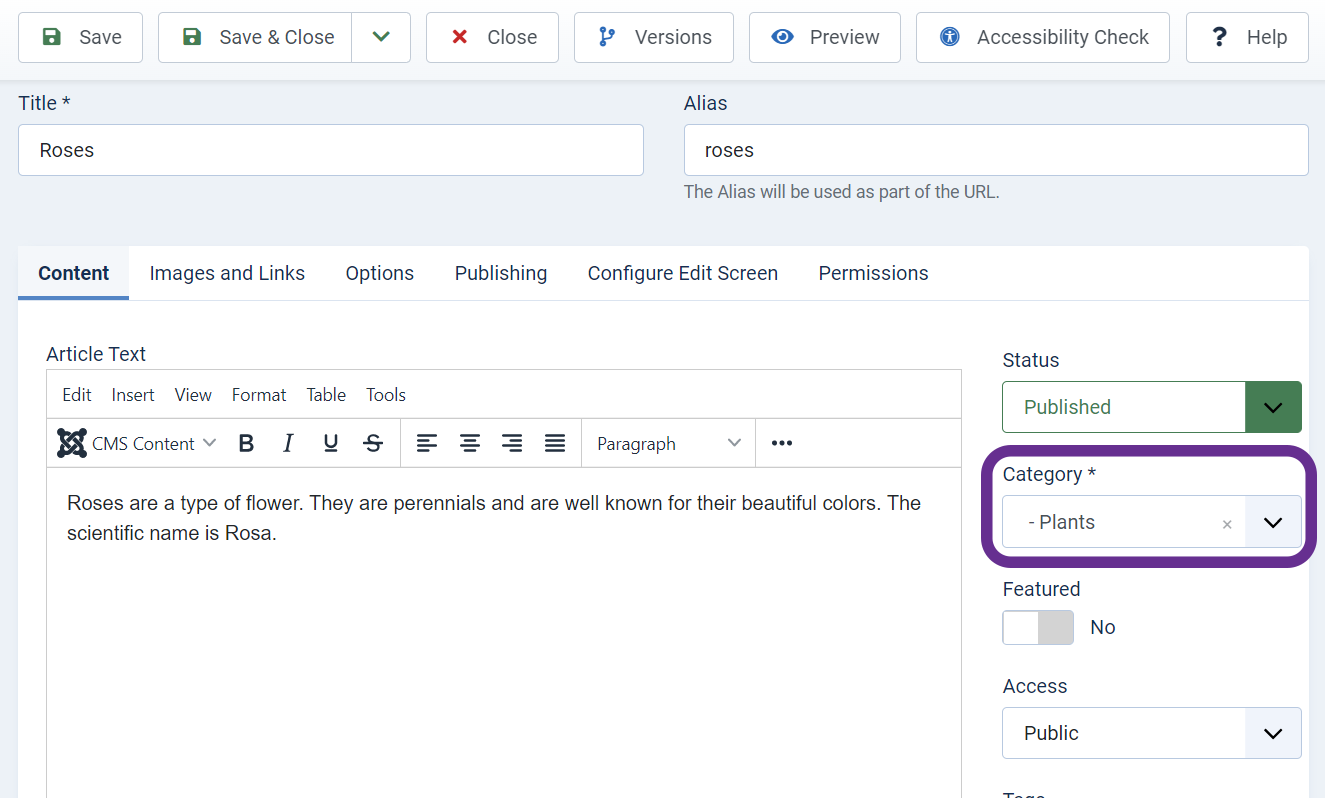
Once you have created your categories, you can return to the article manager to assign articles to the categories. Just click on the article to open it in the article editor and select the appropriate category under the “Category” field in the first tab.
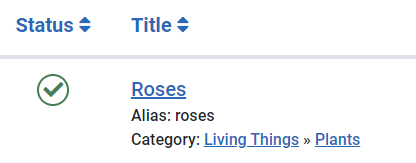
After saving the article with the assigned category, you will see the category displayed under the article in the Article Manager.
When you reach a point where your site has many articles, it may become useful to view articles from a single category at a time, which you can do using the “Filter Options” in the Article Manager.
Assign some articles to categories you’ve created. How you categorize your content is entirely up to you.
Category Views/Menu Item Types
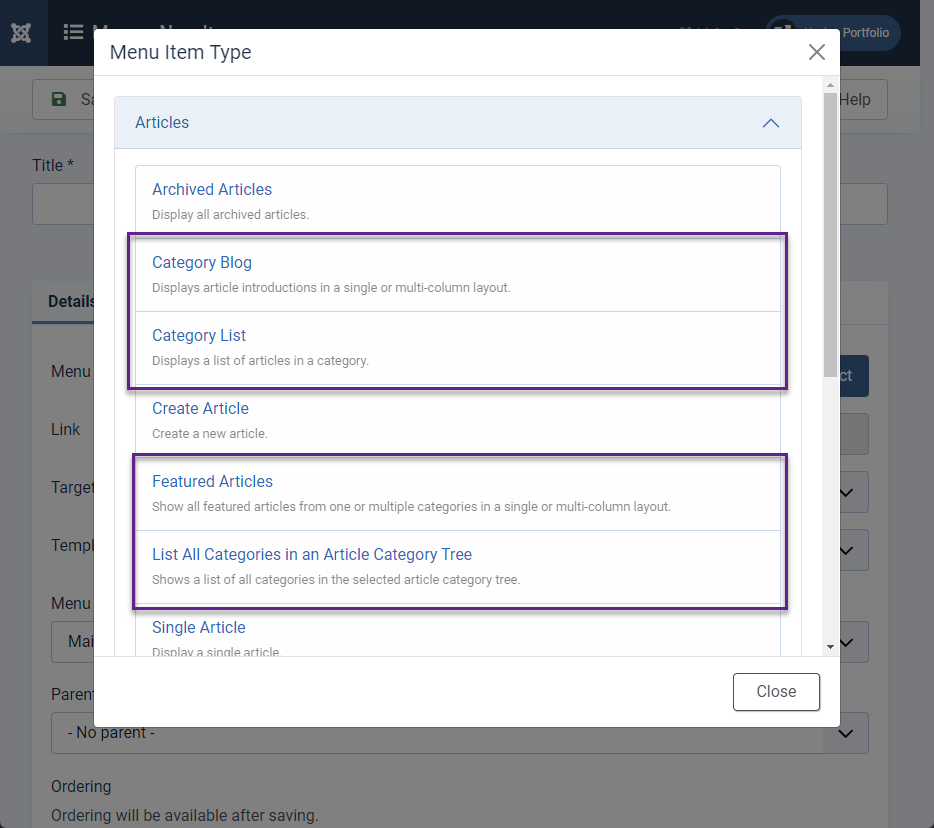
Joomla provides several ways to view categories. There are four basic options: Category Blog, Category List, List All Categories, and Featured Articles.
You can see these options by adding a new menu item to the main menu, selecting “Menu Item Type” and finding the corresponding option under the articles dropdown.
Featured Articles
Featured Articles is the default home view for all featured articles on the site. You are able to assign particular categories to a featured articles view if you’d like. For example, if you only wanted to show featured articles from your “News” category on the home page, you could click the Home item in the Main Menu and set it to the “News” category.
In this example, I have created a new menu item called “Featured News” to display my website news in a feature layout. To select the categories, you will have to navigate to the second tab (“Blog Layout”), which appears after you set the menu item type.
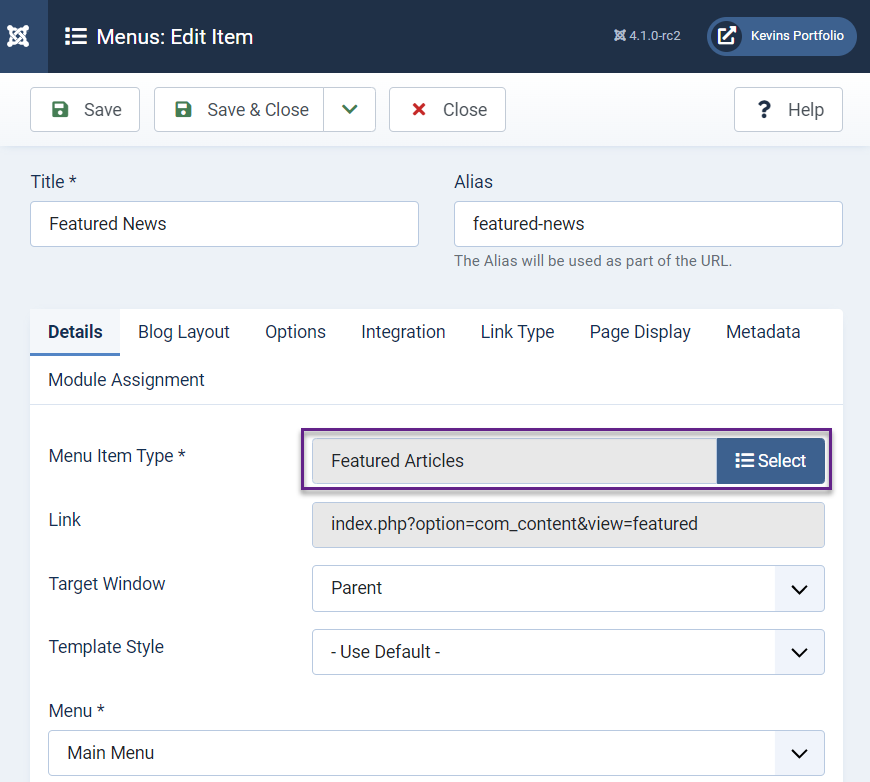

Note in the “Blog Layout” tab I set my columns to 2 and set it to display the articles across. This results in a front-end layout that looks like the following. I added some sample articles for content.
Create a new menu item with a feature/blog layout for any category of your choosing. Make sure the articles are set to featured! Play around with the columns and layout in the menu item settings to see what it does to the appearance of the page.

Category Blog
The Category Blog menu item type is nearly identical to the featured articles, except it displays all articles in one category, rather than just the featured ones. Additionally, the Category blog can only display articles from one category, which is set in the “Details” tab rather than the “Blog Layout” tab. The Featured articles option can display features from multiple categories.
Category List
The Category List menu item type, not to be confused with List All Categories, will list all the articles in a specified category.
Once you select this menu item type, you can select which category you want to list articles from.
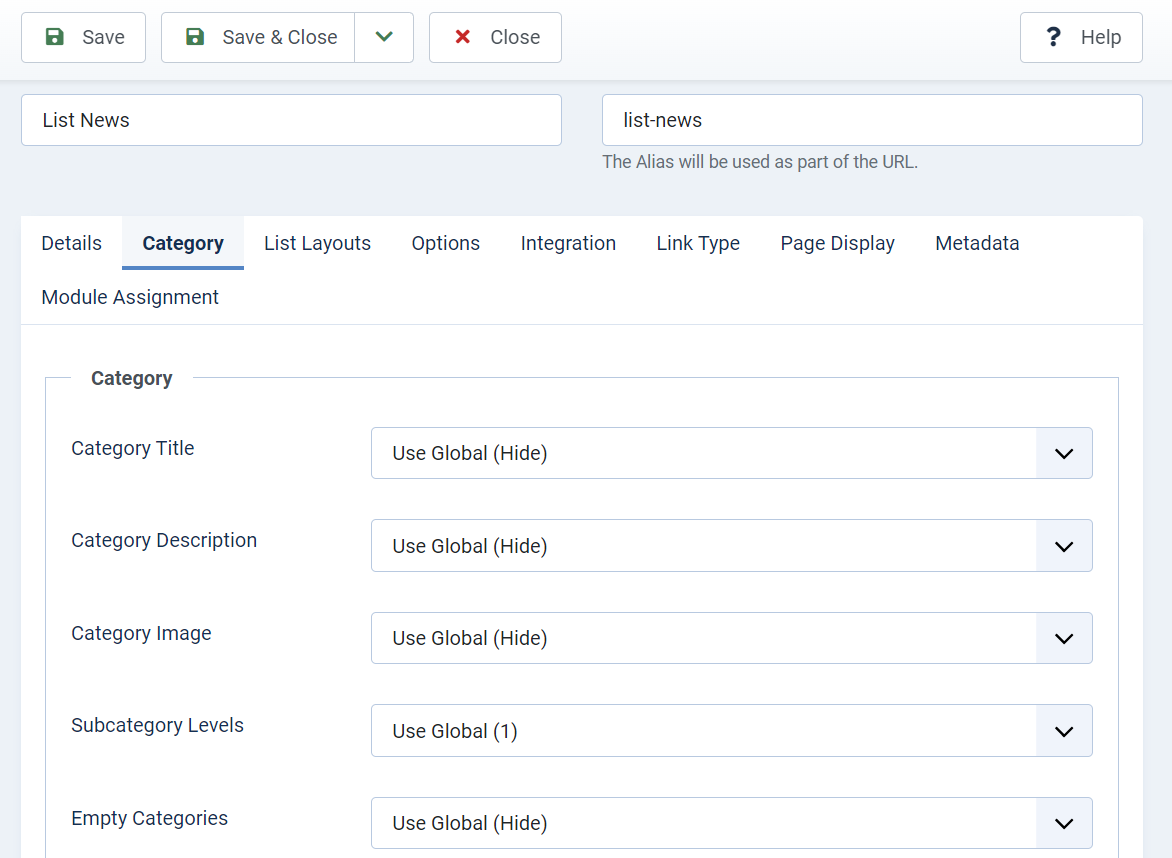
If you visit the Category tab of the Category List menu item, you’ll see a number of settings you can apply to the category list. Some notable options include the ability to show subcategories with the article list, hide empty categories, and show descriptions of the current category and the subcategory.

If you click the “List Layouts” tab under the menu item, you’ll be able to configure what gets shown in the article list. You can show/hide the author name, dates, hits, and more. I’d turn off hits.
Finally, you’ll notice that there’s yet another “Options” tab with article display options. Options set here will apply to all the articles held in this category list, unless they’ve been set differently at the article level or by the options for a “Single Article” link. So direct article link options override everything, options set at the article level take precedence next, followed by the category options, and finally the global settings.
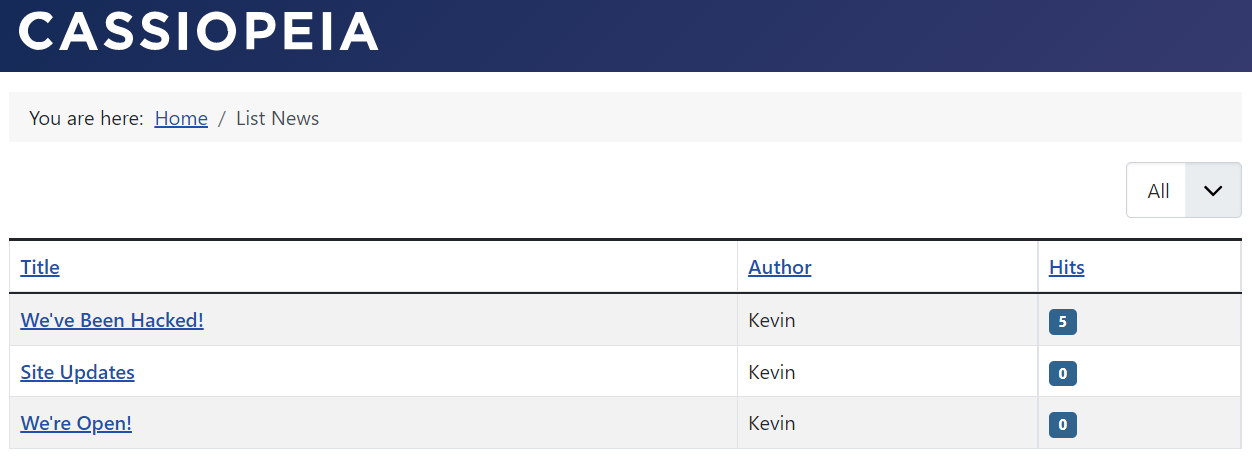
When you view the menu item on the front end, you’ll see a list of all the articles in the category.
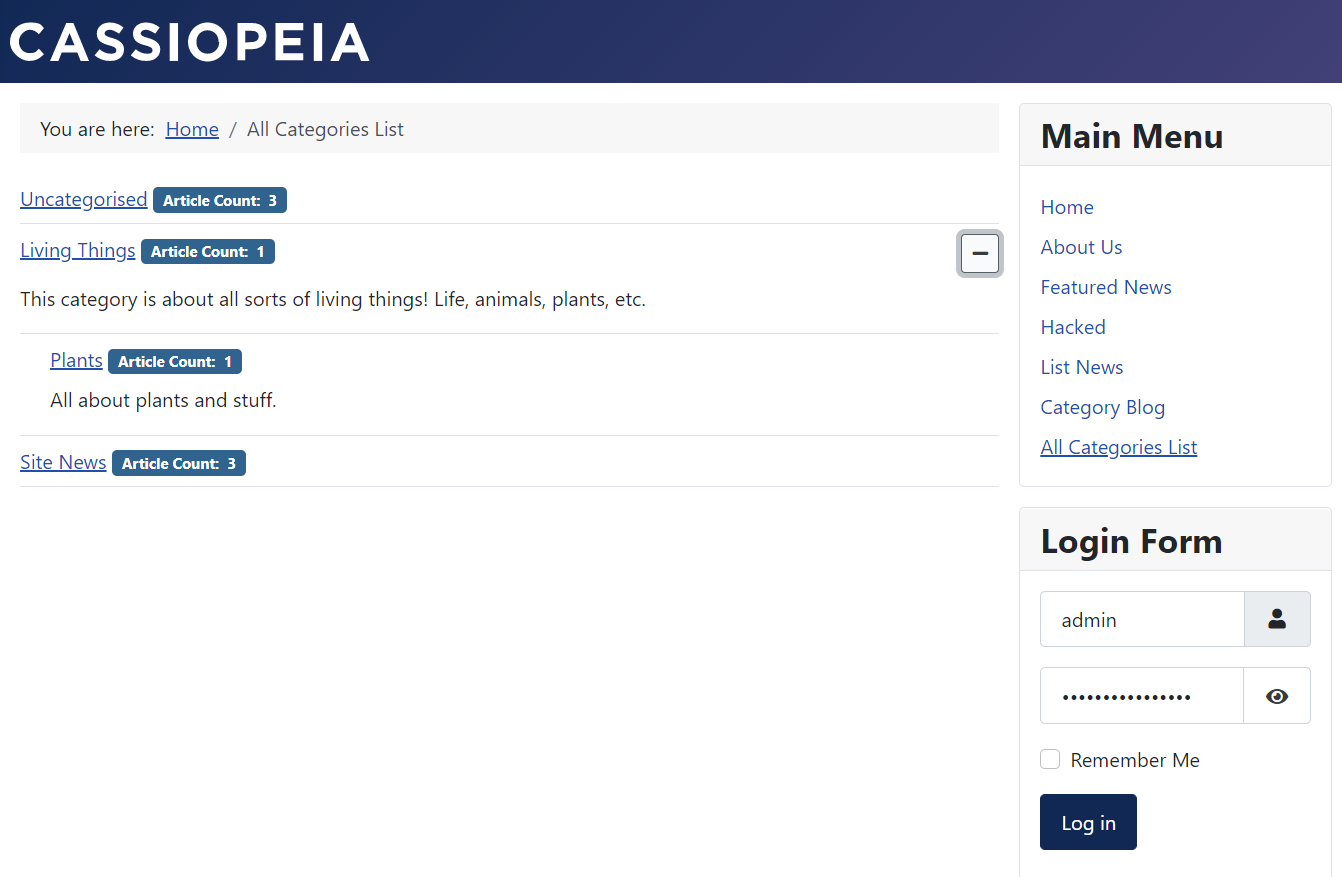
All Categories List
The All Categories List will display a list of all the categories (and subcategories) in a particular category. In this example, I have configured it to display every category on the website by setting the top level to Root.
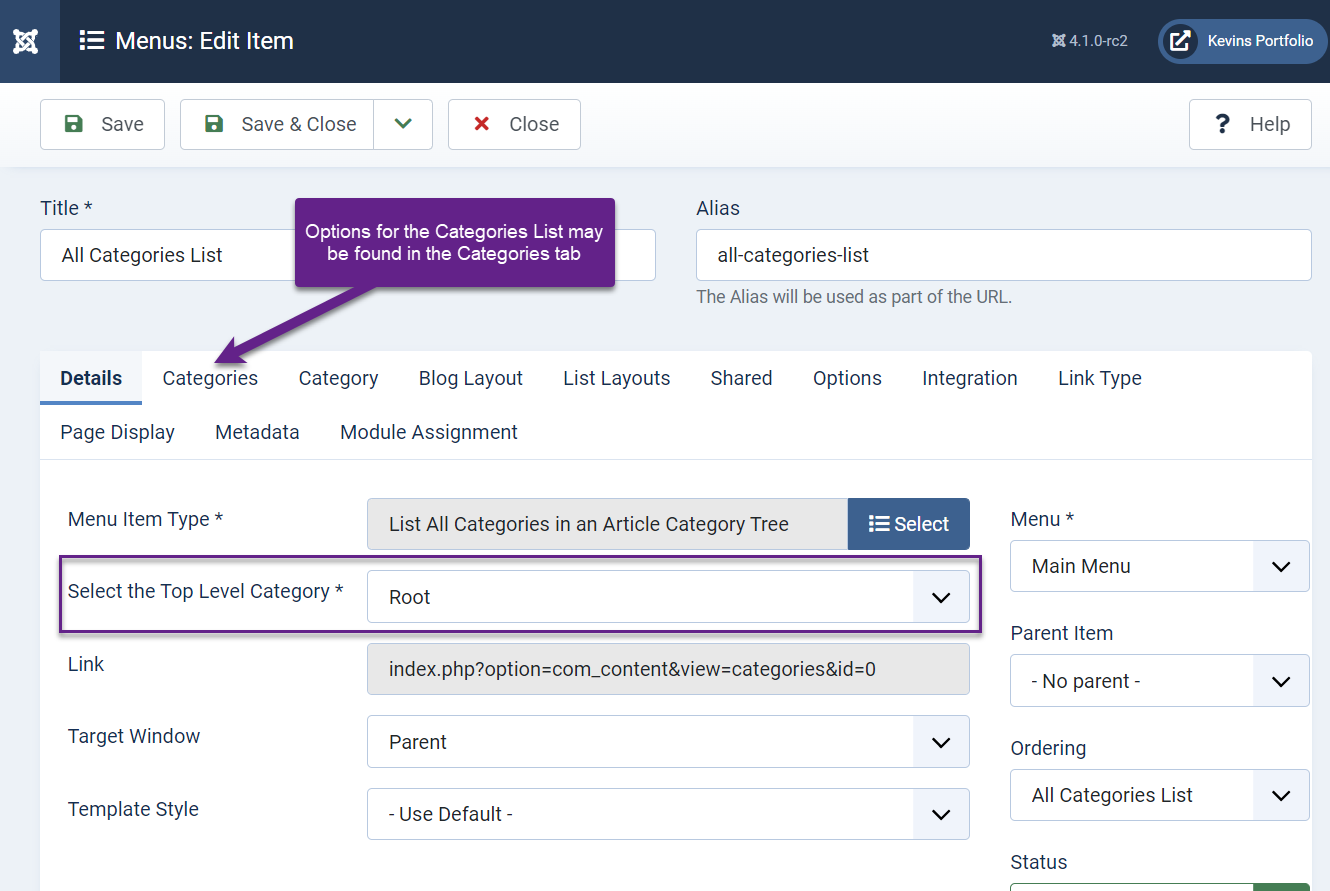
Note that a new tab we haven’t seen yet, “Categories” appears. This is for the Categories list and allows us to configure how many sublevels of categories are displayed, what article info is shown, and whether to show category descriptions.
Conclusion
This concludes chapter 5 on Categories in Joomla. In the next chapter, we’ll discuss how menus and navigation links work in greater detail.
If you are more interested in sorting your articles with tags, check out the guide on article tags.
Assignment
Instructions: Create new categories in a logical manner to store your website’s articles, then place any articles you’ve created into the relevant categories. Use subcategories if you need to. Create links to the top level categories in the main menu using the menu item type you think best fits the content.
