In this chapter, you will learn how to install a local test server on your computer (XAMPP), download and install Joomla 5, and do some basic setup/configuration. We’ll also talk briefly about some Global Configuration settings. If you’re installing Joomla without XAMPP on some other type of server/host, skip the XAMPP part.
Install & Setup XAMPP
XAMPP stands for cross-platform (X) Apache, MySQL, PHP, and Perl. It’s a self-contained local test server environment with all the software needed to get up and running. Apache is the web server, MySQL is the database, and PHP and Perl are coding languages commonly used by web servers (we only need the PHP part for J4).
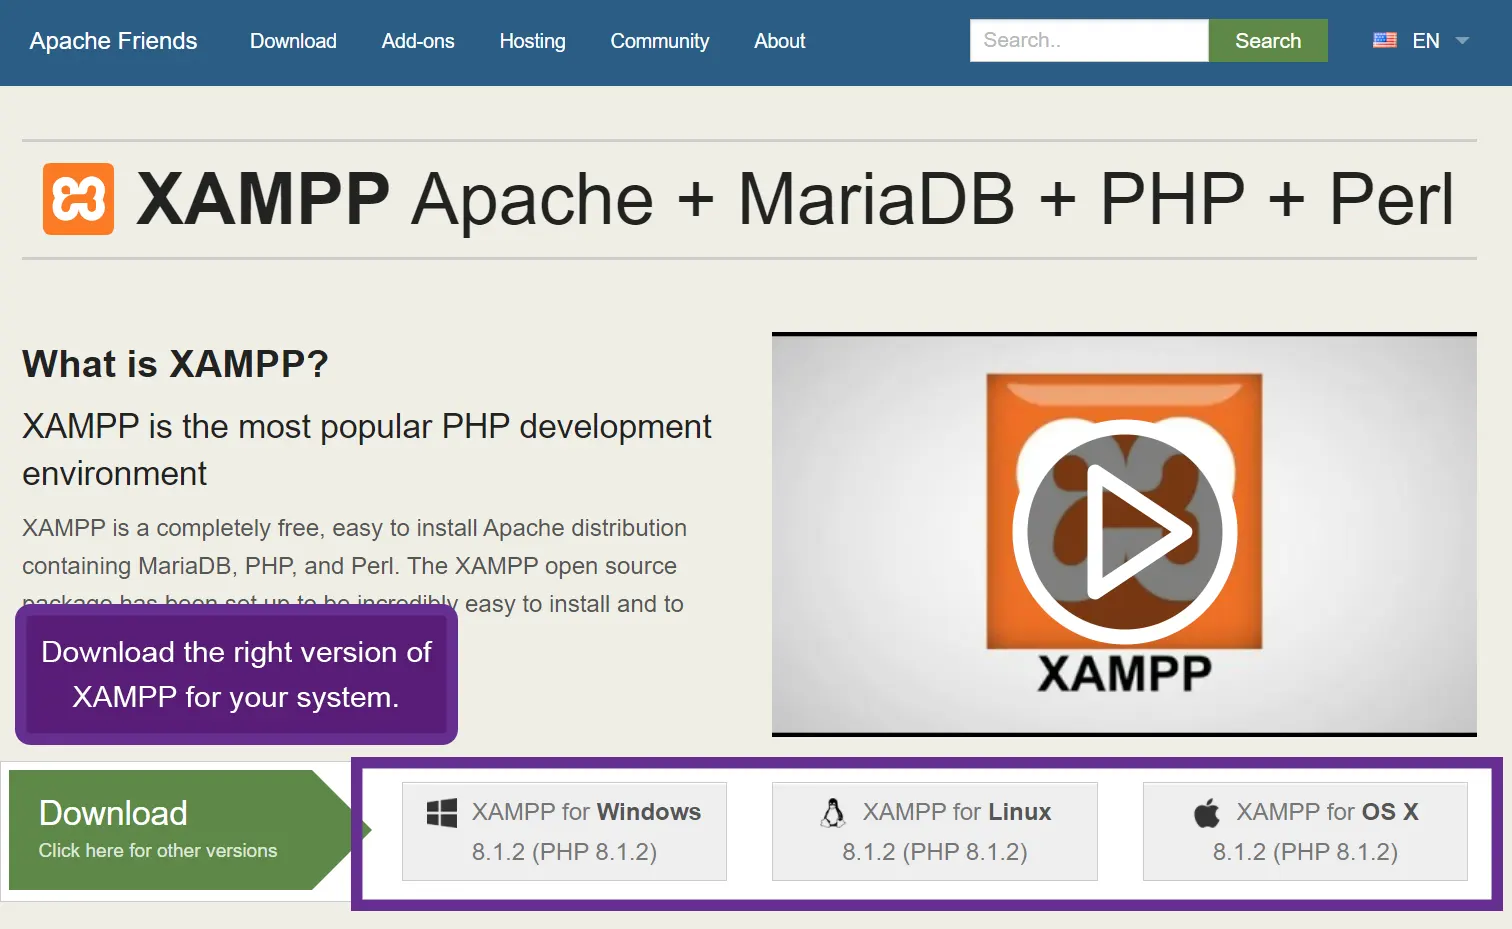
XAMPP is free and works on Linux, Windows, and Mac (cross-platform). I’m using Windows, so I’ll be downloading the Windows copy of XAMPP. You can find the installers on XAMPP’s website at https://apachefriends.org.
I would encourage you to examine XAMPP now. It’s a very popular tool. If you’re looking for something a little different, and you use Windows, check out my other guide on Installing Joomla with Laragon. Laragon contains a similar suite of software to XAMPP, including Apache and MySQL, but with some key differences (discussed in that article). If you don’t really have a preference, just go with XAMPP.
Installation Instructions (Windows)
You can navigate through the steps below using the arrow buttons on the side of the image. Install XAMPP according to the default configuration.
The first step is to download the right copy of XAMPP from ApacheFriends website here.
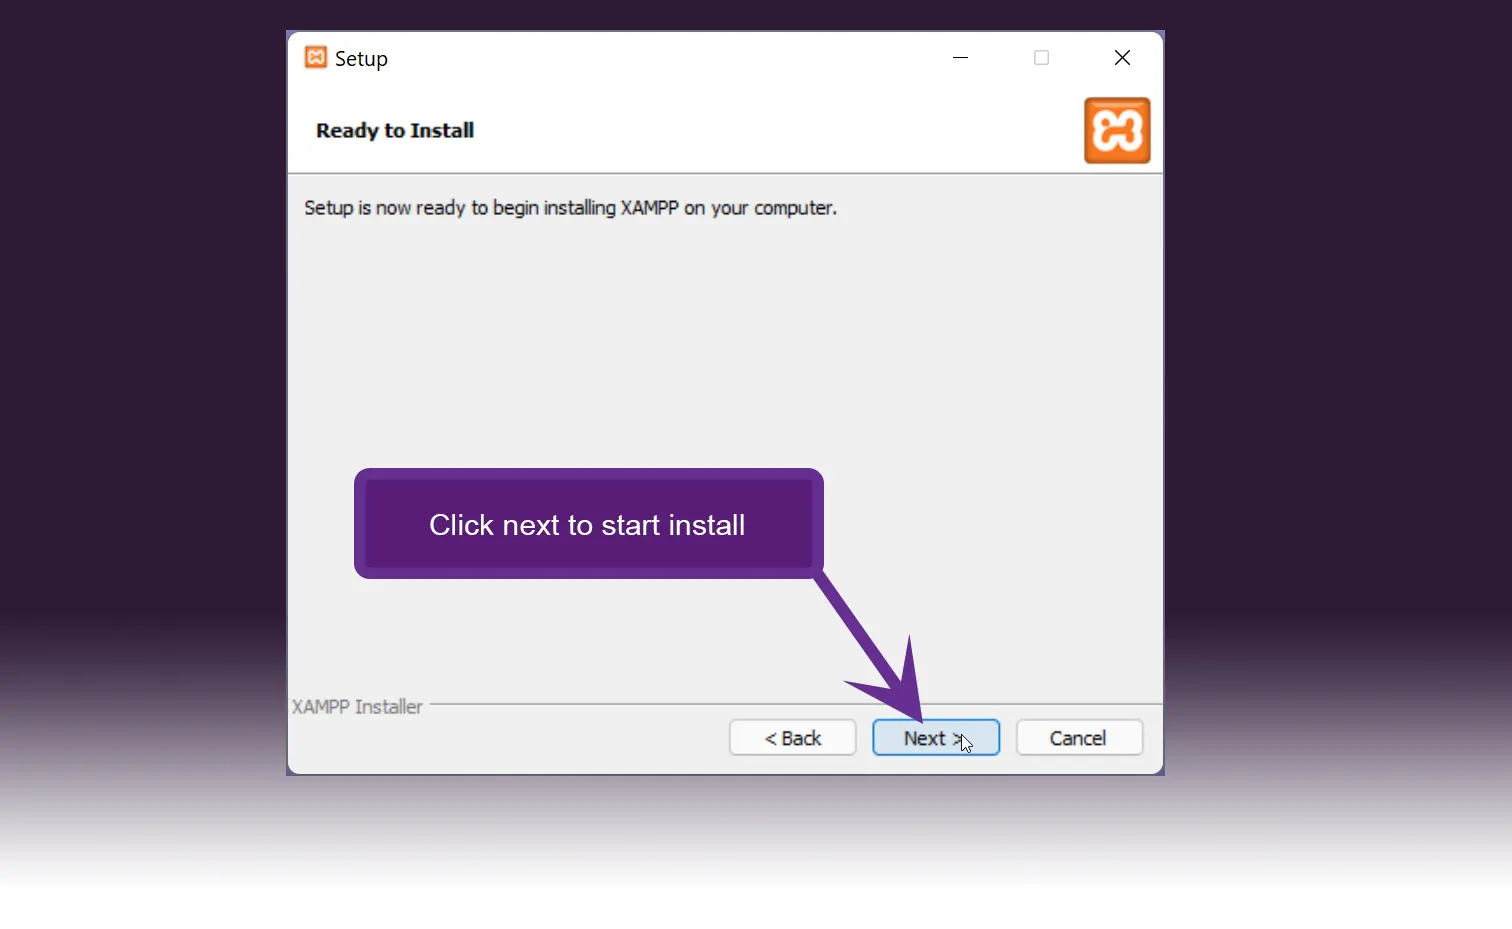
Launch the installer and click next. Might be slightly different on Mac or Linux.

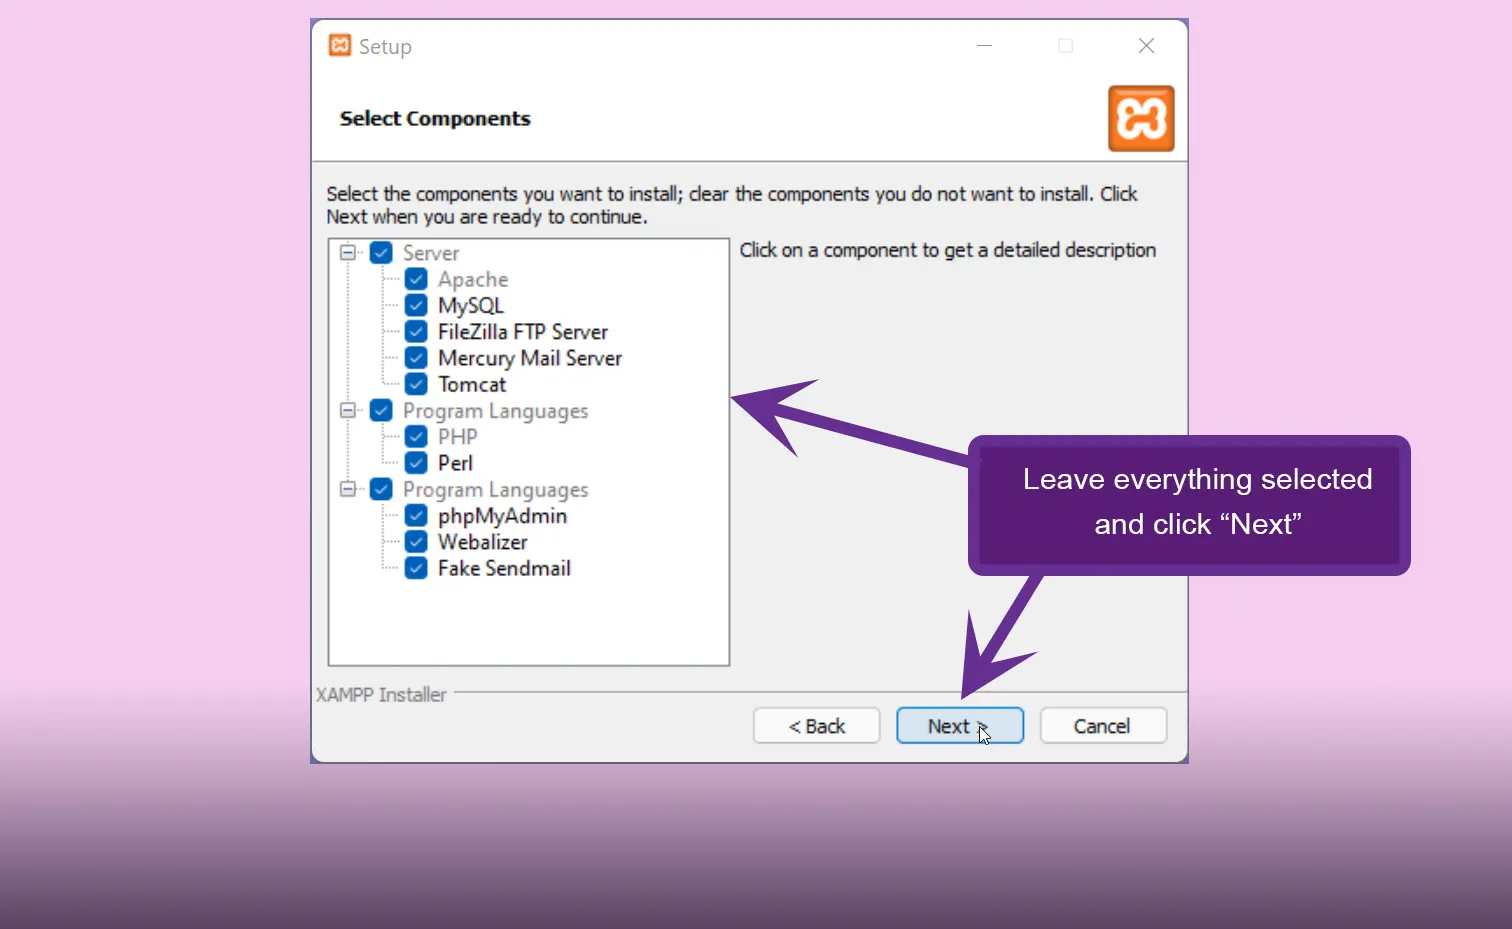
We’re not going to use all this, but for simplicity’s sake, leave everything selected & click next.
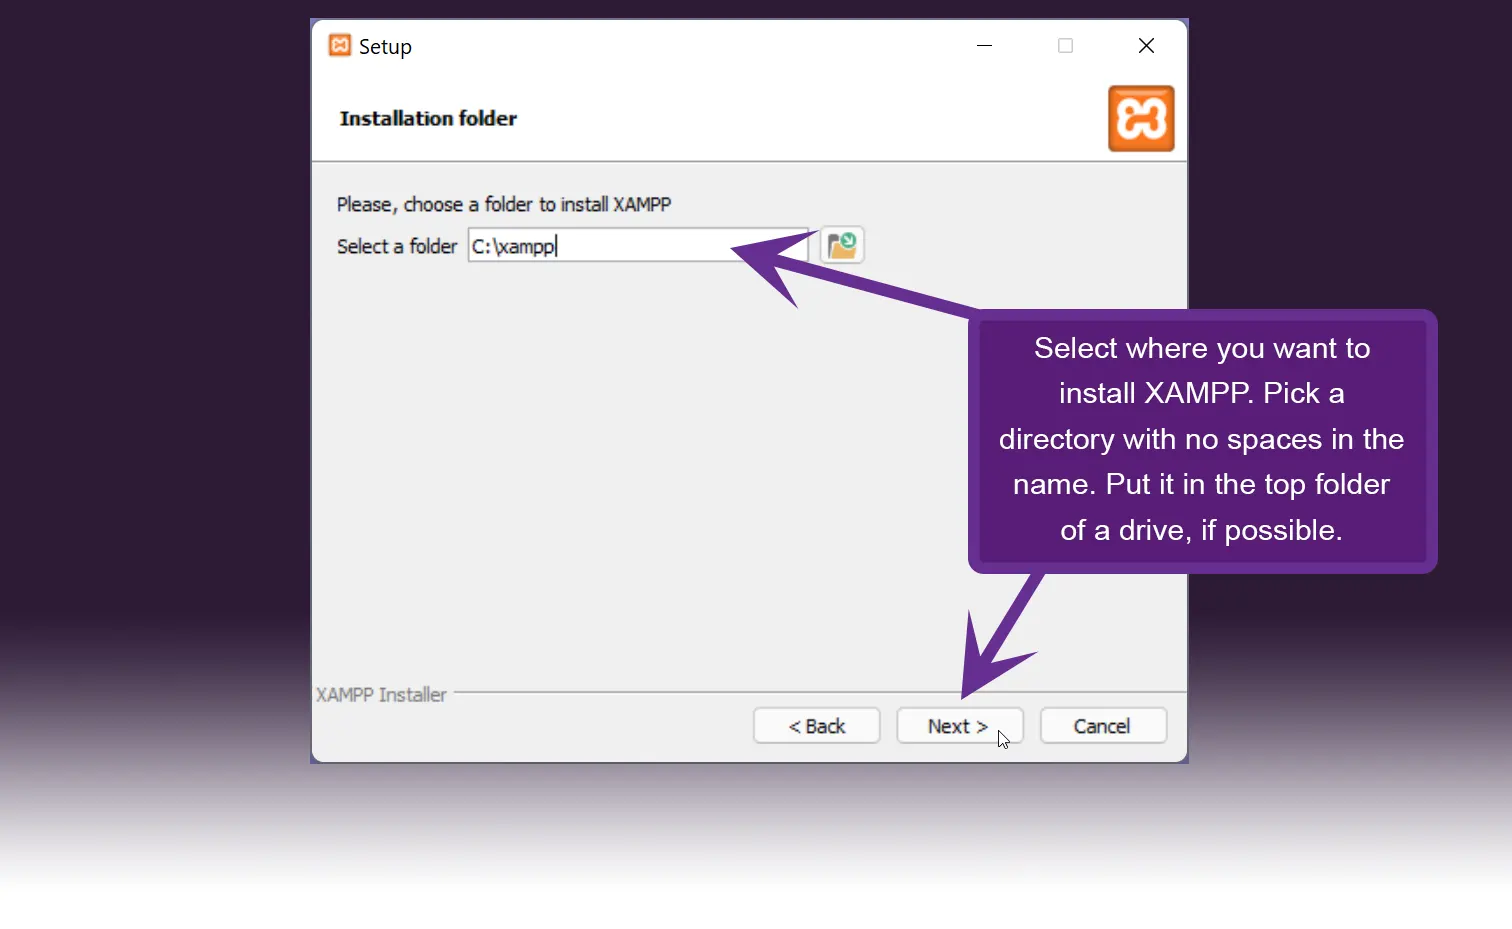
Select where you would like to install XAMPP. Select a directory in the top folder of a drive if possible, this will make things easier down the road. Do not put xampp in a directory with spaces in the name such as “my folder” or “Program Files” – this will complicate things later. Remember where you installed XAMPP.
Select the language you use, probably English, and click Next.

Bitnami is a tool to make it easy to install CMSes. We’re not going to be using it.
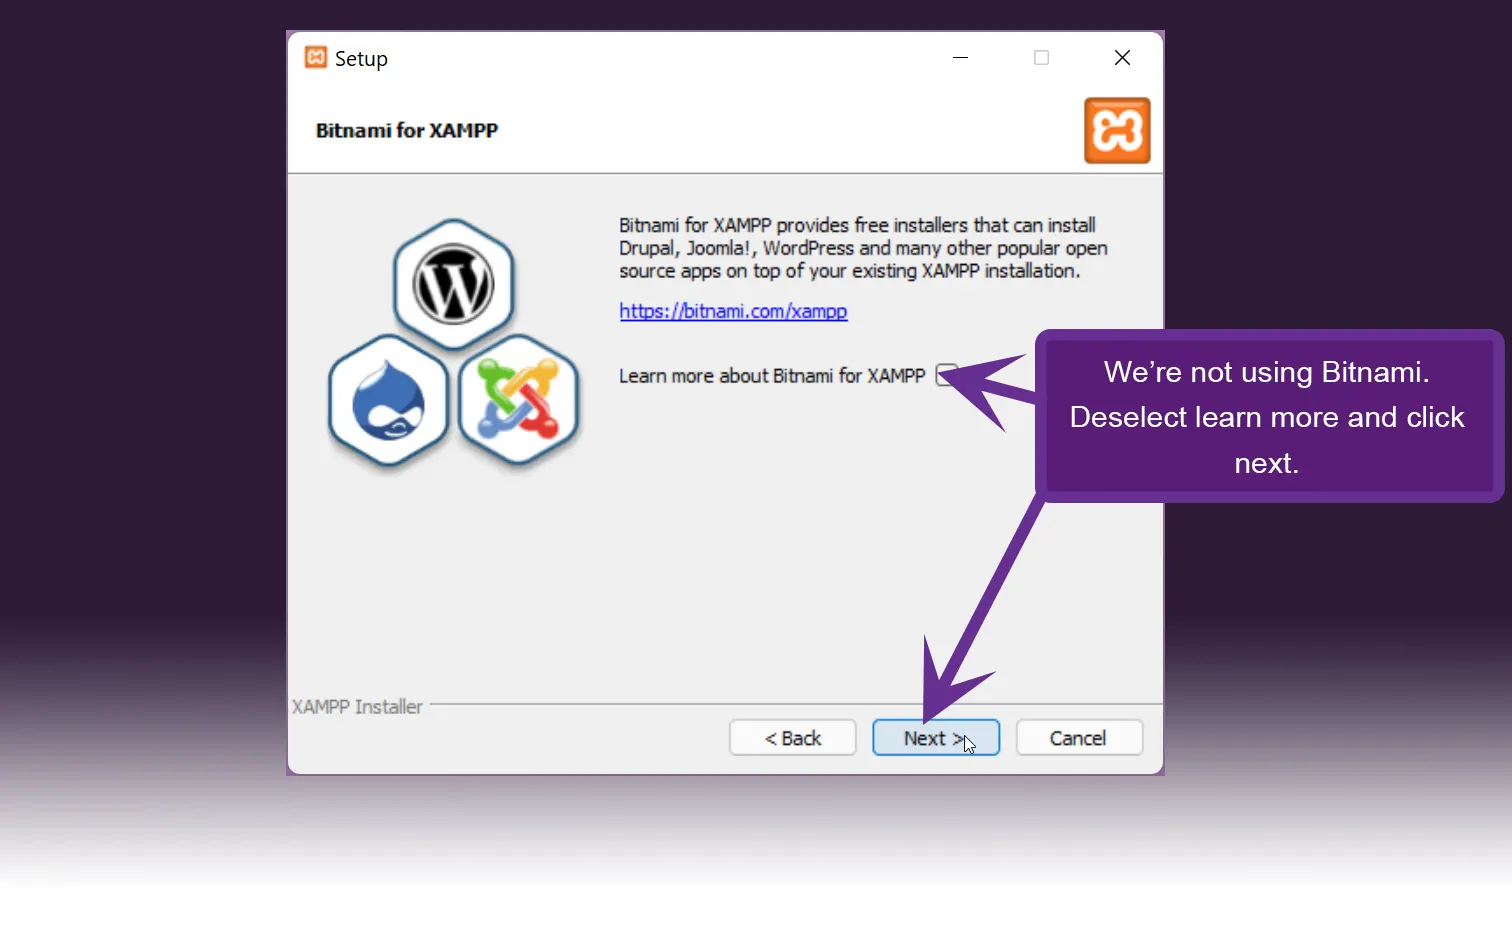
Click next…
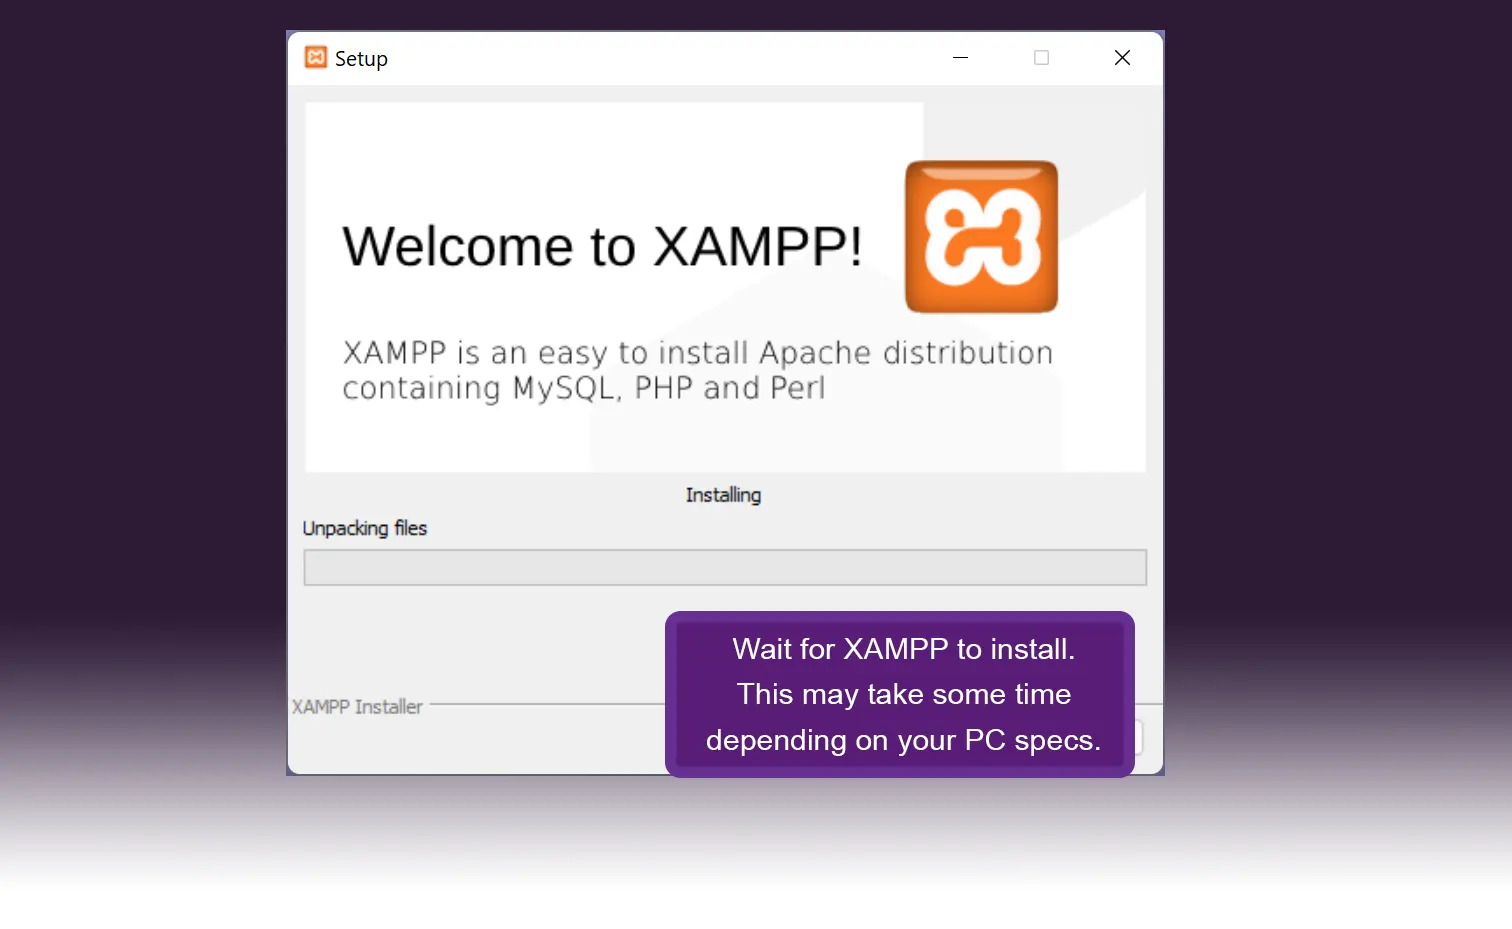
Wait for the installer to finish. This may take a few minutes.
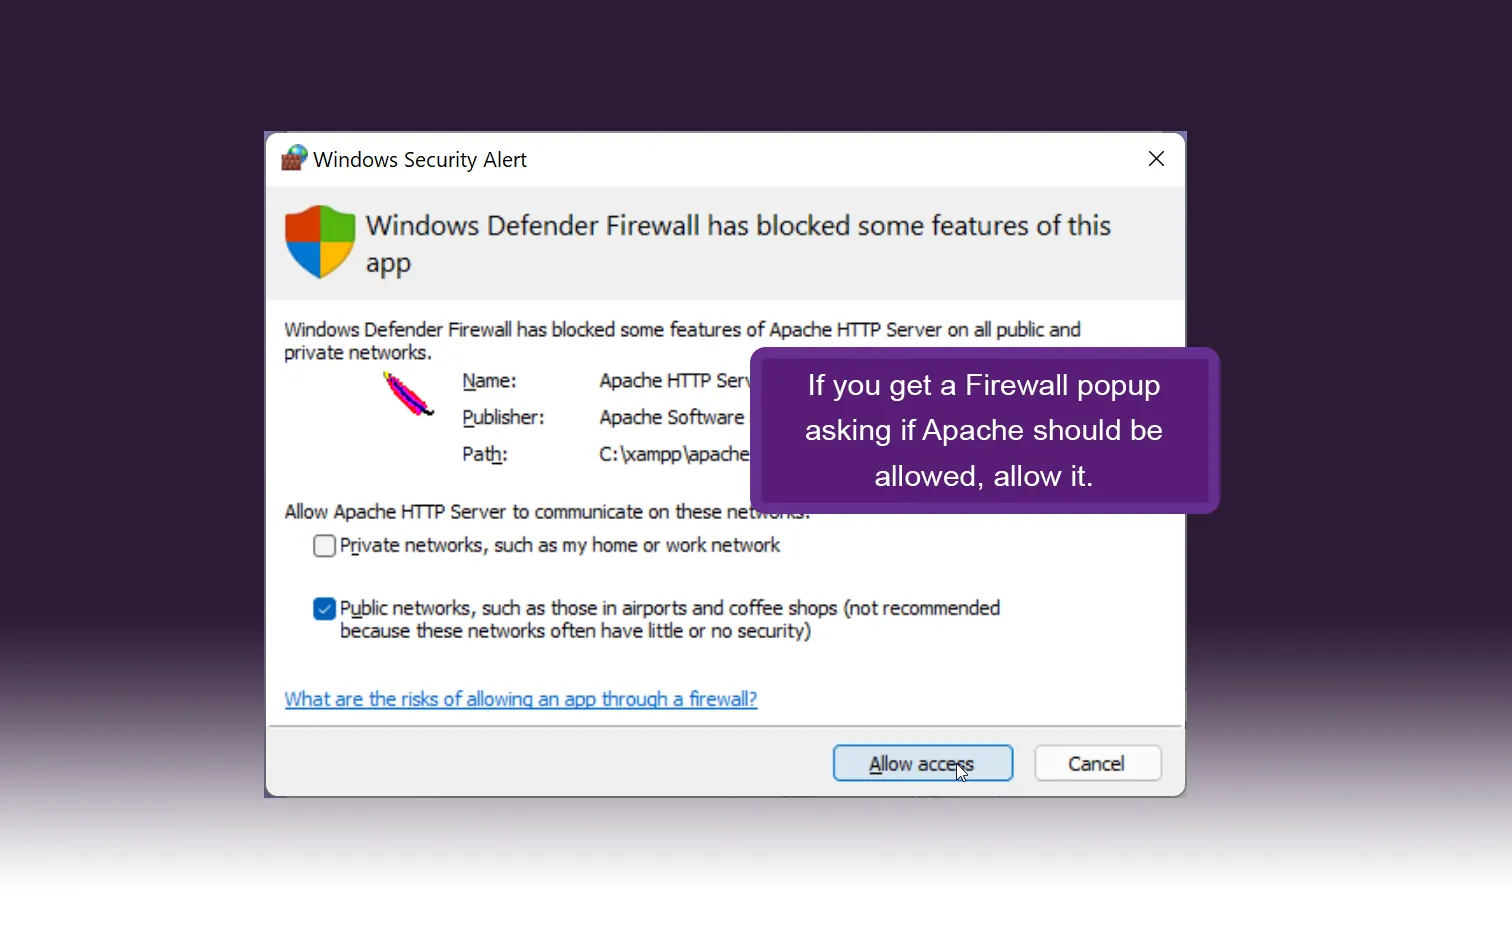
Allow XAMPP through your firewall if prompted.
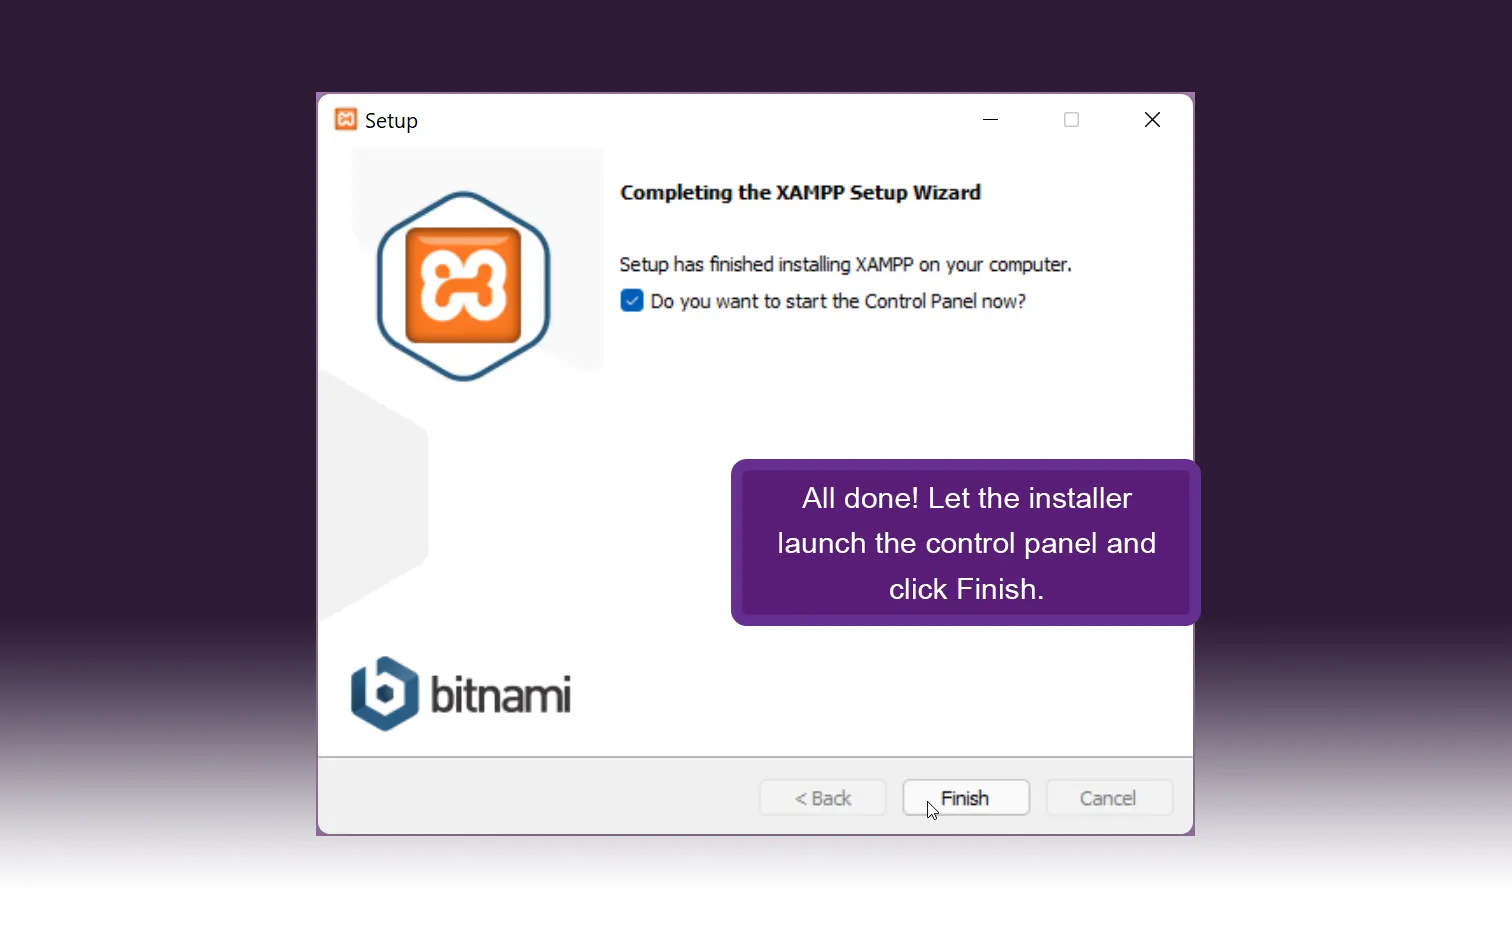
All done! Click finish and launch the control panel. Next steps below.
Checking Out XAMPP
Now that it’s installed, you should be looking at the XAMPP control panel shown here. If you do not have it open, you can get to it from the start menu. If it’s already running, you may be able to launch it by right-clicking the XAMPP icon (Orange X) in your system tray.
Note: If you’re using XAMPP on Linux or Mac, your management screen will look pretty different. It should still have Apache, MySQL, and an FTP server.

XAMPP modules may be installed as services, meaning they run automatically each time you turn on your computer. If you plan on doing a lot of development, it may make sense to enable Apache and MySQL as services. This is what I do. If your computer has limited resources, or you don’t plan on working on your website on a regular basis, you might be better off manually starting Apache and MySQL each time.
Install Apache & MySQL As Services (OPTIONAL)
If you’d like to install Apache and MySQL as modules, you can do so by quitting XAMPP entirely and relaunching the program as an Administrator (Right-click in the start menu, and select Run As Administrator).
Again, only do this if you want these programs to run every time you log in to your computer. This will use some extra CPU and RAM. Personally, I leave them installed as services because I do a lot of testing and my computer has tons of resources to spare, so I don’t mind these running even when I’m not developing.

You should now be able to check which modules you want to install as services. Check Apache and MySQL.
Start Apache & MySQL
Next, start Apache and MySQL by clicking the start button (if they’re not already running). You may have to allow administrator privileges to run them. The module names should have a green background that shows they’re running. If you’ve gotten to this point, congratulations, you’ve successfully set up your first web server. There is no need to run any of the other modules at this time.
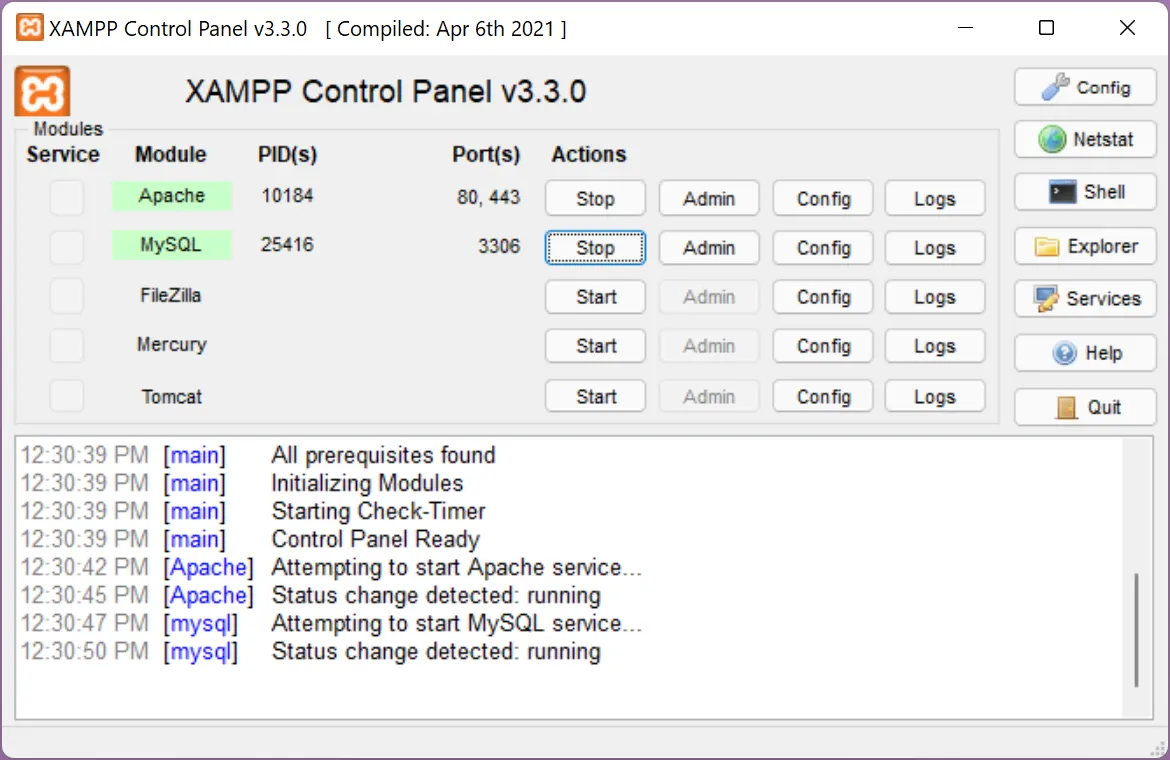
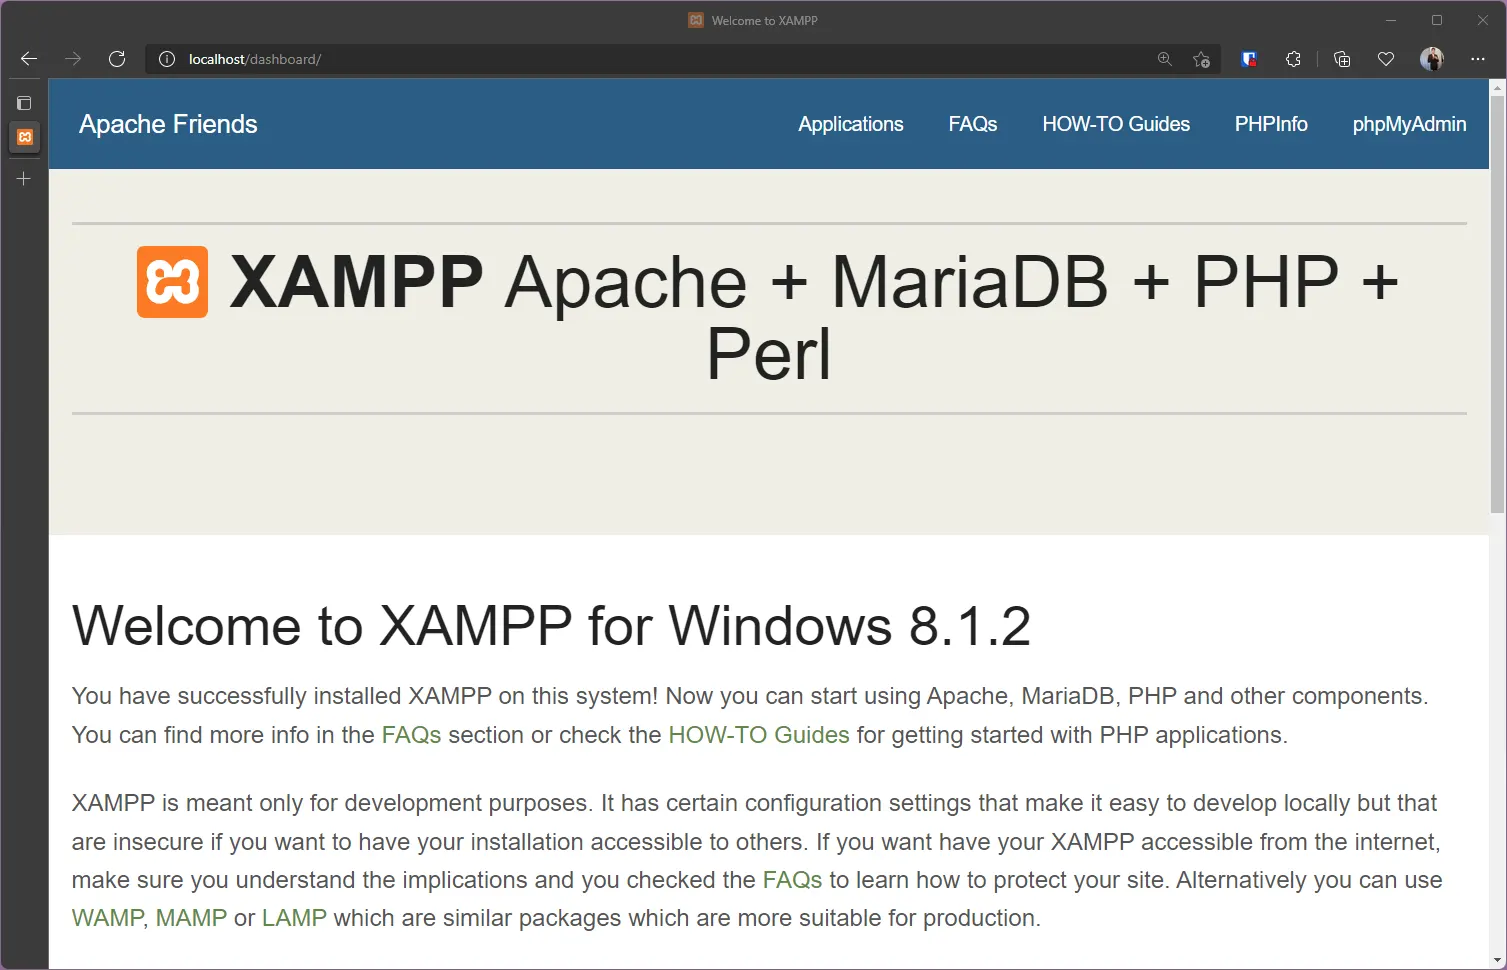
Finally, you can navigate to your local server’s website by typing localhost in your browser of choice on your computer. Note that this server is only accessible from your PC. If you try typing localhost on a different device, it won’t take you to the same place. Localhost just means go to the PC you’re currently on, the “local” host.
You should see the XAMPP welcome screen.
What you are viewing is the local test site created by XAMPP. By default, XAMPP loads it with some general documentation. If you are seeing this page, it means you did everything right up to this point. You’re now done setting up XAMPP and can proceed to install Joomla.
Install Joomla
Next we will be installing Joomla to our local test server. The first step is to download Joomla 5 from the official download site.
Be sure to download the full package, not the upgrade package. You may notice that it says “English (UK).” By default, Joomla is in UK English, as most of Joomla’s core development team comes from Europe. If you’re in the USA like me, don’t worry, we can change it to US English later. The UK version is fine for starting.
Step 1: Extract Joomla
Once downloaded, we want to extract the contents of the zip file to a location where we’ll install Joomla. By default, our web server’s root or primary directory is the htdocs folder wherever you installed XAMPP.
I installed XAMPP in my D:\xampp folder, so my htdocs directory is at D:\xampp\htdocs in Windows. Remember where you installed XAMPP. Your directory might be different from mine. If you used the Windows defaults, it’s in the C drive, not the D drive.
If you navigate to this folder, you will notice there are already quite a few files here. These are all files related to the XAMPP demo site we visited at http://localhost. We want to replace this with our installation of Joomla, so localhost takes us to Joomla instead of XAMPP’s demo site.
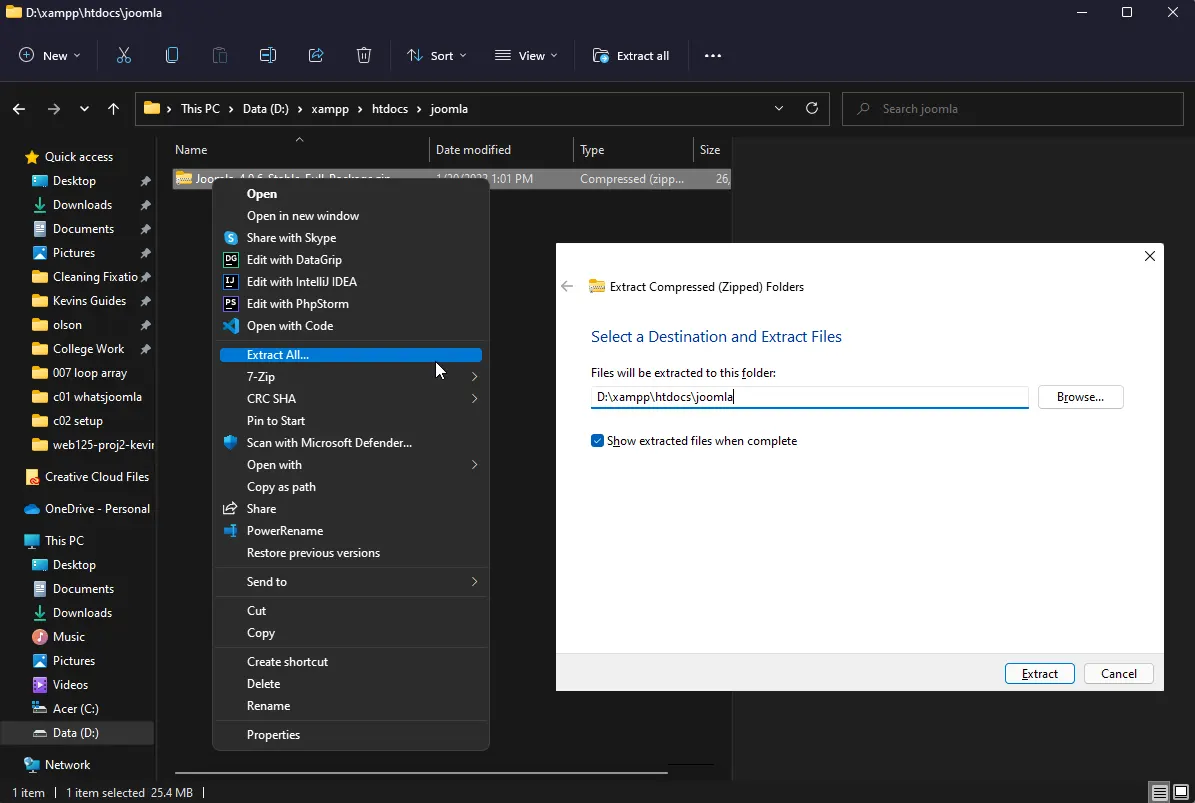
You could delete all these files and replace them with Joomla, but a better option might be to create a subdirectory in the htdocs folder for our Joomla install. We can change a setting in Apache to point to Joomla instead of the XAMPP dashboard/demo site. This way, if we want to get back to the XAMPP dashboard again at a later date, the files are still there.
Create a new folder in your htdocs directory called joomla. Mine looks like this D:\xampp\htdocs\joomla
Copy or move the Joomla zip file to the joomla folder you just created. Then right click and select “Extract All” (in Windows), or use your favorite archive extractor. You want to extract all the files to this directory, not a separate “joomla/Joomla_x” folder. My window is pictured in the screenshot.
My folder looks like this when everything’s extracted. This may take some time depending on your system, there are several thousand files in Joomla.
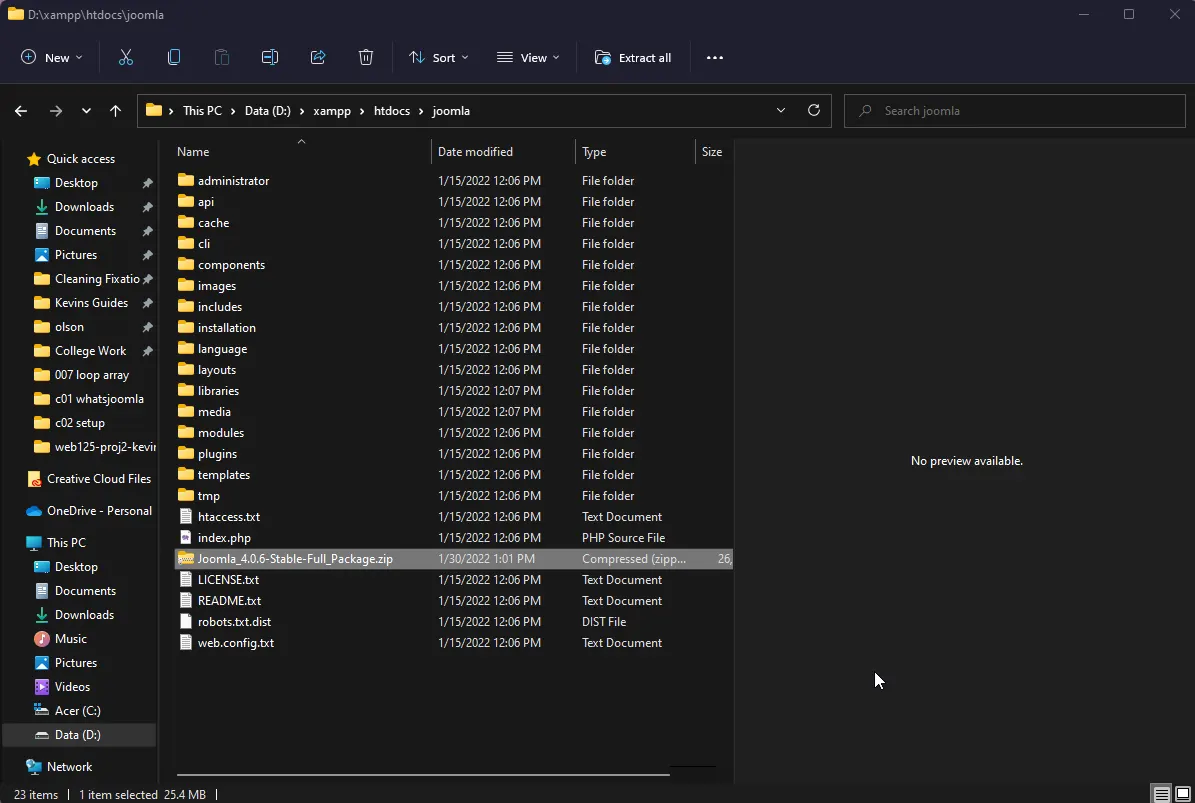
If you accidentally extracted the files to the wrong folder, you can manually move them into the htdocs/joomla folder. Once you are done extracting everything, you may delete the zip file.
Step 1b: Change Apache’s Root Directory (OPTIONAL)
Now that we have Joomla’s files extracted, we want to have localhost direct us there, not to the XAMPP dashboard. We could use Joomla by going to localhost/joomla. Alternatively, we can tell Apache to make htdocs/joomla the root directory instead of just the htdocs folder. Note that this is optional. If you plan on running multiple installations of Joomla for testing purposes, you might be better off leaving the document root as the htdocs folder.
If you want to change it from htdocs to htdocs/joomla, we will need to make a simple edit to an Apache configuration file.
Go to the XAMPP control panel and select the “Config” button next to Apache. Open the “httpd.conf” file.
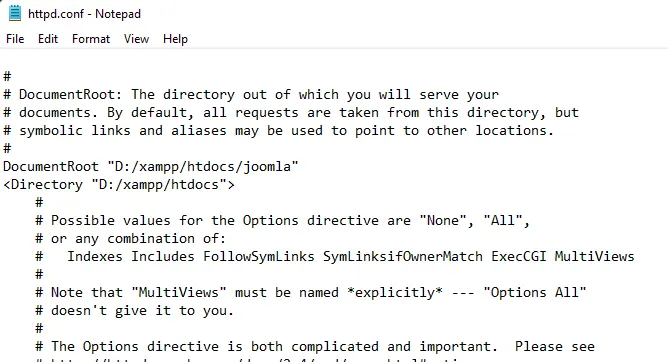
This will open notepad. We want to change a single setting, the one that sets xampp/htdocs as the root directory to xampp/htdocs/joomla.
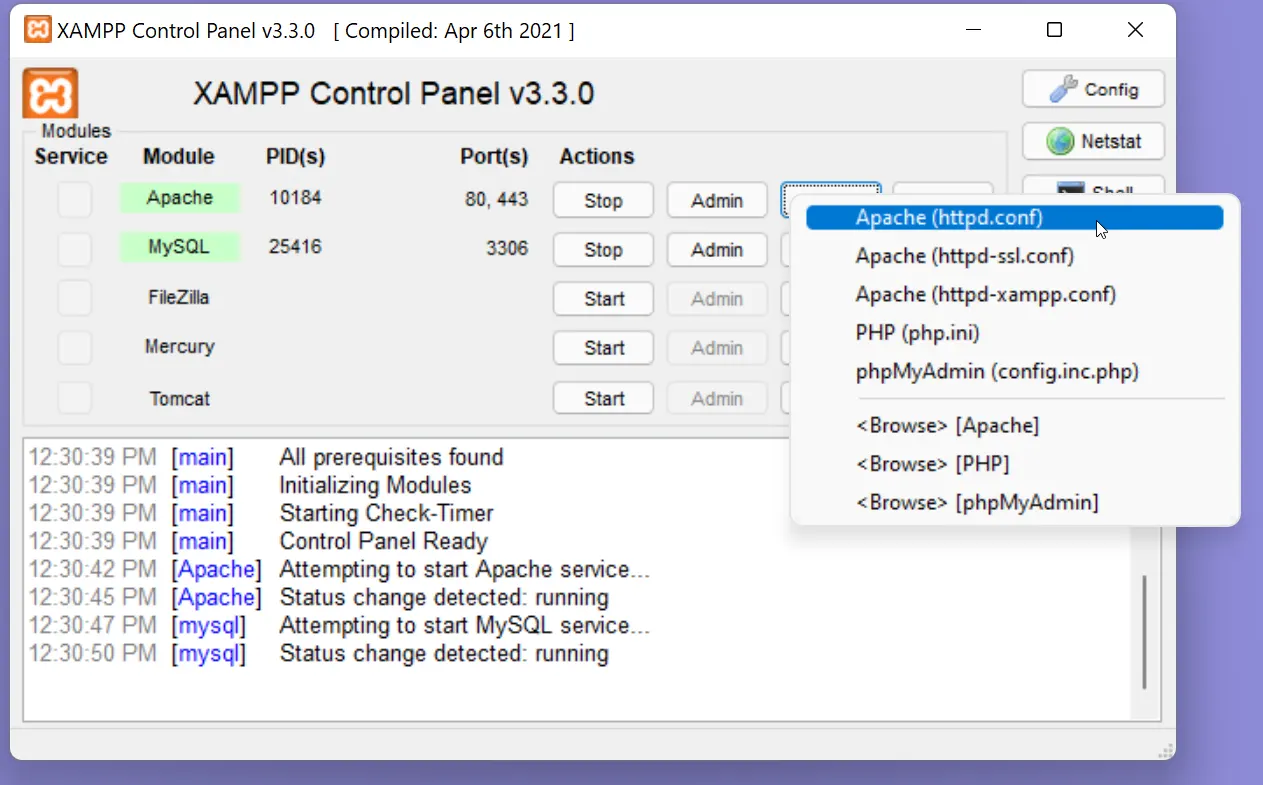
I find the easiest way to get to this setting is to use notepad’s search feature (Ctrl+F) and type “DocumentRoot” – this is the setting we are looking for. Specifically, it’s on line 252, or a little less than half way down the text file.
Change DocumentRoot “D:/xampp/htdocs to DocumentRoot “D:/xampp/htdocs/joomla”
Save the document (Ctrl+S) or File-Save and close the file.
For the change to take effect, Apache needs to be restarted. From the XAMPP Control Panel, stop Apache by clicking the “stop” button next to it and restart it by clicking “start” again after it’s stopped. You can leave MySQL running, as we haven’t changed any MySQL settings.

Step 2: Joomla Installer
If you followed all the above steps correctly, you should now be able to navigate to “localhost” in your web browser and the Joomla installer should appear. If you skipped the above section where we changed the root directory, you can get to the installer by visiting “localhost/your_subdirectory_name” in the browser.
The first page asks you to select a language and give your website a name. I’ve chosen to call mine “Kevin’s Portfolio” for demonstration purposes. You may name it whatever you’d like. Click the button to go to the next page when you are done here.

Setup Login Data
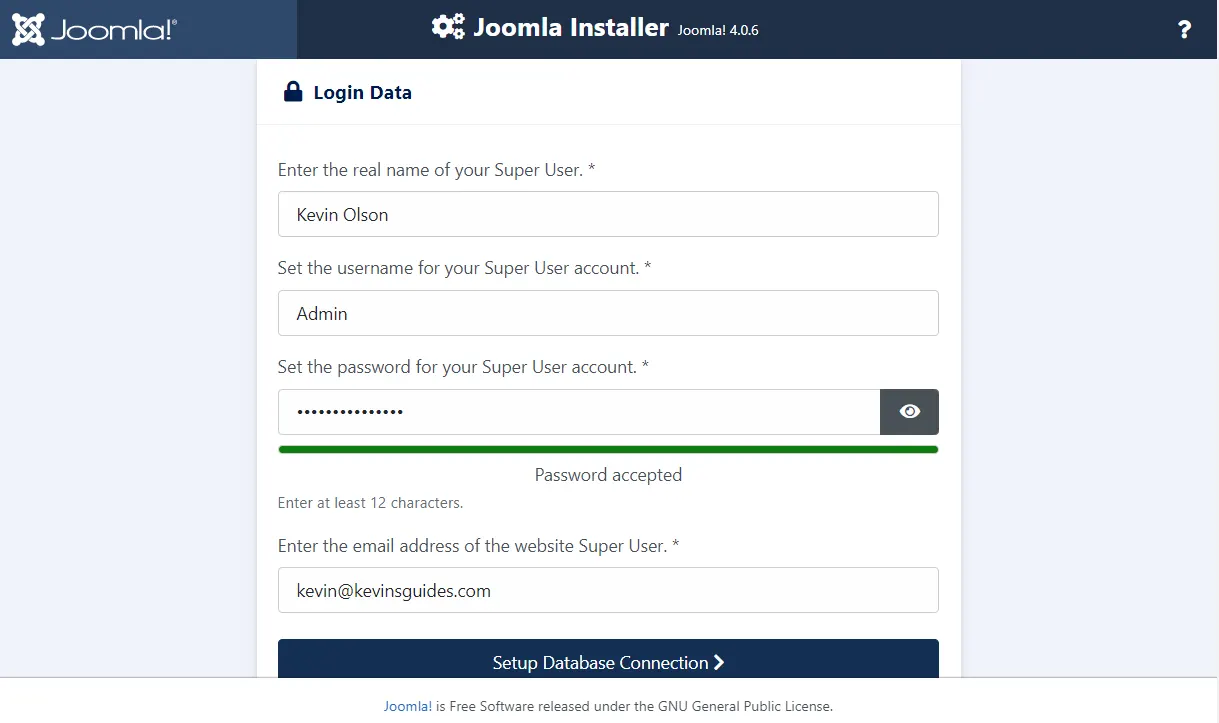
Next, we are asked to set up our super user account. This will be the highest-ranking user in the system. They have total control over all aspects of the website. Fill out this information. For demo purposes, I just make a very basic password like “adminadminadmin” or “letmeinplease.” If you’re installing Joomla on an actual web server, you’ll want to use stronger passwords. I use basic passwords I won’t forget for testing, so I don’t have to worry about resetting them. Since I don’t have an email server set up on my local test machine, resetting the password would be difficult if I forgot it.
Step 3: Setup Database
By default, Joomla chooses MySQLi as the database type. This is the type we’ll be using (and most hosts use).
Since we’re running the database on our local test server, we can leave the default address to the host server as “localhost”
If we were running Joomla on a paid host, they would provide the MySQL hostname for you, and you would have to configure a new database and MySQL user to access the database.
Since we’re using XAMPP, the default MySQL username is “root” and there is no password. This would be a huge security risk on a live production server.
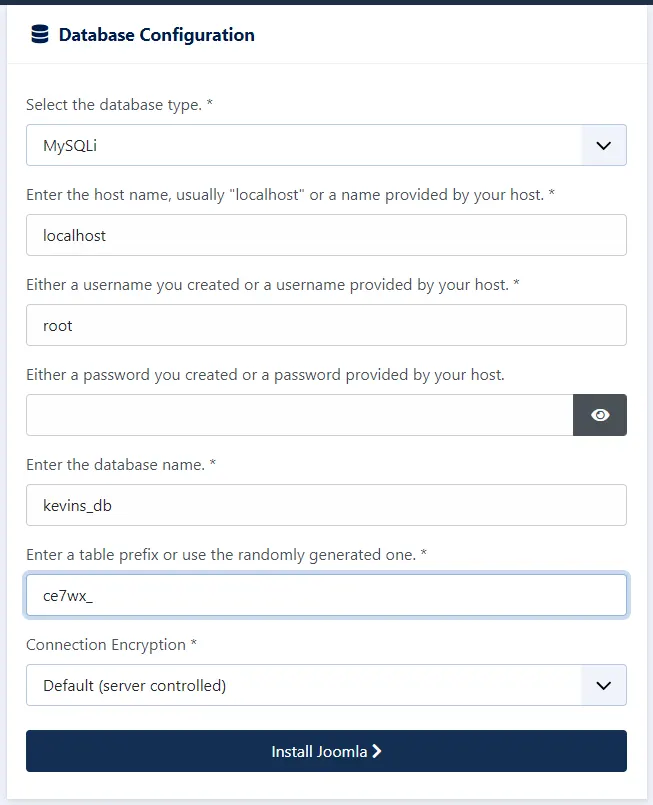
In a production setting, you need to manually create a new database on your web host’s MySQL administration page. Since we have root permissions with XAMPP’s install of MySQL, we do not need to manually create a database. Whatever database name we enter will automatically be created for our Joomla installation. You may name it whatever you’d like but don’t use spaces.
MySQL databases contain various tables of information, much like an Excel spreadsheet. The table prefix is appended to the name of every table used by Joomla in this database. If you were using the same database for multiple installations of Joomla (or other systems), you would want to use different table prefixes for each of them, so information doesn’t get mixed up between different systems. You may manually assign a table prefix or leave it with the random default.
Leave the encryption setting on default. We don’t need to worry about that.
Click Install Joomla when done. This will set up the database.
Step 4: Finish Installation
If everything goes according to plan, you will see a congratulations page. This means the database connection has been established and the tables have been set up. If you run into any problems, retrace your steps and try again. Make sure MySQL is turned on in the XAMPP control panel.
You’ll likely notice some warnings Joomla raises about various server settings. These are “recommended” settings for production servers. We can ignore them for now.
You can click the “Open Site” button to see your site’s front end, or the “Open Administrator” button to get to the website’s admin login page.
If a message comes up saying Joomla couldn’t delete the installation folder, like this one:


This just means you need to manually delete it yourself. The installation folder is in your joomla directory. Mine’s at htdocs/joomla/installation
It’s important that the installation folder is deleted. If this were a live site, and the installation folder was not deleted, anyone could potentially access the installer and mess the site up.
All Done!
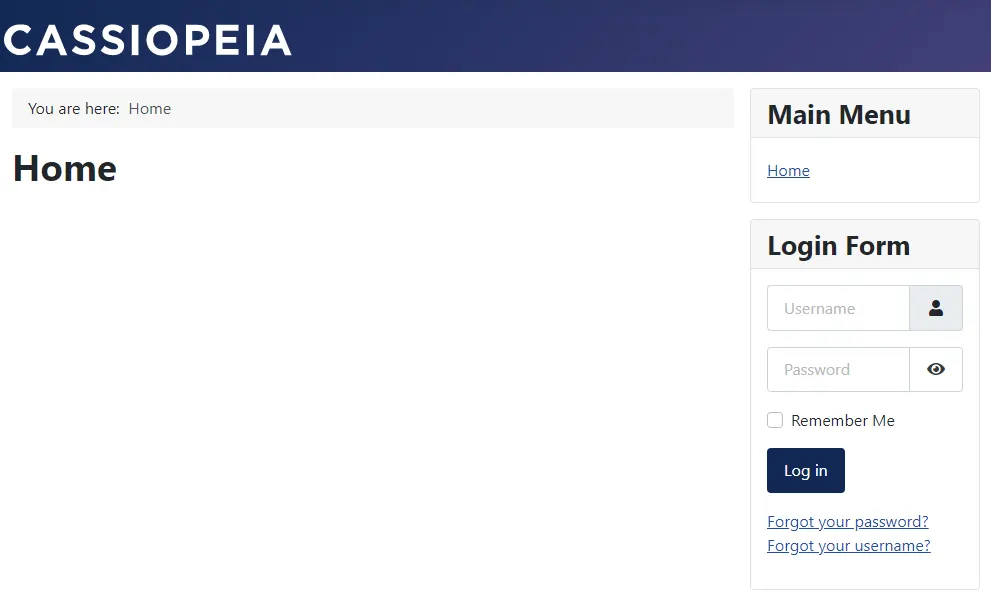
You should now be able to navigate to http://localhost in your browser and see your website. It’s somewhat anticlimactic, but this blank site can be transformed into anything!
Cassiopeia is just the name of the default J4 template. We can change that text later.
Conclusion
This concludes the second chapter in the Intro to J4 Series. In the next chapter, we will learn more about the site’s global configuration and create our first posts and pages.
Assignment
Instructions: Setup Joomla on a local test server using XAMPP or on a paid web host. If you don’t have an idea for a new website, take some time to come up with one now. It could be a portfolio, it could be an informational website, it could be a personal blog. Pick any topic that interests you, or a topic that applies to your field of work.
