In this guide, you will explore the Media Manager in Joomla. You’ll learn about best practices, the best ways to organize your files, and how to insert media into your articles.
In the scope of Joomla, media refers to any file that’s going to be used as part of the content. Examples of media you might show on your website include images, video, audio, and PDF files.
Media in Joomla is managed using the Media Manager. The media manager provides an interface for managing directories, uploading files, and editing some of their basic properties. It may be accessed from the administration menu under Content → Media.
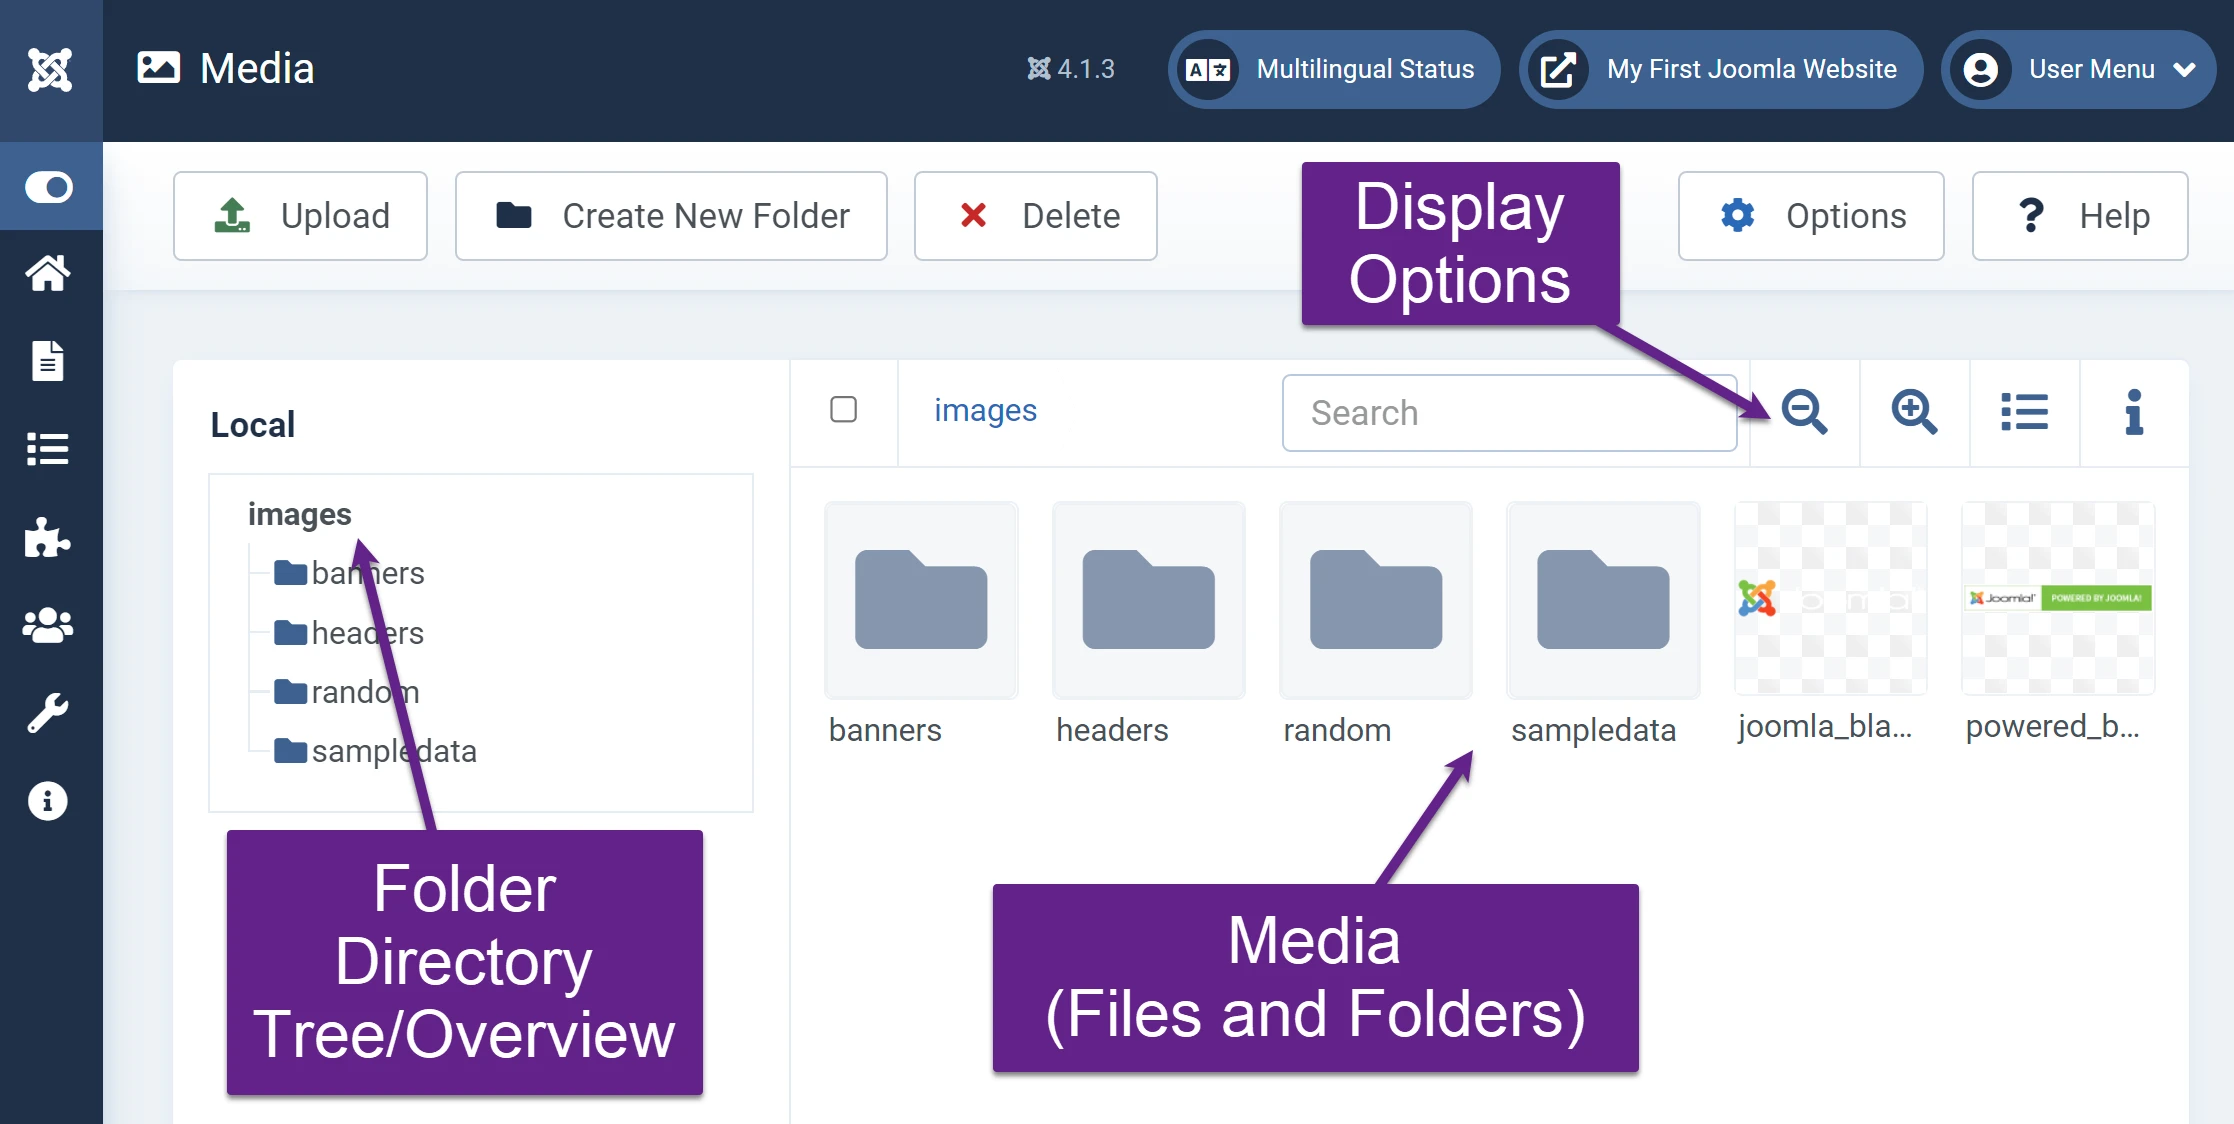
The Media Manager has a pretty straight-forward layout. In the center it displays all the files, along with their thumbnails, for the current folder you’re in. You may double click any file to get a larger preview. To the left, there is a tree-view of the directories. By default, the Media Manager uses the “images” directory under the location you installed Joomla to store media. You may click any folder to open it.
In the topmost toolbar, there are tools to upload new files and create new folders. Any file uploaded or folder created will be added to the folder you’re currently viewing.
In the smaller toolbar, directly above the media, there are some display options. You can increase or decrease the size of the items in the grid, view information about a file by opening the information panel, or change the way the files are displayed (grid or detailed list).
If you’re attempting to access the media manager on a mobile device, I’d advise you to set the display option to list instead of grid. Otherwise it may be difficult to view and modify items.
Basic Operations
Uploading Files
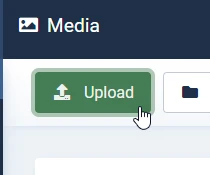
To upload files, first navigate to the folder you would like to place them in. Then, click the Upload button on the toolbar. This will open an upload window where you can select and upload your file.
Alternatively, you can drag and drop the file from your computer to the center area of the media manager. By default, Joomla will allow you to upload most image formats, PDF files, video files, and audio files.
Creating Directories
It’s important to have a well-organized media directory. If you can avoid it, you don’t want a hundred images in a single folder. Devise a way to logically sort your content into different directories. You could structure your directories after the categories and articles on your site, creating a new folder for each category, and a new folder for each article within each category. You could also sort the pictures based on what their purpose is or what they contain (e.g. “Trees” folder has trees, “Dogs” folder has dogs, “Icons” has icons, etc.)
How you decide to structure your directories is ultimately up to you. Having an easy-to-use system in place will make it easier on yourself later, especially if multiple users will end up uploading and using the content stored here in their articles.
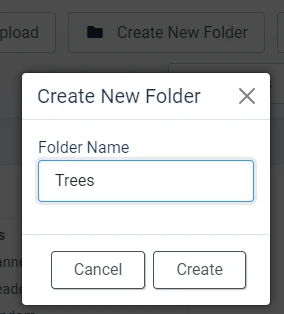
To create a new folder, just click the Create New Folder button, type the name of the folder in the box that appears, and click Create.
Deleting Items
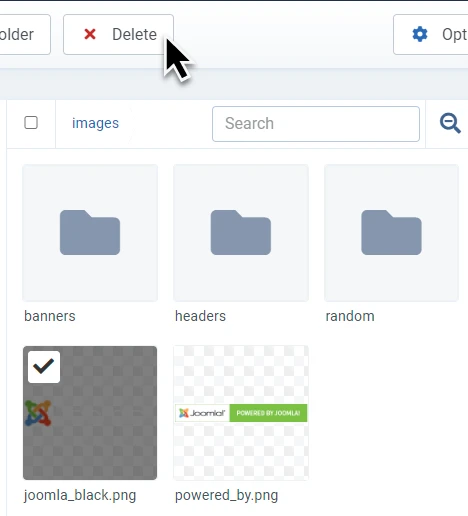
You may delete any file or folder by selecting it using the checkbox in the upper left corner of each item. Once selected, you can click the Delete button in the toolbar.
Alternatively, you may open the options for an individual item (three dots at top right), and then click the red trashcan icon to delete it.
You may delete all the Joomla sample data if you don’t plan on using it.
Renaming Items
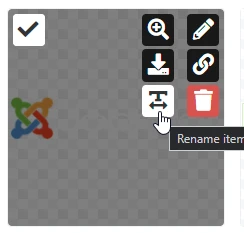
Items may be renamed by opening the item’s options menu (three dots) and selecting the rename option. It looks like a T.
Adding Images to Articles
You may add images to articles from the media manager. The way you do this may be different depending on the WYSIWYG editor you’re using.
TinyMCE
If you’re using Joomla’s default editor, TinyMCE, there are several ways to add images, but only one way to add images using the media manager.
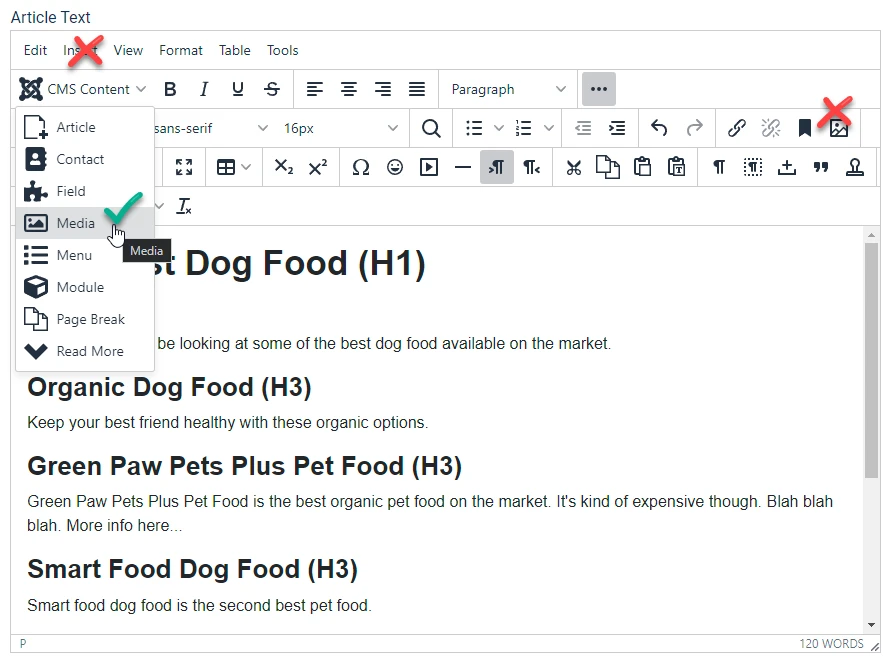
To add images from the media manager in TinyMCE, first place your text cursor where you want the image to appear. Then navigate to the CMS Content dropdown and select the Media option. Do not select the Media/Image options from the Insert menu, or click the little image icon in the toolbar, as these options will not show you the media manager. The other options are for adding an image based on its URL, which is usually more difficult than just selecting it from the media manager.
The media manager will open. Here, you can edit and upload files as you would normally.
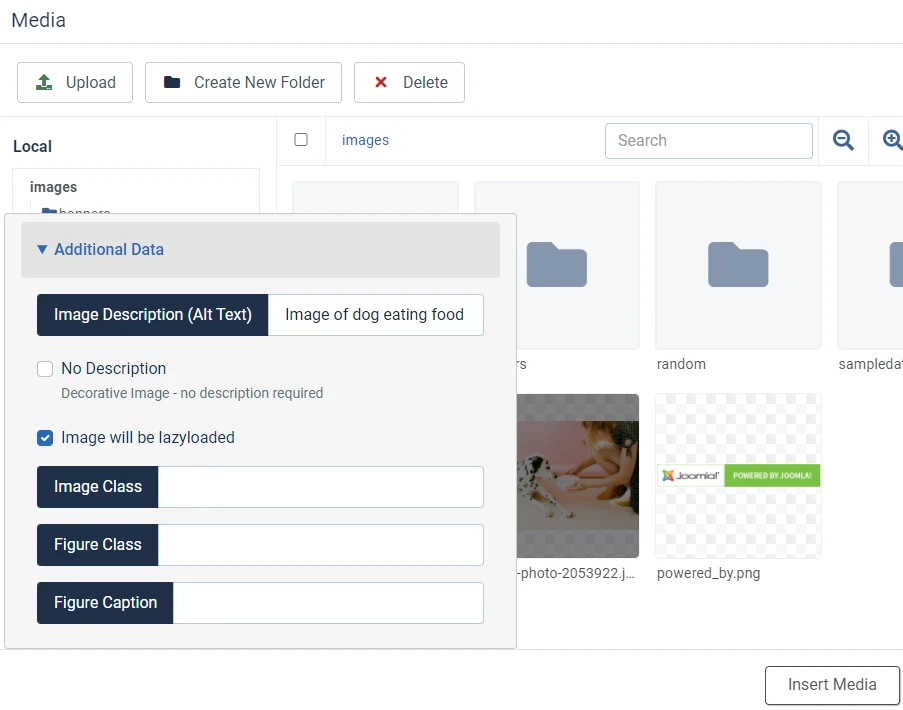
When you select an image, a small Additional Data window will appear with some additional options.
Always write something in the Image Description (Alt Text) box. This is important for search rankings and accessibility reasons. It should be a brief description of what the photo is of, for people who are visually impaired or on very slow internet connections.
Selecting the Image will be lazyloaded checkbox will only load the image on the user’s page if they’re scrolled down to the image, rather than loading it before they get to it. This helps improve page performance and saves on bandwidth. It’s a good practice to leave this checked.
After selecting an image and setting its additional data, click Insert Media to add it to the article.
Once the image is in the article, you can resize it to your liking. Note that resizing the image in TinyMCE does not actually resize the original image, it just constrains it to fit within the new dimensions. This means your full-size image is still downloaded by the user when they view the page, even if it’s only half an inch wide on their screen. To save on space, upload an image that’s the right size to begin with, so you don’t need to resize it in the editor.
For more information on optimizing images for the web, read the guide on performance optimization and security.
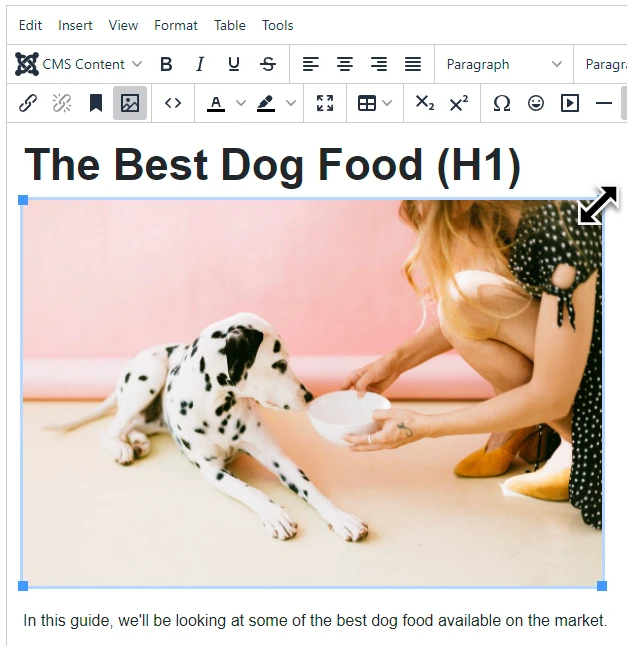
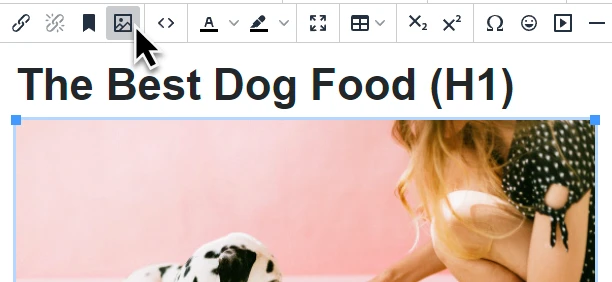
If you select an image in TinyMCE, the Image icon in the toolbar becomes greyed out. This indicates that the image is selected, and that if you click this button, it will open the properties for the image selected.
On the image properties page, you can change the description, and see the width/height of the image. You may also add a title to the image, and show it below the image as a caption.
If you’d like to use an image as a link, select it and click the Insert/Edit Link button. This will make the photo clickable.
Other Editors
CodeMirror
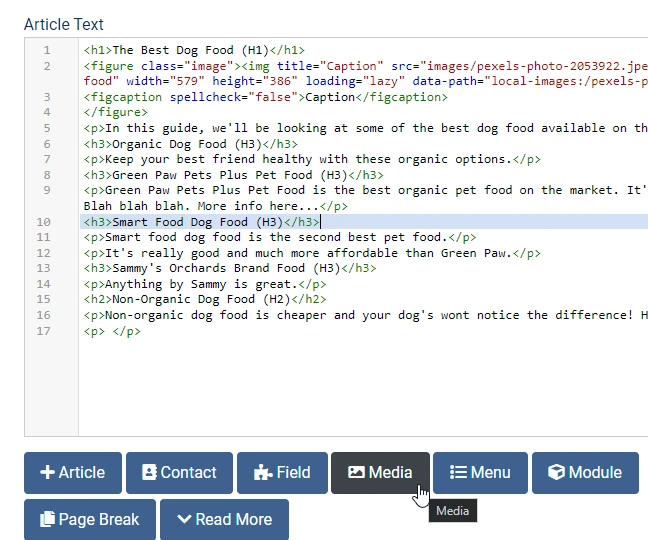
If you’re using CodeMirror to edit raw HTML, you may still access the media manager within an article by clicking the Media button under the editor.
The image will be inserted wherever you have the text cursor in the editor.
Adding Other Media
Besides images, you may use the Media Manager to add videos, audio, and PDF files to your articles.
PDF Files
Upload the PDF to the directory of your choosing the same way you would with any image. When you go to add the media to your article, you will be given an option of inserting the file as a link or as an embedded PDF.
If you select the link option, a link to the PDF file will be inserted into the article. This is usually the better choice.
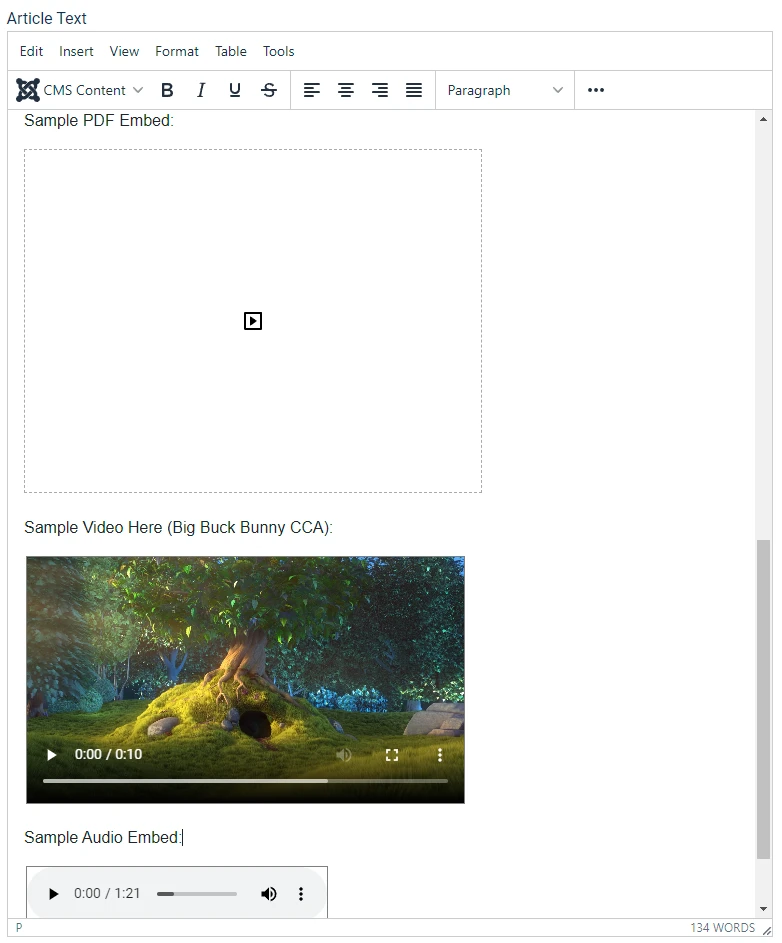
If you decide to embed the PDF file, you’ll be given an option to set the width and height of the embedded PDF. By default, the dimensions are set in pixels. If you leave it this way, the embedded PDF area will be locked to those dimensions. It will not be mobile friendly/responsive.
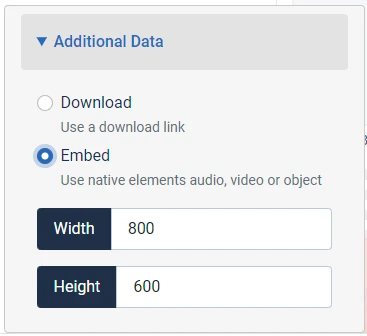
If you’d like the width to be responsive, you may set the width to 100% and the height to a value of your choosing. This does not mean the PDF itself will look much better on the website.
PDFs are not the best medium for sharing content, unless the intention is for them to be easily printable by the user. If possible, take the contents of the PDF itself and turn them into a web page, rather than using a PDF file. Only use PDFs if you want the document to be printable, like a worksheet, book, pamphlet, or academic/legal document.
Video Files
Video files take up a lot of space on your server. Many web hosts do not allow you to use them to share videos, as they require too much bandwidth. If you plan on sharing videos on your website, the better solution is to upload them to YouTube, or a similar external video host, and then link to that video or embed it.
Before you upload your video using the Media Manager, ensure it’s in the right format. It needs to be an h264 mp4 file or an ogg file. The latest browsers may support the webm format.
Upload the video using the media manager, then insert it like you would any other media. Like PDFs, you will be given an option to link or embed the video.
If you want to embed the video and you want it to be mobile-friendly, set the width to 100% and set the height to nothing (leave the field blank). This will make the video responsive. If you enter numeric widths and heights, the video will be fixed to those dimensions.
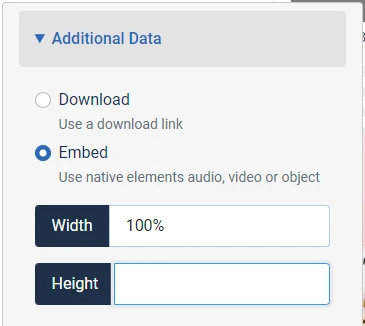
The video, or the link, should now appear in the article.
Audio Files
You may also embed audio files on your website using the media manager. Upload your mp3 or ogg audio file and insert it using the media manager. If you select the download option, it will create a link to the audio file. If you select the embed option, a browser audio player will appear for that audio file.
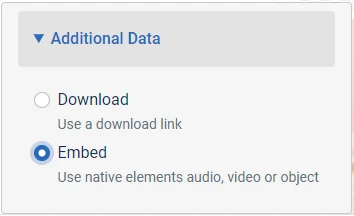
Note that mp3 is supported in almost every browser. ogg is not supported in some versions of Safari, but is supported in nearly every other modern browser. If you want the largest amount of compatibility, use mp3.
Note on Resizing
If you resize either an embedded PDF or video in TinyMCE, it will overwrite the responsive 100% width setting with fixed dimensions.
Embedding YouTube Videos With TinyMCE
It’s possible to embed YouTube videos directly in your Joomla articles without the use of a third party extension (though they may still be helpful).
Change Plugin Settings
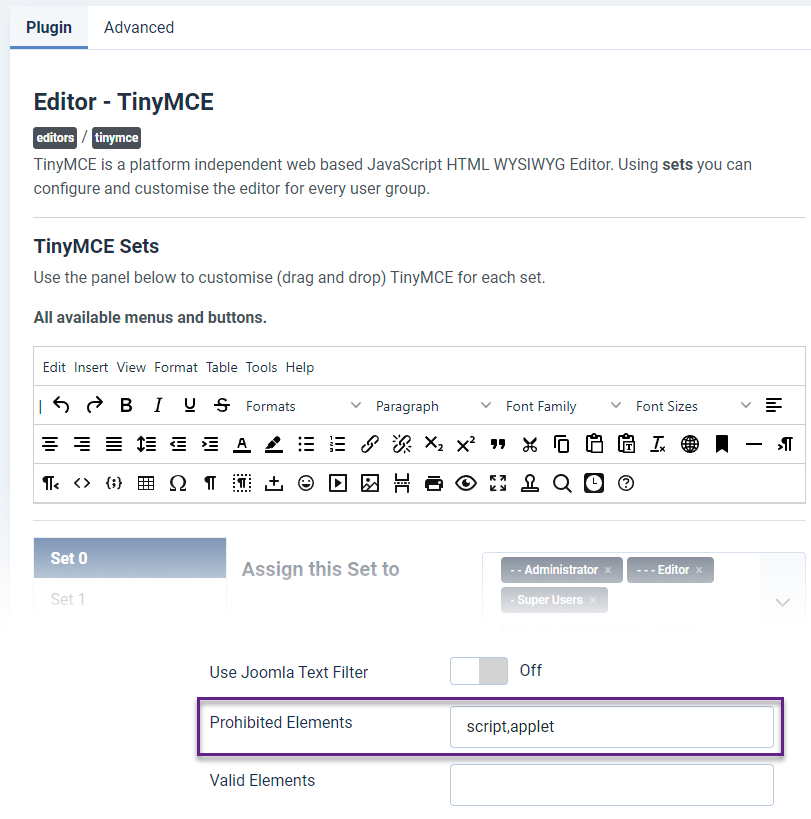
To do this, first you must navigate to the plugin settings for TinyMCE under System → Manage → Plugins → TinyMCE.
To embed YouTube videos, you have to remove the iframe restriction from your editor profile. Only remove this restriction for the user groups you trust, the default set 0 should be good.
Under the Prohibited Elements field, remove iframe from the list and then save the plugin settings.
Get The Embed Code
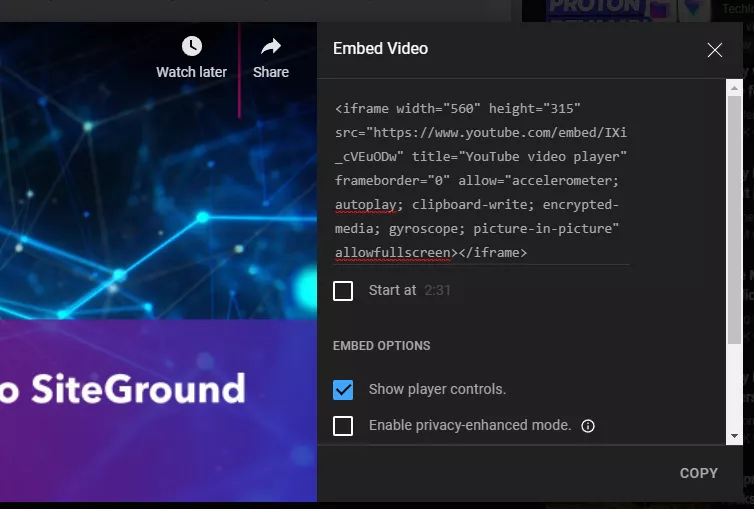
You can find the embed code by visiting the YouTube video you want to embed. Note that not all videos are embeddable. Ideally, embed your own videos hosted on YouTube.
Click the Share button on the video page. Then click “Embed” and copy the embed code.
Insert With TinyMCE
Open the article and move your text cursor to the position where you want to embed the YouTube video.
Click Insert – Media and then go to the Embed tab.
Paste the code you got from YouTube here and click save. The video should now appear in your article.
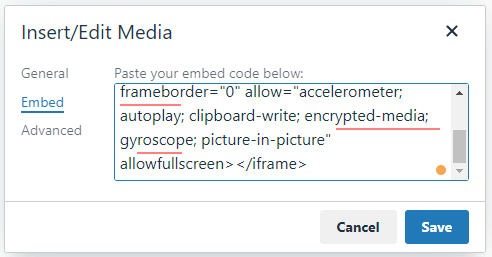
The same method should work for embedding media from other sources (SoundCloud, Vimeo, etc.)
Image Effects (Media Actions)
Joomla has several basic media actions you can use to modify images. They provide the ability to crop, resize, and rotate an image.
Note that when you save these changes, it overwrites the original file with the changed version. It does not create a duplicate or backup the original copy.
You may access these features by clicking the little edit pencil over any image in the media manager.
Crop
Cropping a photo allows you to remove unnecessary space on the sides, tops, and bottoms of an image. It lets you focus in on one key area. This discards all of the photo, except for the area that’s selected.
To select an area to crop, just drag the borders of the image and move the rectangle around. Click save when you have the crop box in the right location. This discards everything outside the box, leaving you with the focused portion of the image.
The quality is the level of image compression to use for the saved file. A quality level of 100 means don’t compress it at all, and a low number, like 1, means compress it a lot. The more you compress it, the smaller the file size will be, but the clarity of the image may suffer.
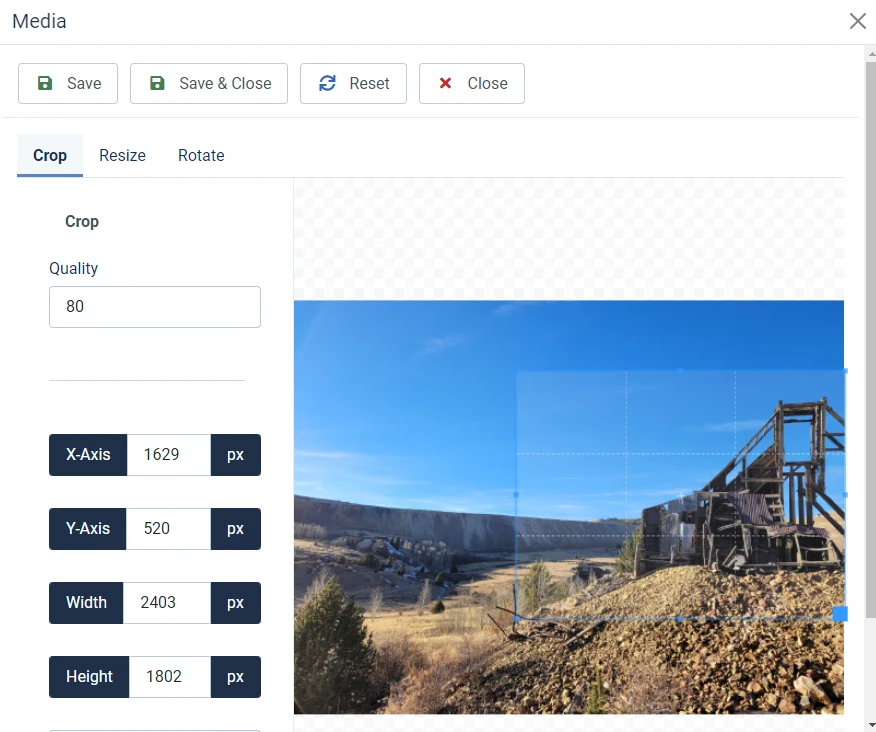
Resize
The resize tool allows you to take a large image and shrink it down to smaller dimensions. Resize differs from crop, as cropping removes part of the image, while preserving the resolution of the cropped area.
This is also different from resizing an image in the editor itself, as that only changes the width at which the full-size image is displayed. This feature actually takes the full-size image and changes its dimensions. Resizing images should result in a smaller file size.
Dimensions (width/height) are constrained based on the images aspect ratio. This prevents you from stretching images out and distorting them.
To use the resize tool, enter your new image dimensions and click save.
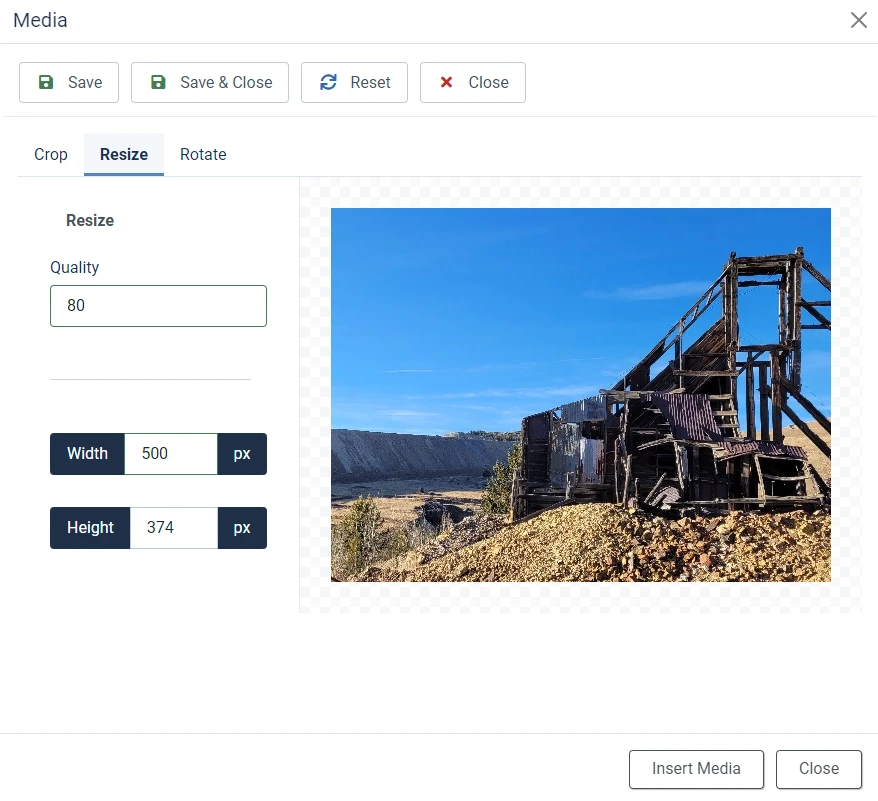
Rotate
The rotate tool allows you to rotate the entire image. The most common rotations are at angles 90, 180, and 270. Rotation operations are performed clockwise. So 90 degrees clockwise will take a landscape image and flip it onto its right side.
While you can choose other degree rotations, this is not recommended, as it will place a black background around parts of the image and cut parts of it off. You’ll likely just want to rotate using the 3 provided buttons. If you need to do more advanced rotations, use an image editor like Gimp or Photoshop.
Click save when you are done editing.
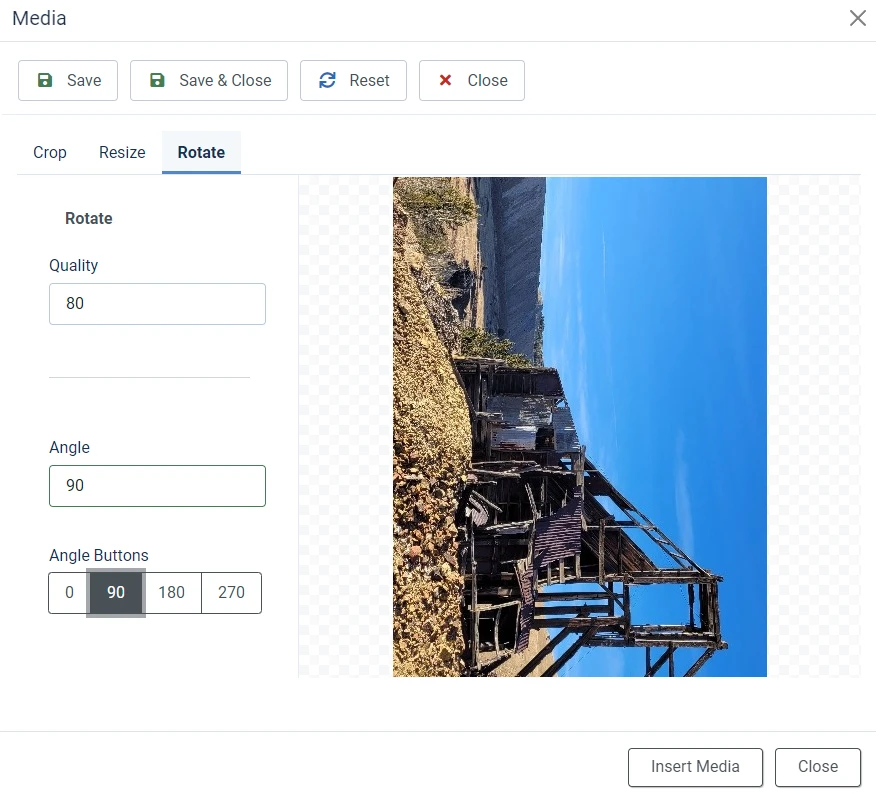
The saved images will be in the same format as the original. If the image is in a lossless format like PNG, the quality setting does not make a difference.
If you are editing the images from the media manager within an article, return to the media manager to insert the image after you have saved the edits.
If you want to disable any of these editing options, navigate to the plugin manager and disable the corresponding plugin. The plugins are named “Media Action – Crop” “Media Action – Resize” and “Media Action – Rotate”
Auto Resize
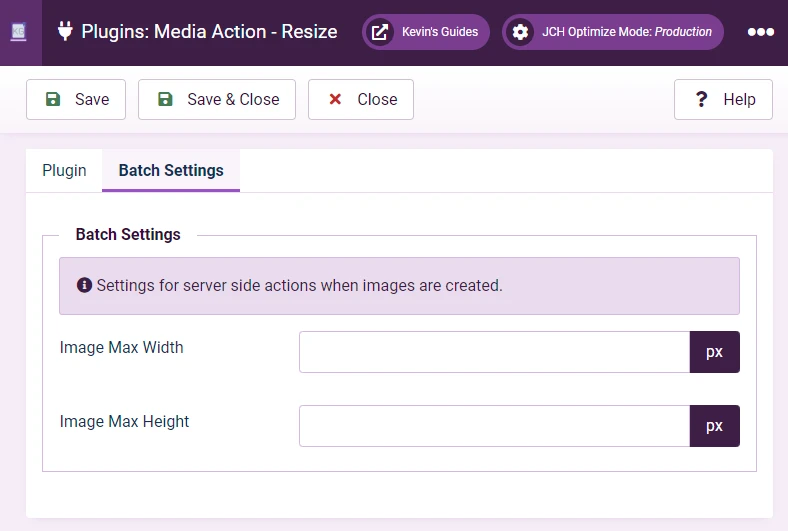
Notably, the “Media Action – Resize” plugin has an option under the “Batch Settings” tab to resize all uploaded images over a certain size. For example, if you set the Image Max Width field to 1000, any uploaded images above 1000 will automatically be resized to 1000px.
Media Manager Options
You may access the options for the Media Manager by clicking the Options button in the toolbar on the Content → Media page, or by opening the Global Configuration and going to the Media component.
Options
- Maximum Size (in MB)
- The maximum size of any uploaded file. Cannot be larger than your web server’s PHP upload_max_filesize config option.
- Path to Files Folder
- The folder where files used by the media manager reside. Usually the same as the option below.
- Path to Images Folder
- The folder, relative to your Joomla installation directory, where you want media to be stored. The images folder is a good default option.
- This option must either be the files folder, or a sub-folder of the files folder.
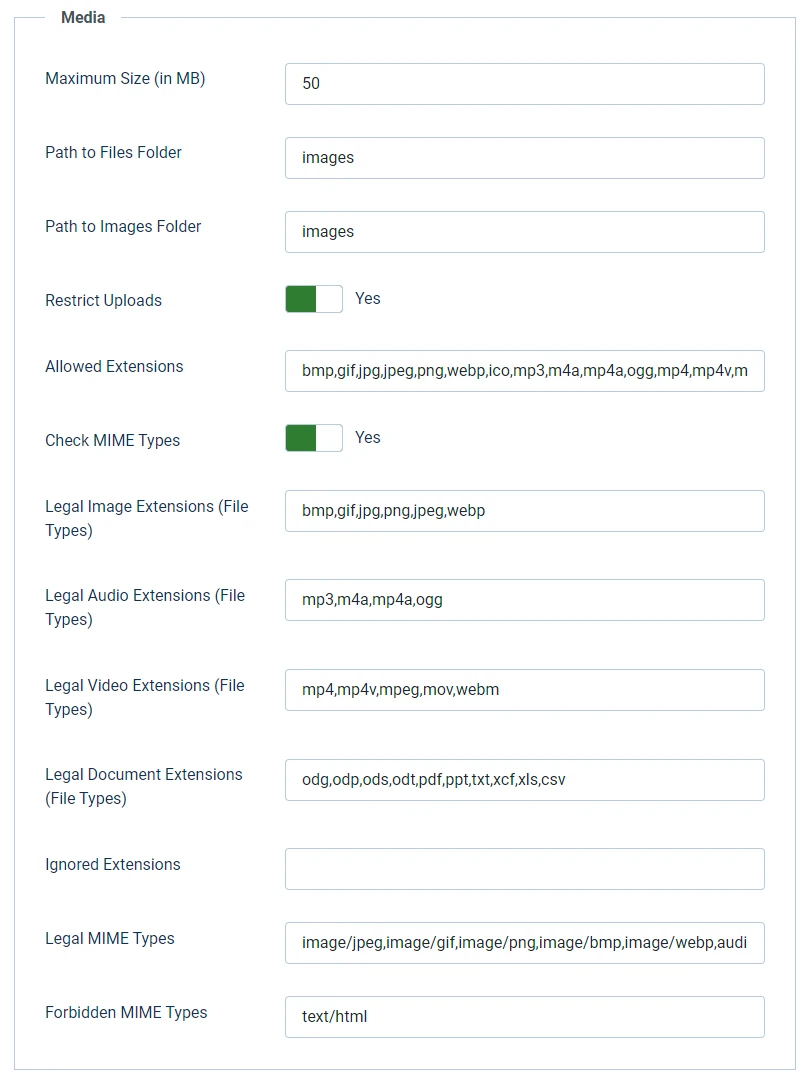
- Restrict Uploads
- If yes, Joomla will check to make sure files are validated based on their MIME types and extension name.
- This prevents users from uploading files that are not compatible with the website, or may cause harm.
- Allowed Extensions
- A complete comma separated list of all the file types users may upload to your website. Anything not on this list will not be allowed.
- Check MIME Types
- Used to check if images are what they say they are.
- Legal Image Extensions
- All the image extensions allowed.
- Legal Video Extensions
- All the video extensions allowed.
- Legal Document Extensions
- The document extensions allowed.
- Ignored Extensions
- The extensions Joomla won’t check MIME types for
- Legal MIME Types
- The MIME types that may be uploaded. Usually, leave this alone.
- Forbidden MIME Types
- MIME types that are not allowed. text/html is a good option to prevent users from uploading and running malicious scripts.
Media Manager Permissions
Here is a description of which each action in the Permissions tab of the options does, as it relates to the Media Manager.
- Configure ACL & Options
- The user group can edit the access options and component options. Should be denied to everyone except admins and super users.
- Configure Options Only
- Leave this option alone, Super Users only.
- Access Administration Interface
- This user group may access the Media Manager from the admin interface.
- Create
- The user group can upload files using the media manager.
- Delete
- The user group can delete files using the media manager. Do not give this permission to users unless they know what they’re doing.
- Edit
- The user group can use the image edit tools, and rename files/folders. Does not give them permission to delete. Note that they could still mess up the images royally with this option, depending on edits applied.