In this guide, you will learn how to create a very simple page curl/fold/peel effect on one of the corners of a document. We’ll be going step by step, so if you’re new to Photoshop you should be able to follow along without issue. This should work for pretty much any version of Photoshop released in the last decade. You can use this effect on any corner (or corners) of a page.
This should take about ten minutes or fewer to complete, depending on your level of experience.
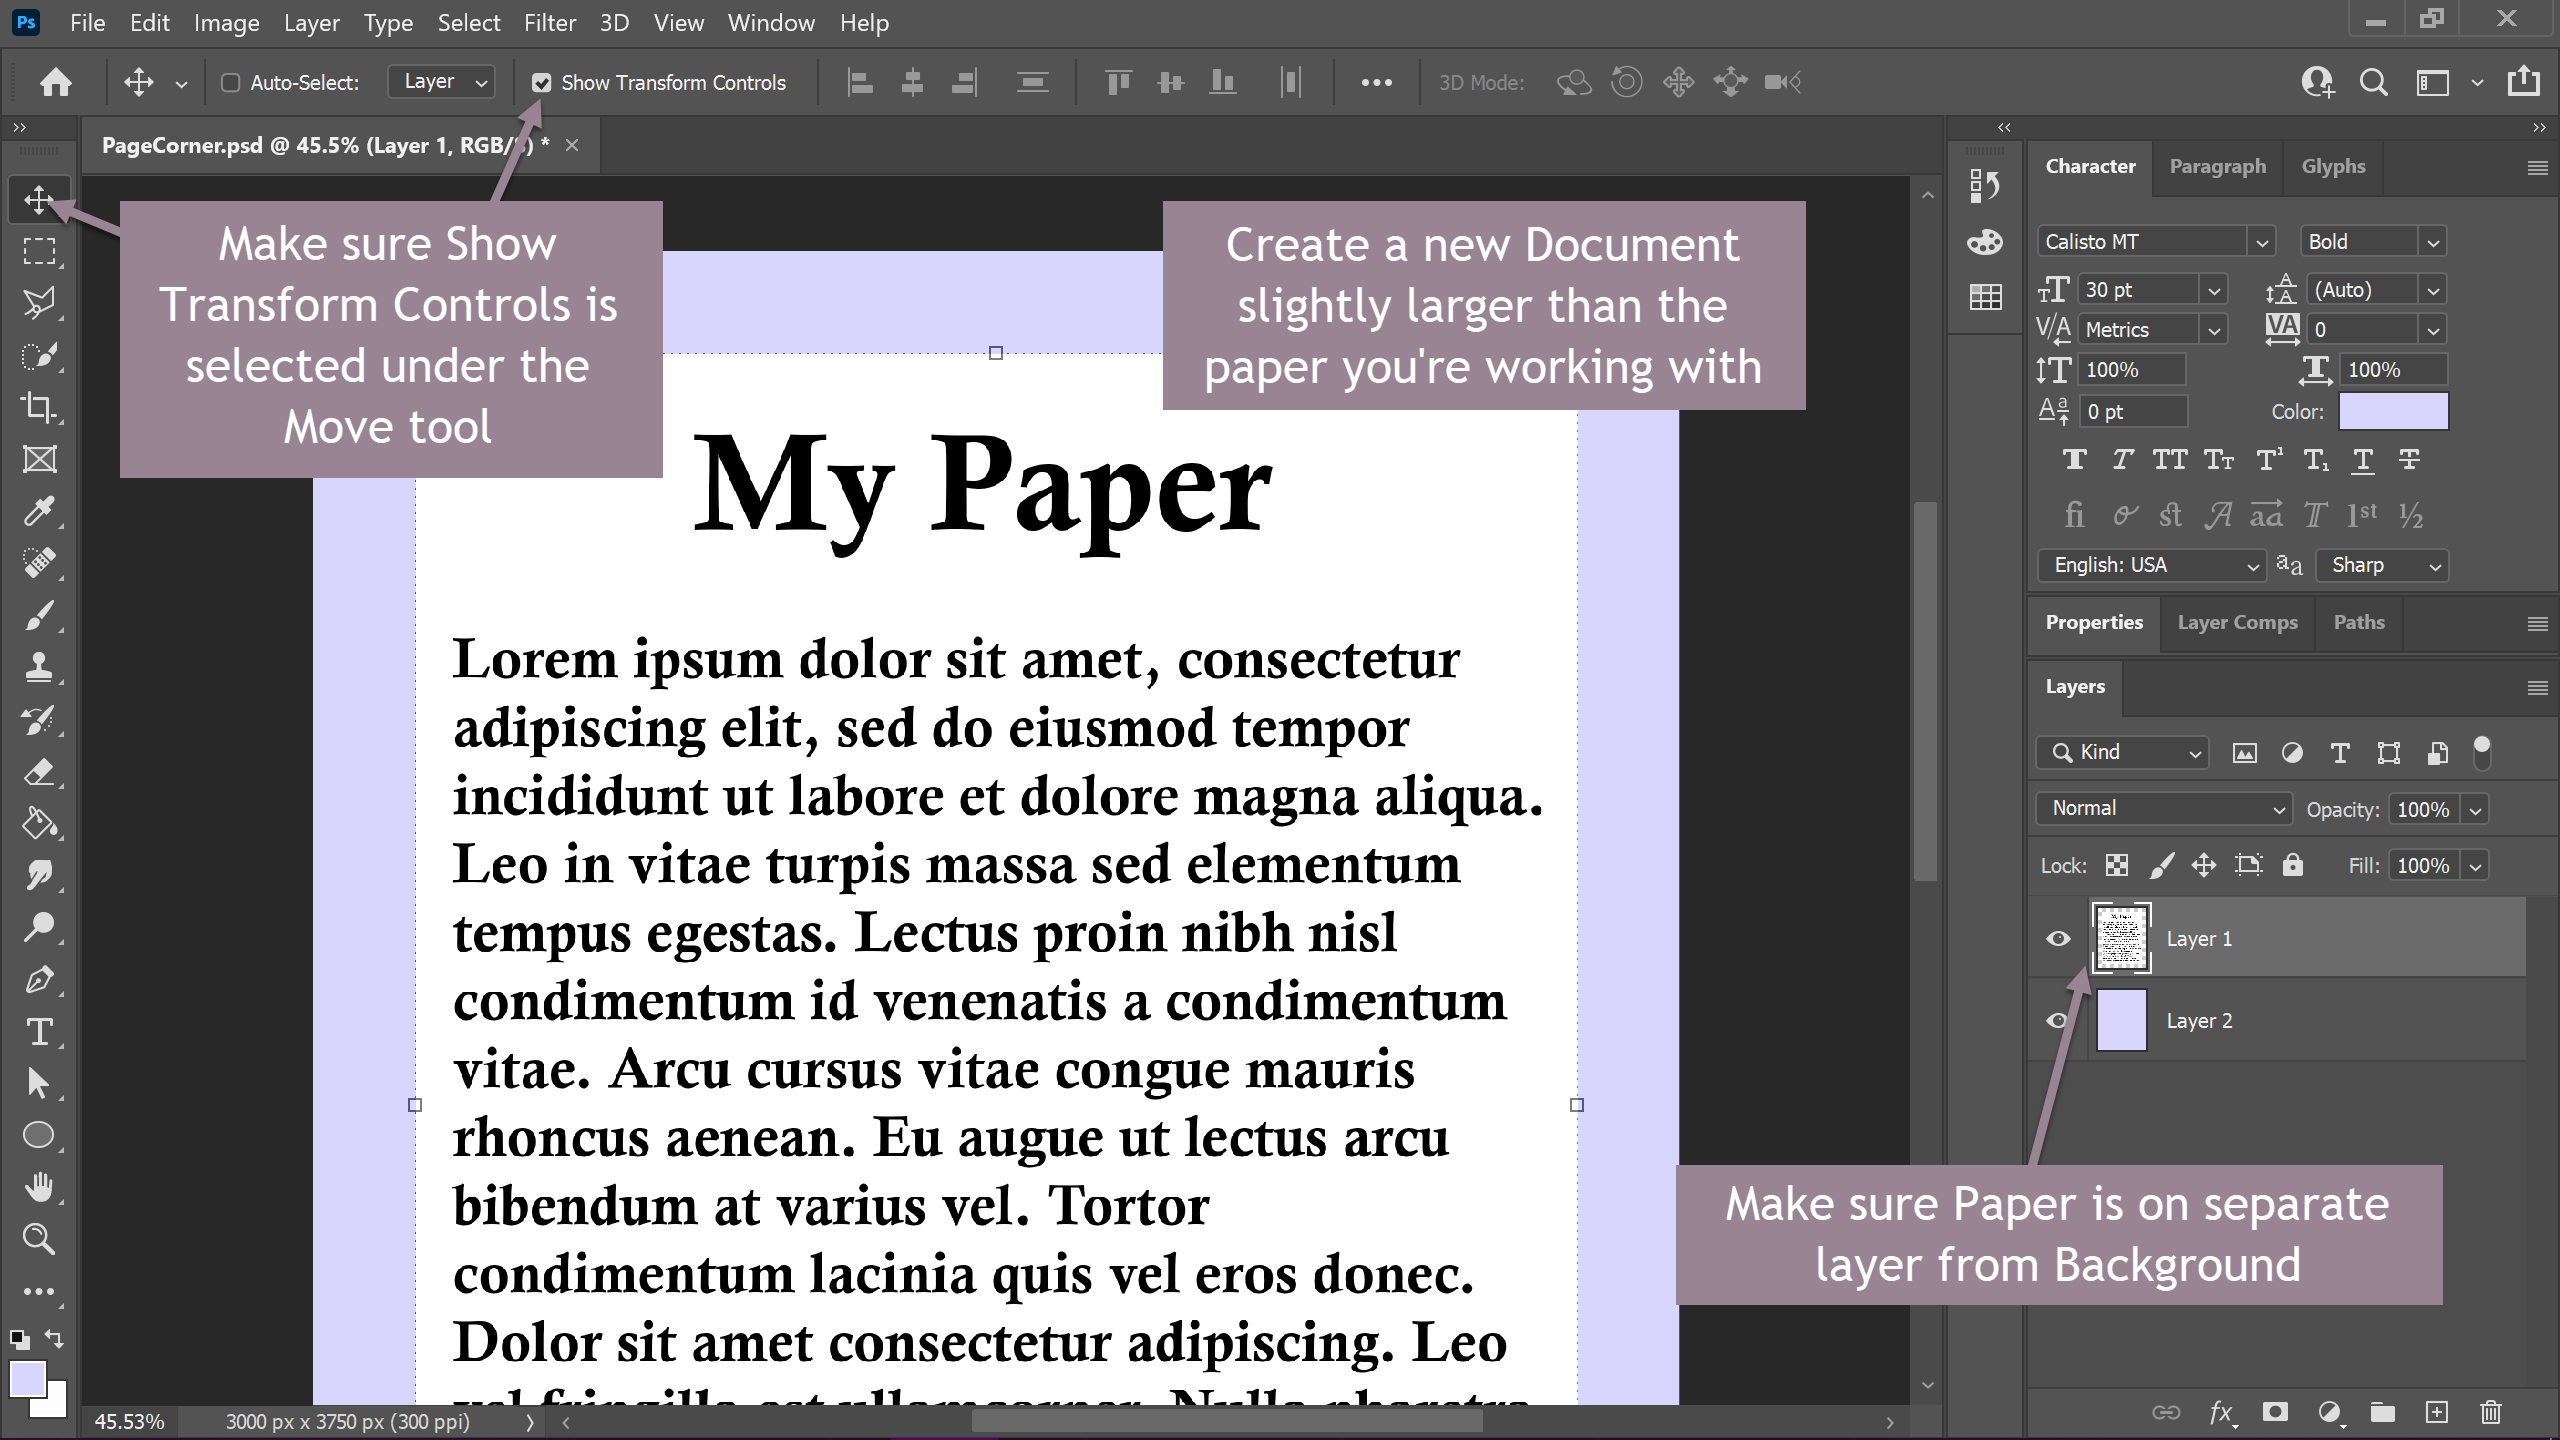
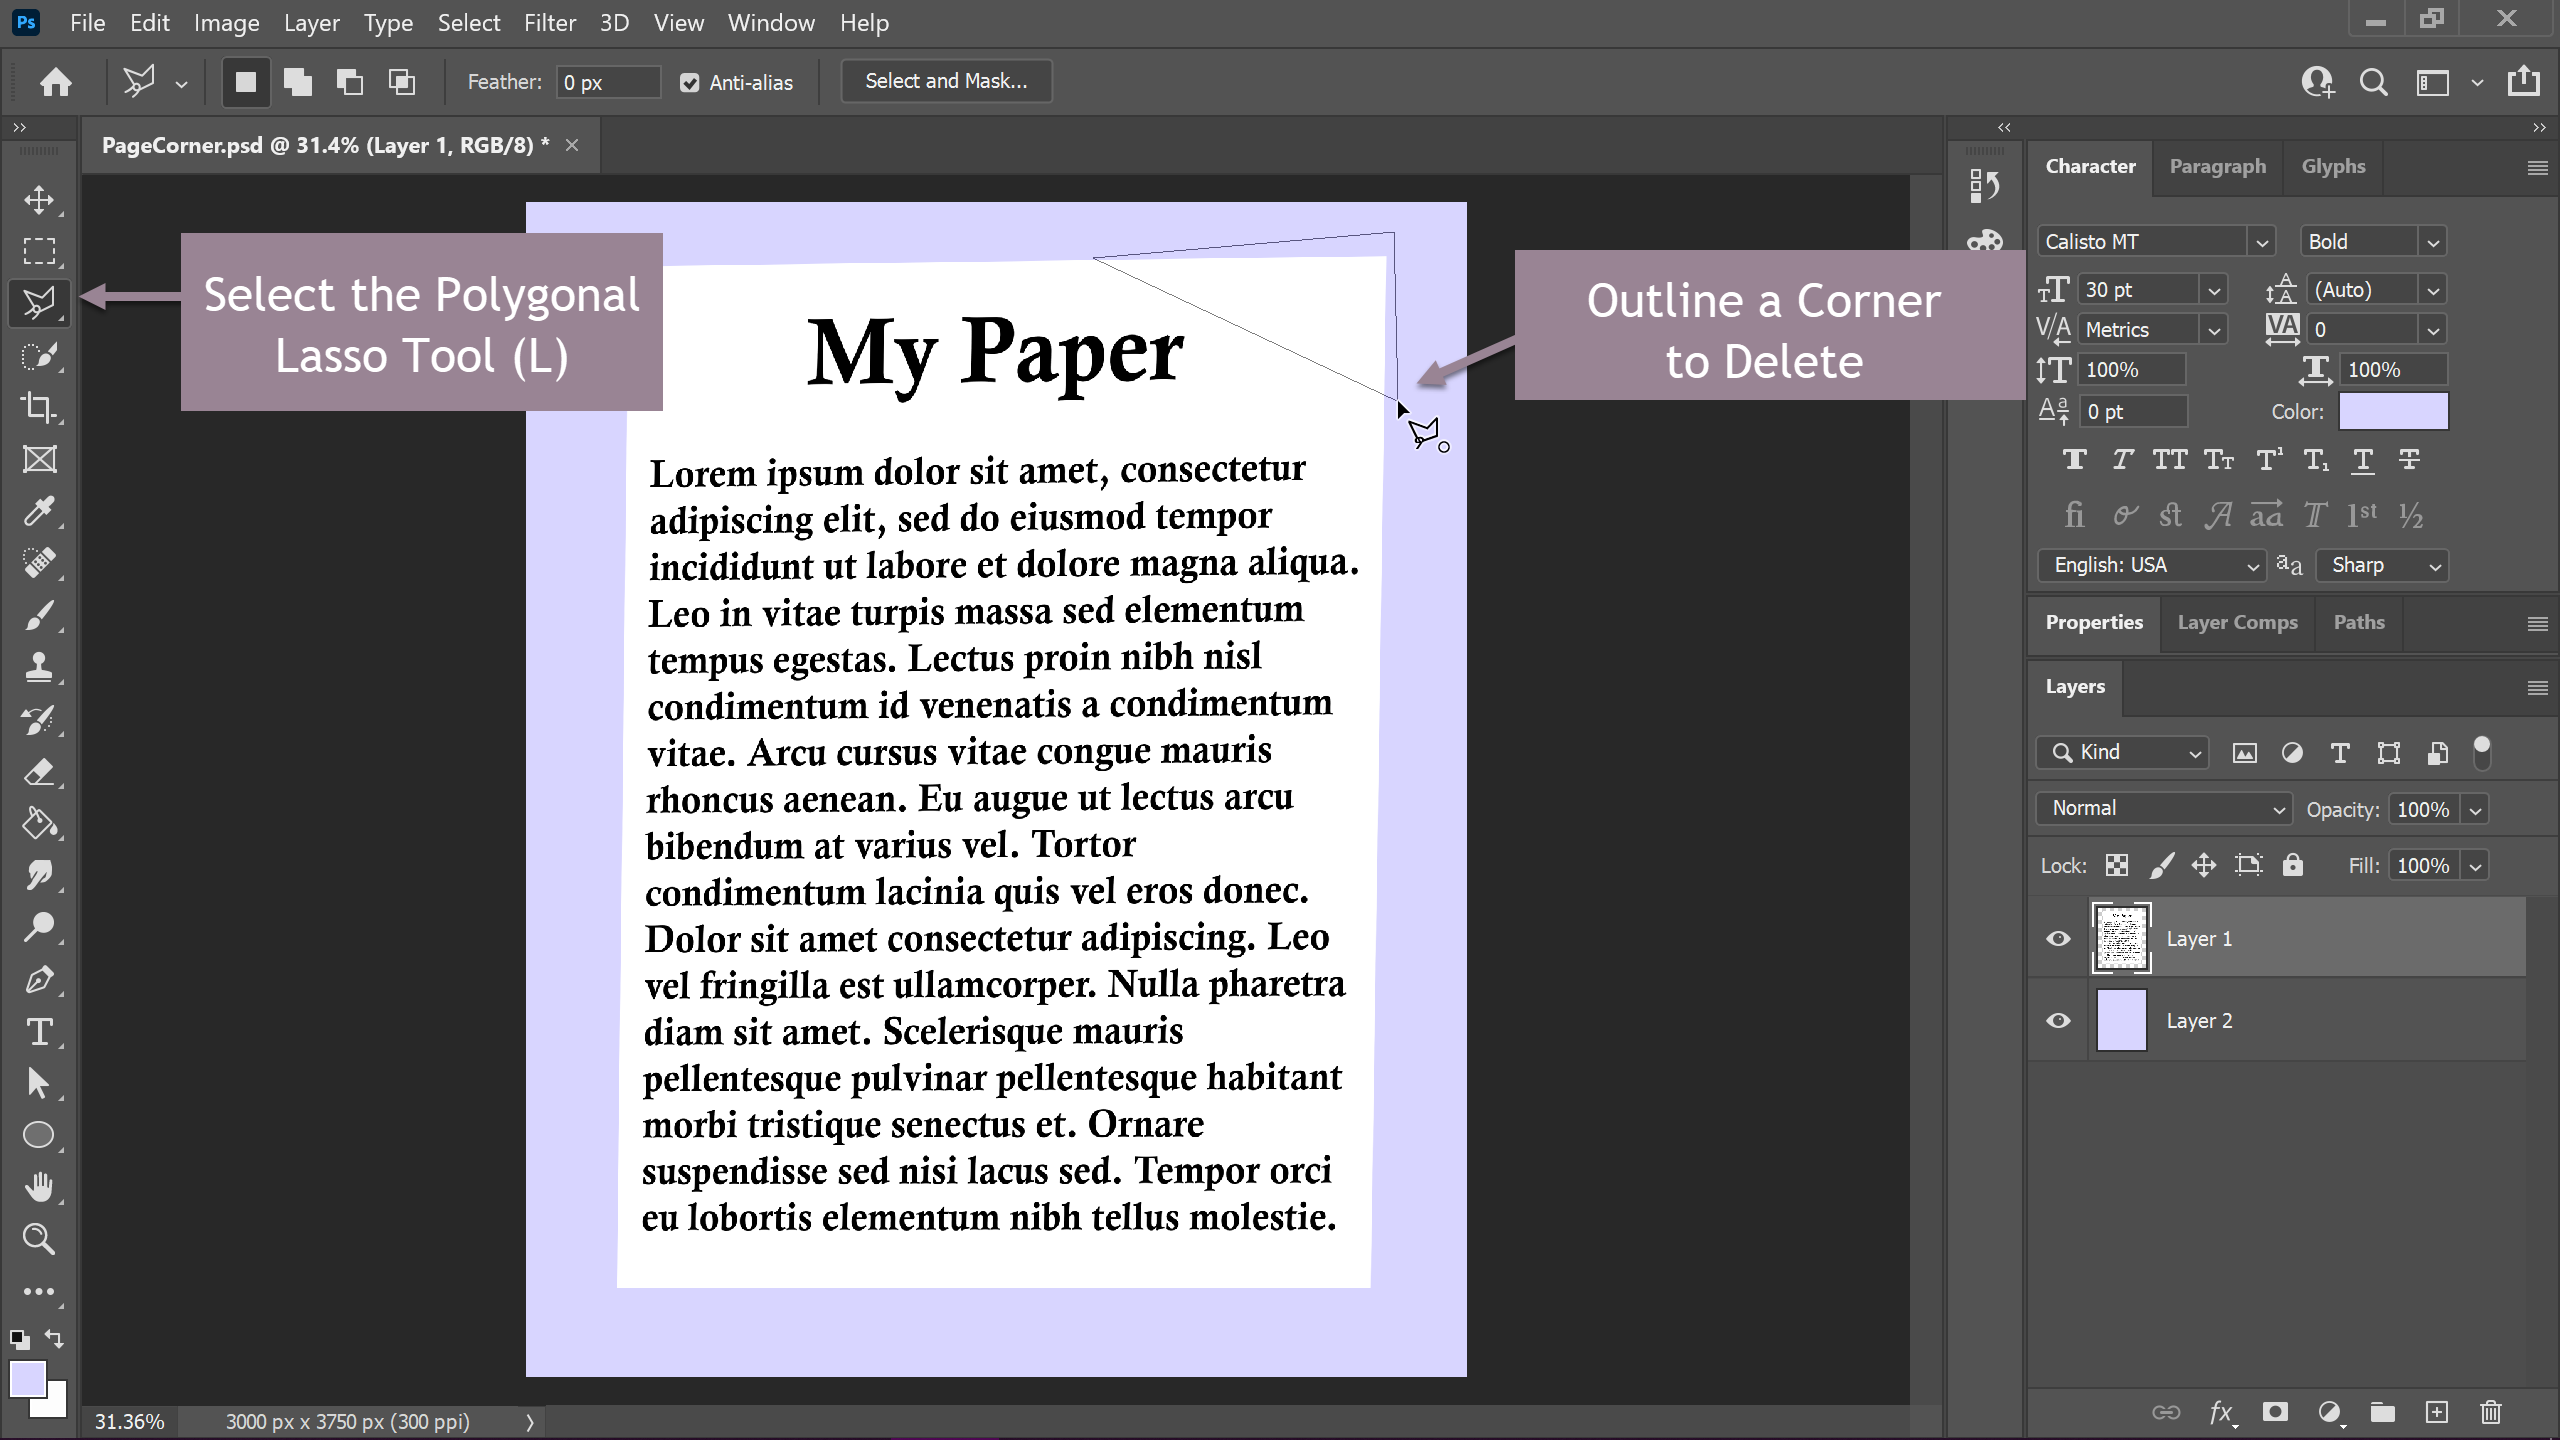
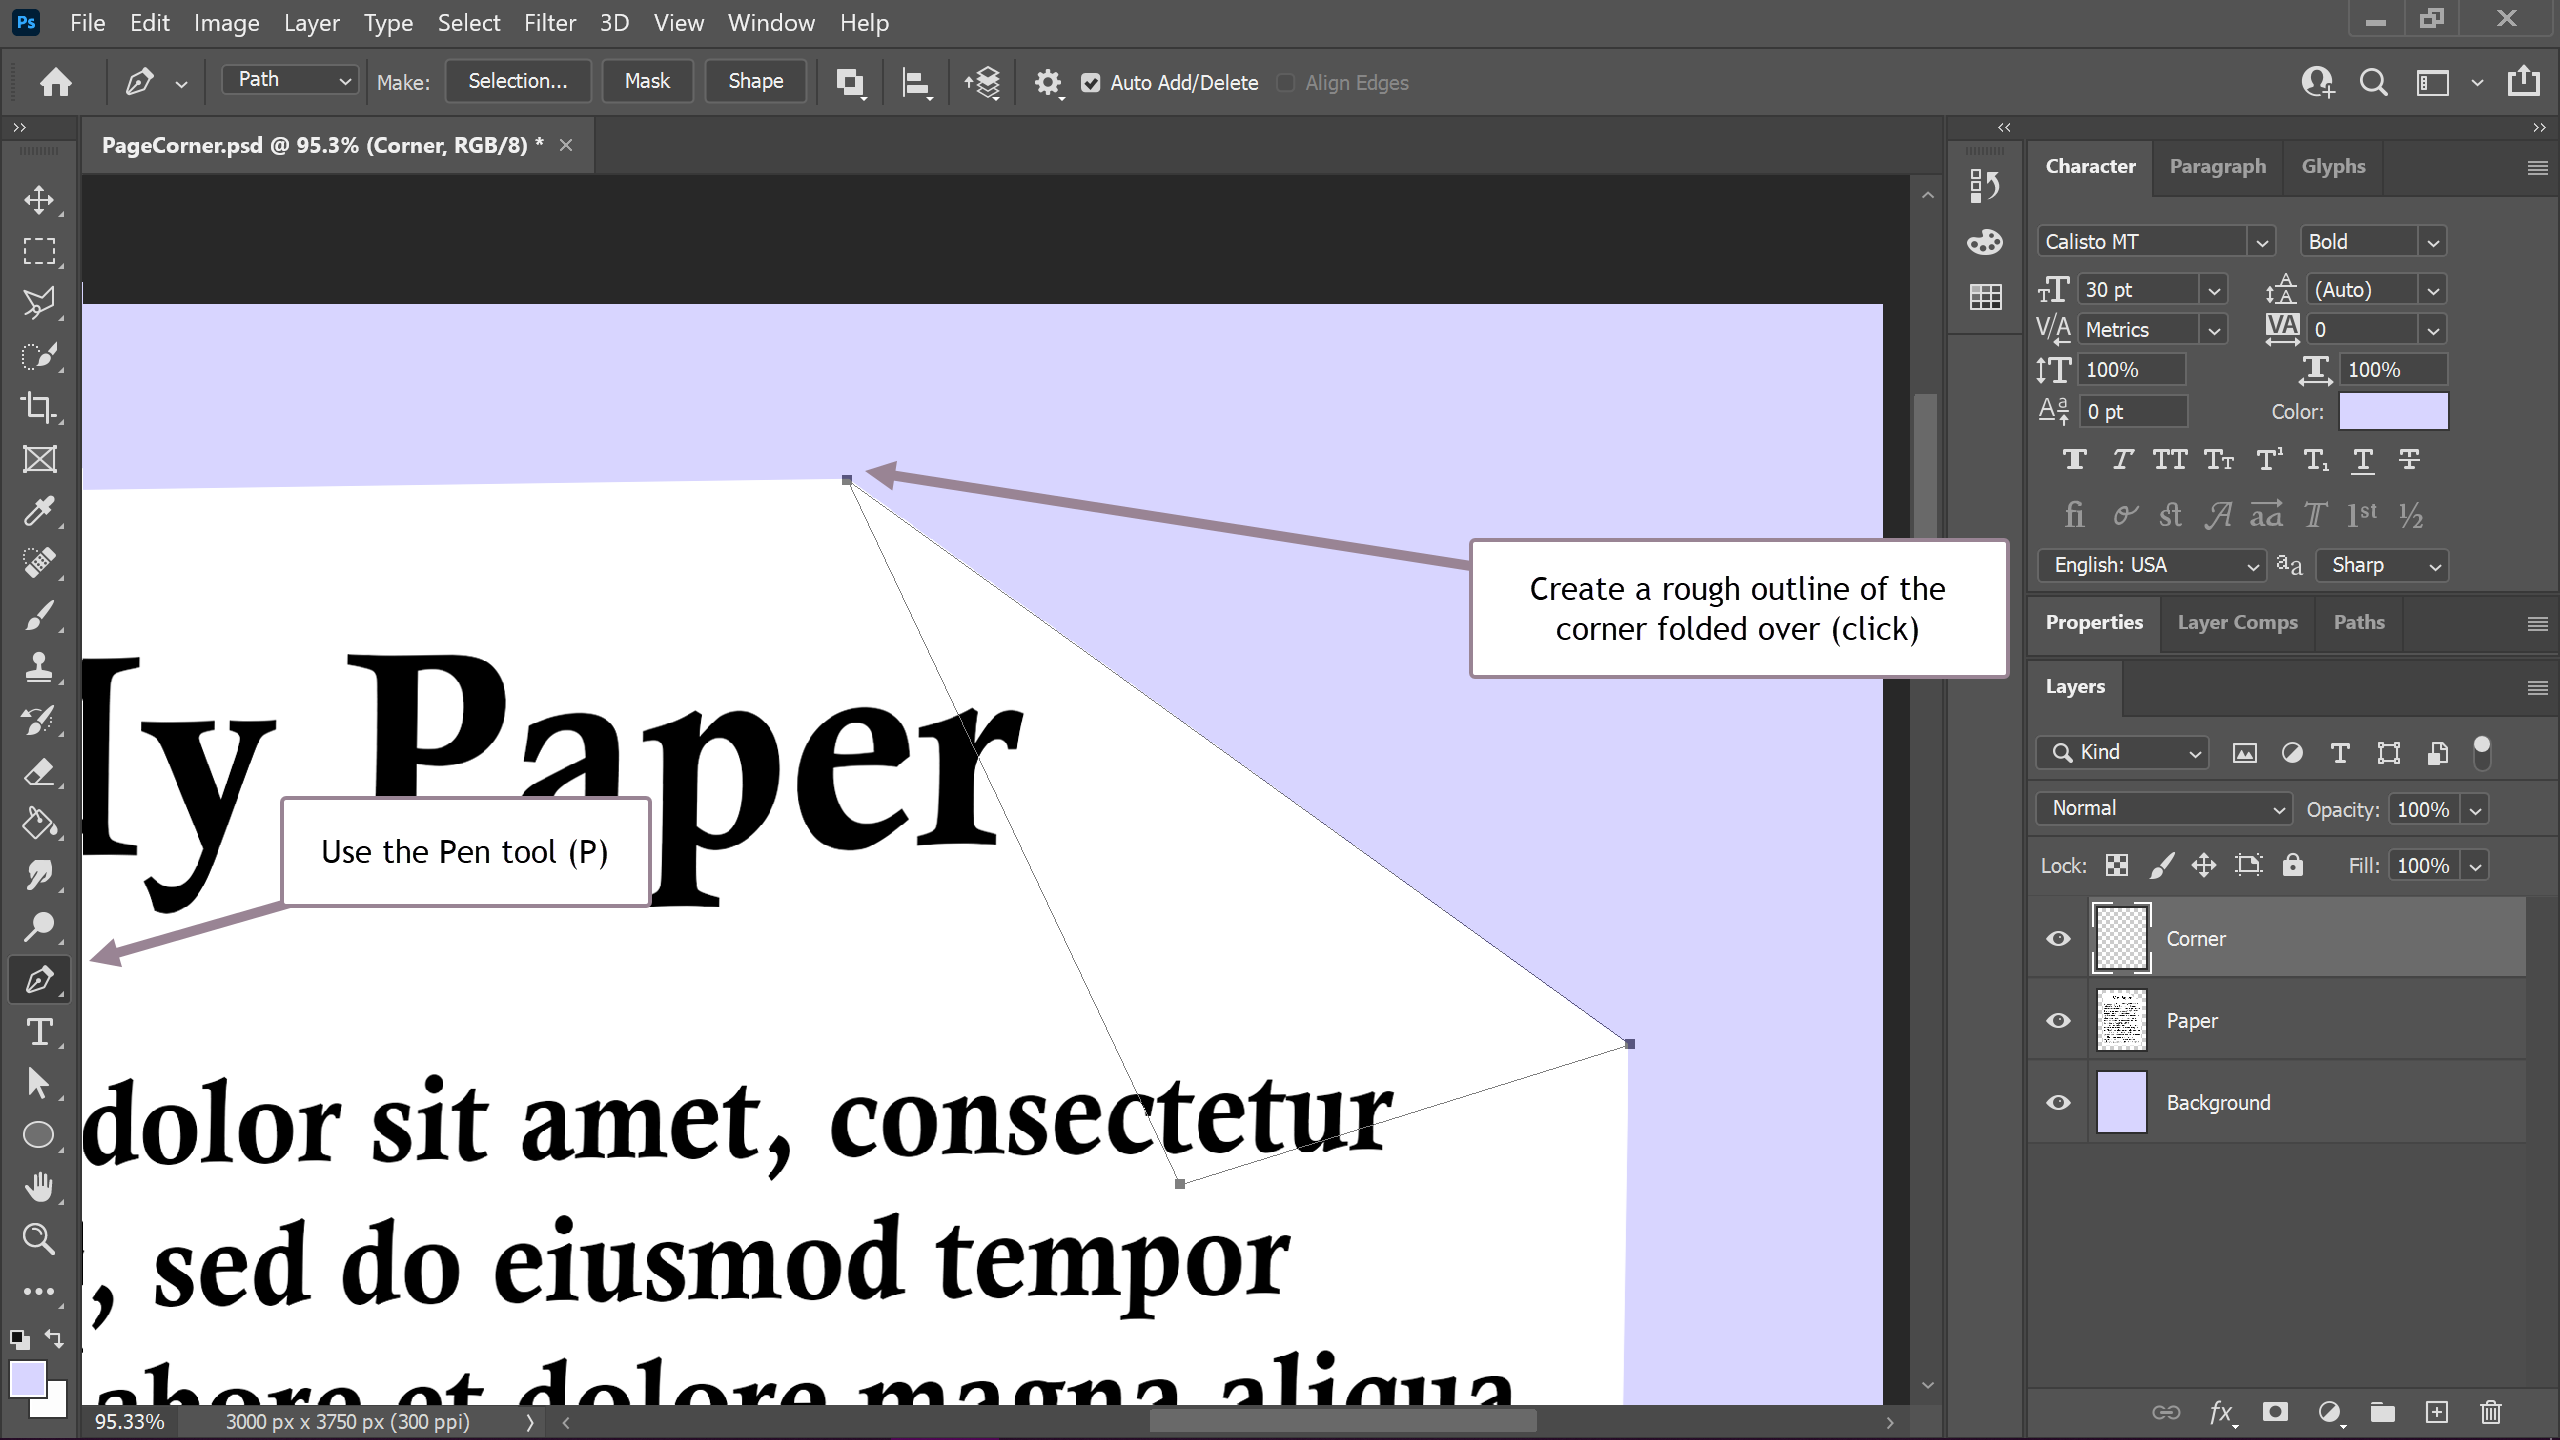
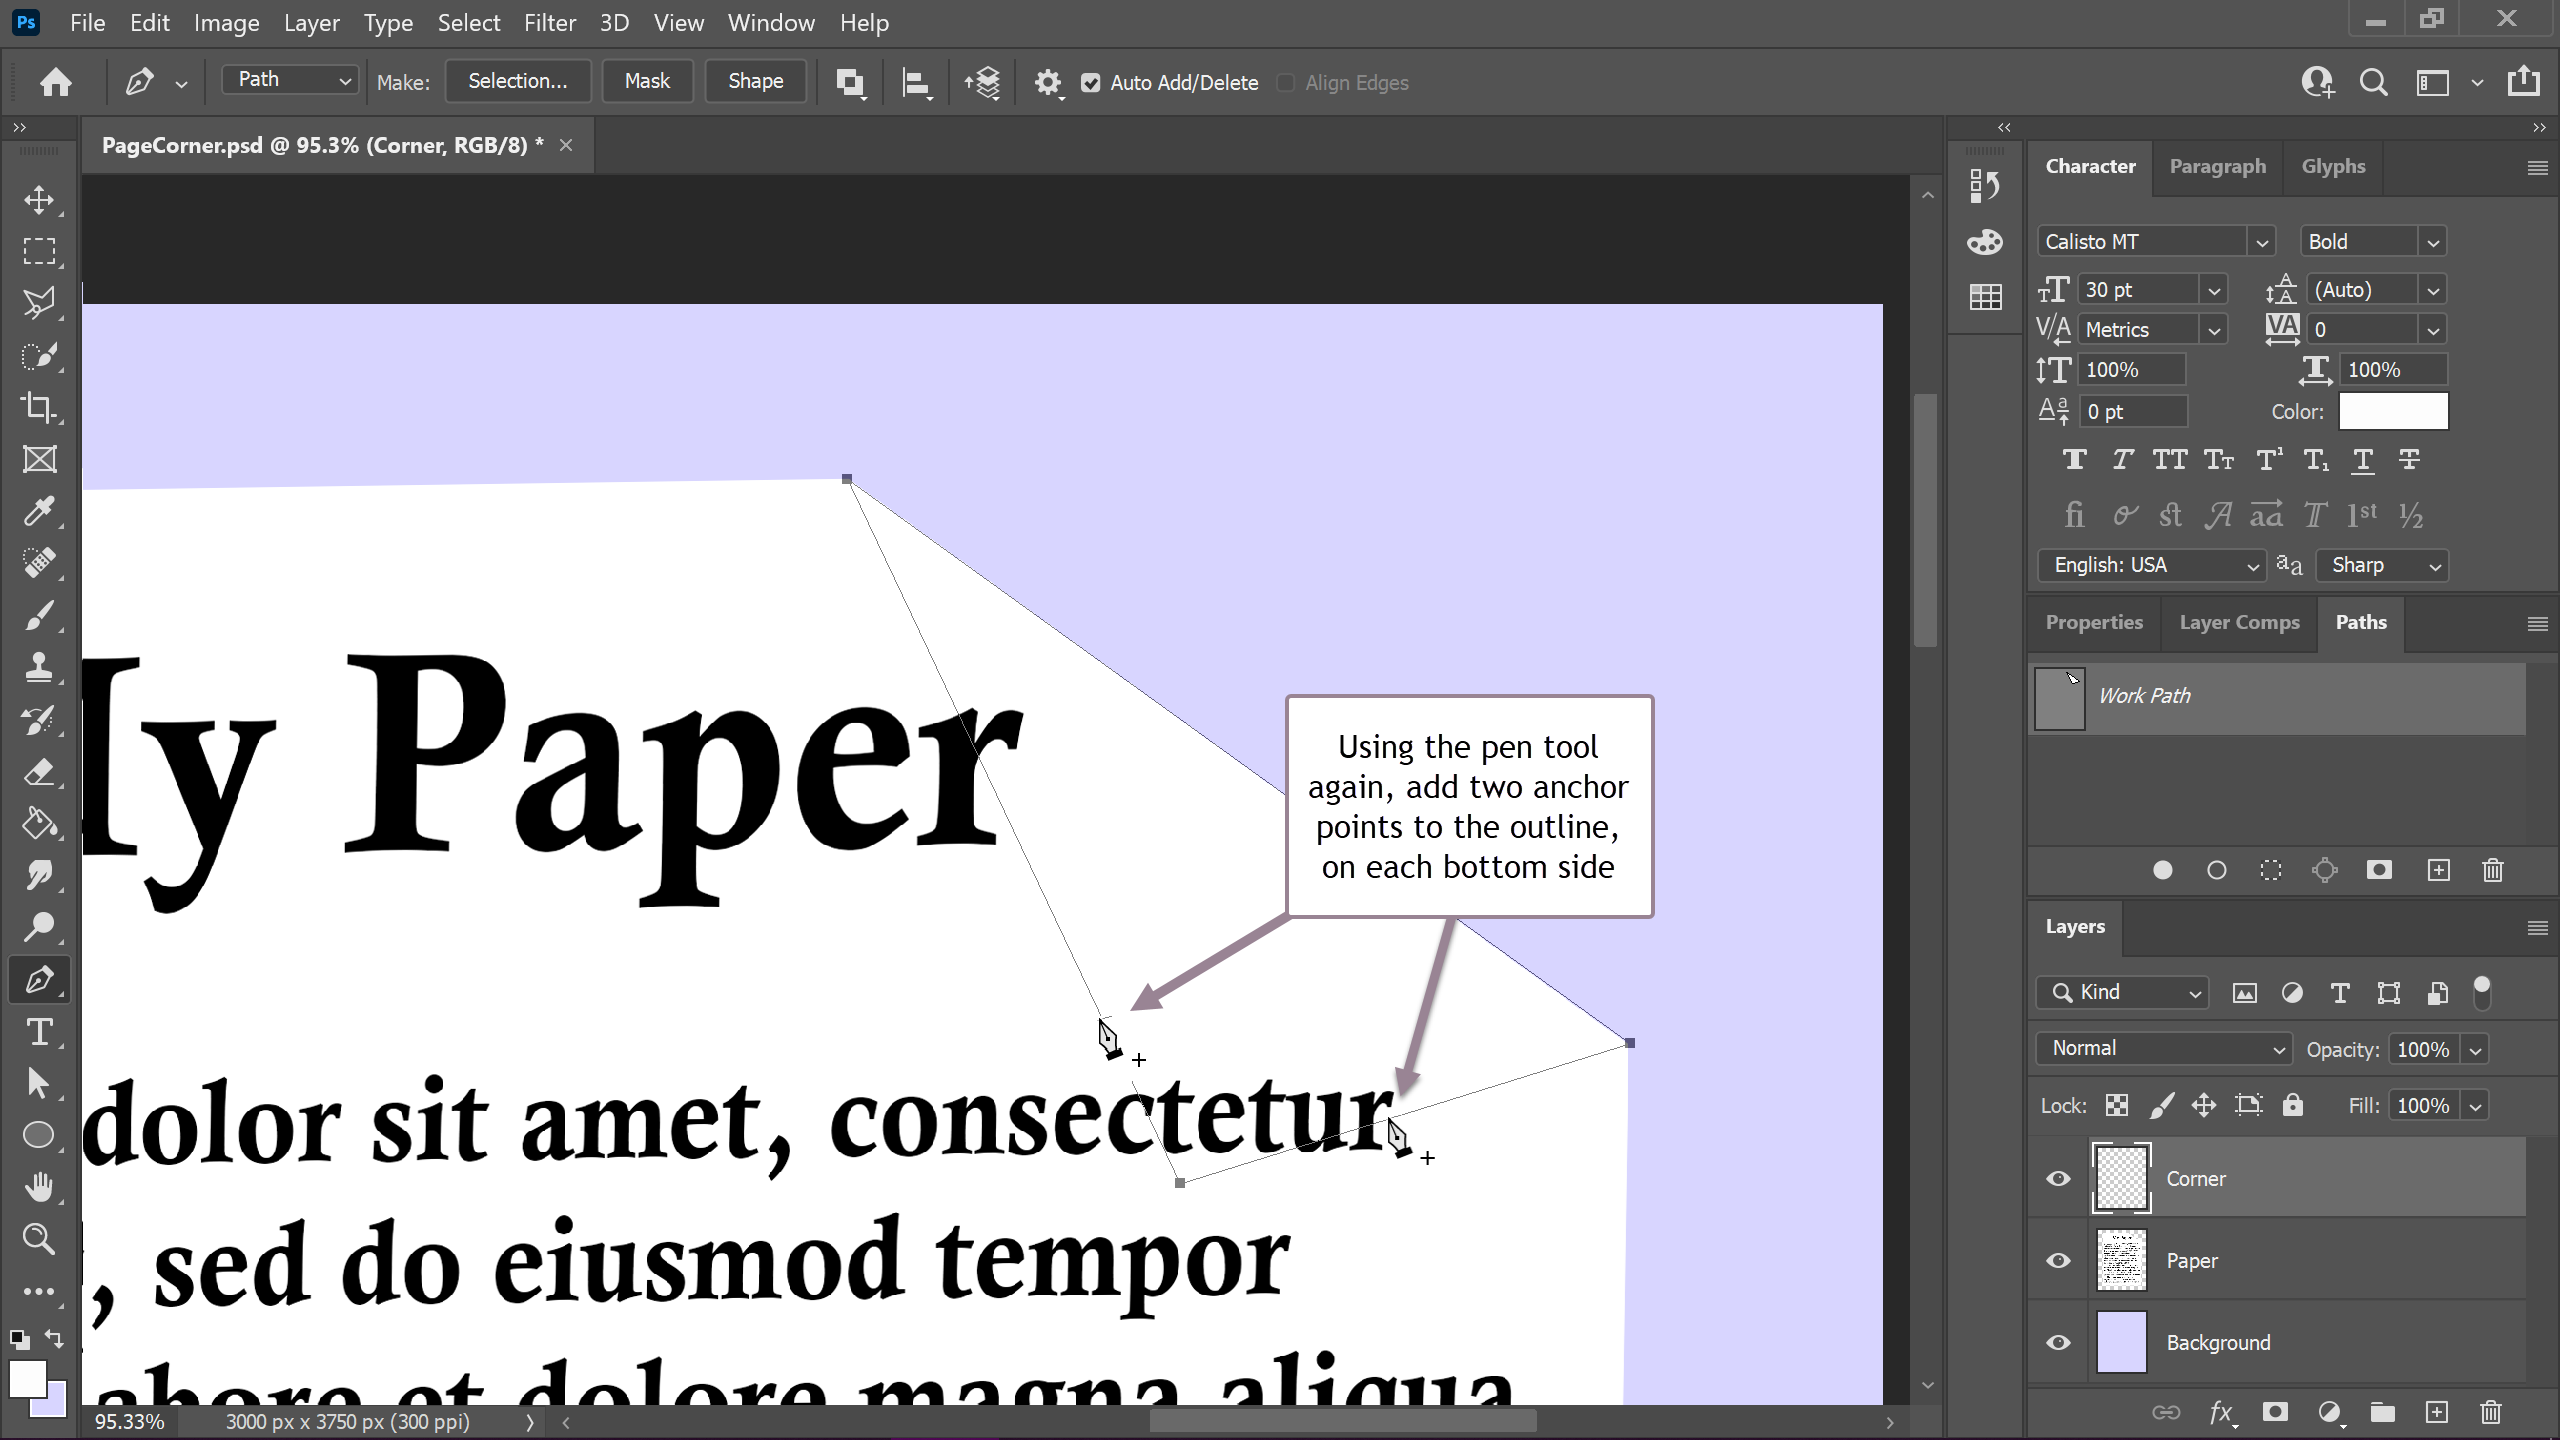
We will use layers, the polygonal lasso tool, the pen tool, and some basic effects to achieve this. Start by opening up Photoshop and selecting a photo to edit. I’m starting with an image of a fake document.